Deployments & widget embed
A deployment is a configured instance of an agent on a channel. The same agent can have several deployments — different themes, different domains, different chat copy — without duplicating any underlying configuration. In this chapter you'll:
- Create a deployment for your agent on the web-widget channel
- Walk through the three-step deployment wizard (Basic, Content, Style)
- Pick up the embed snippet and put it on a live site
- Open the widget on the demo site and run a conversation
The deployments screen
Open Deployments from the team's left-hand rail.
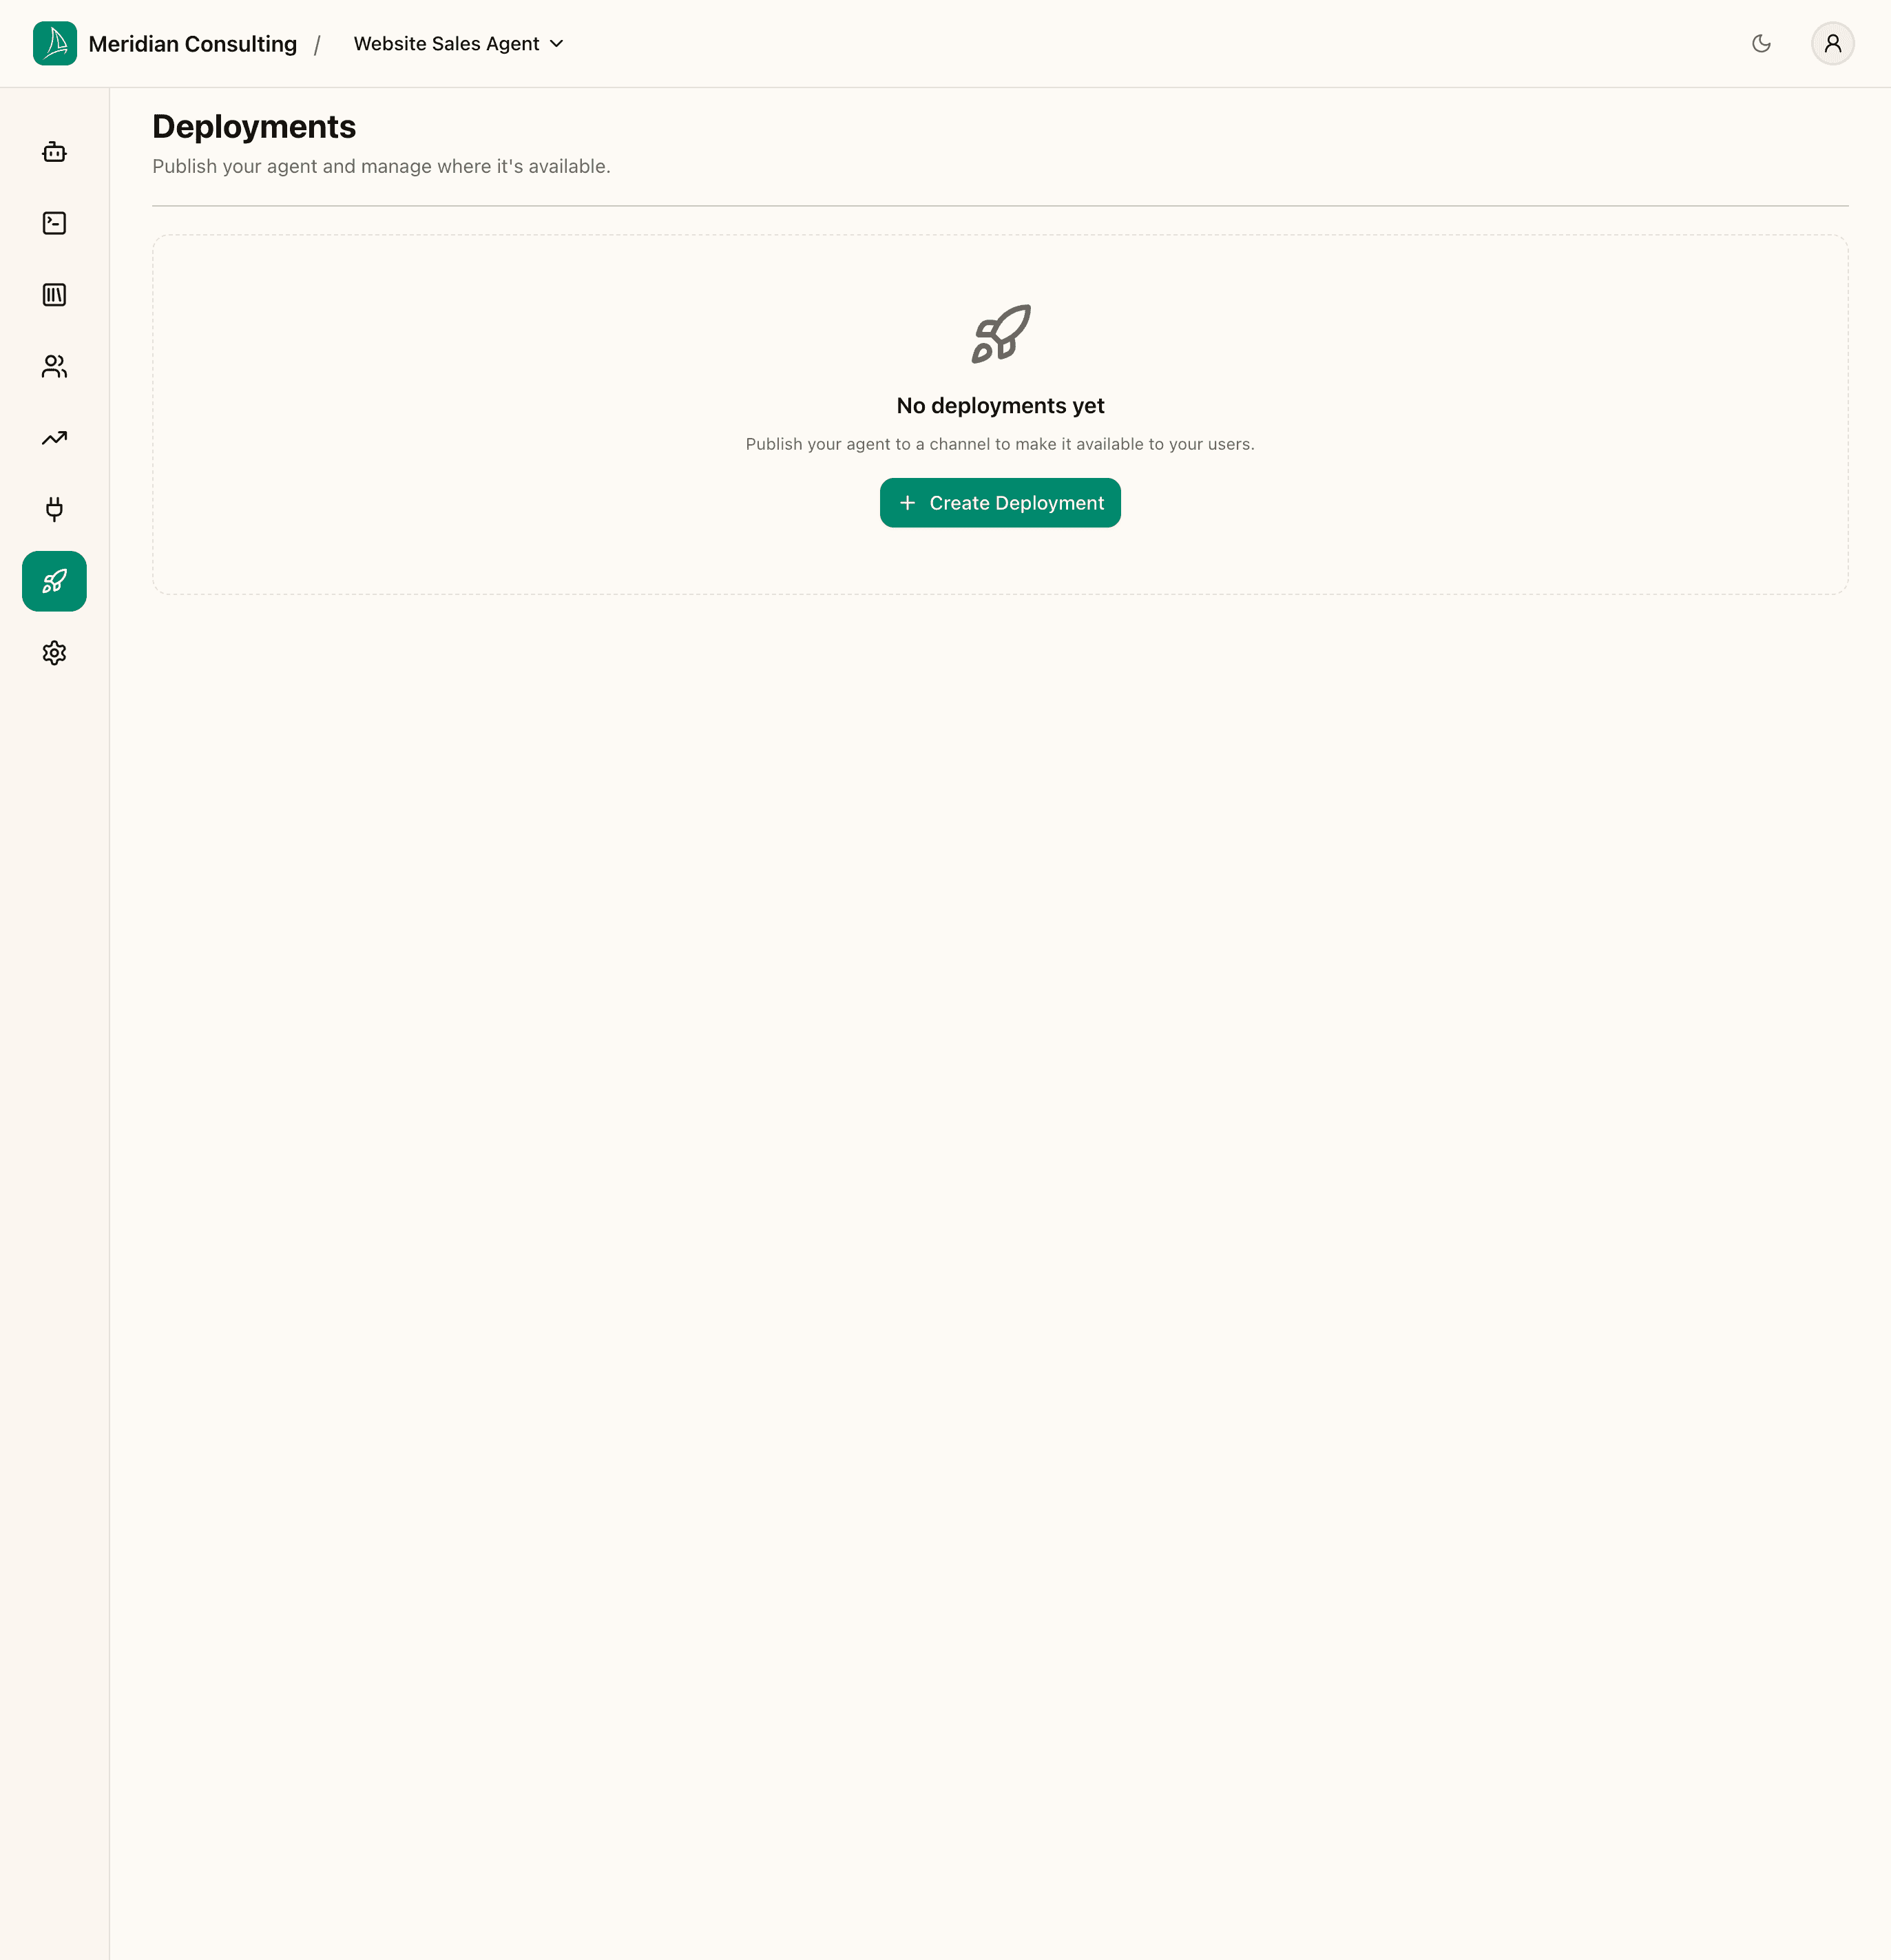
A new team has no deployments. Click Create Deployment to start the wizard.
Step 1 — Basic Settings
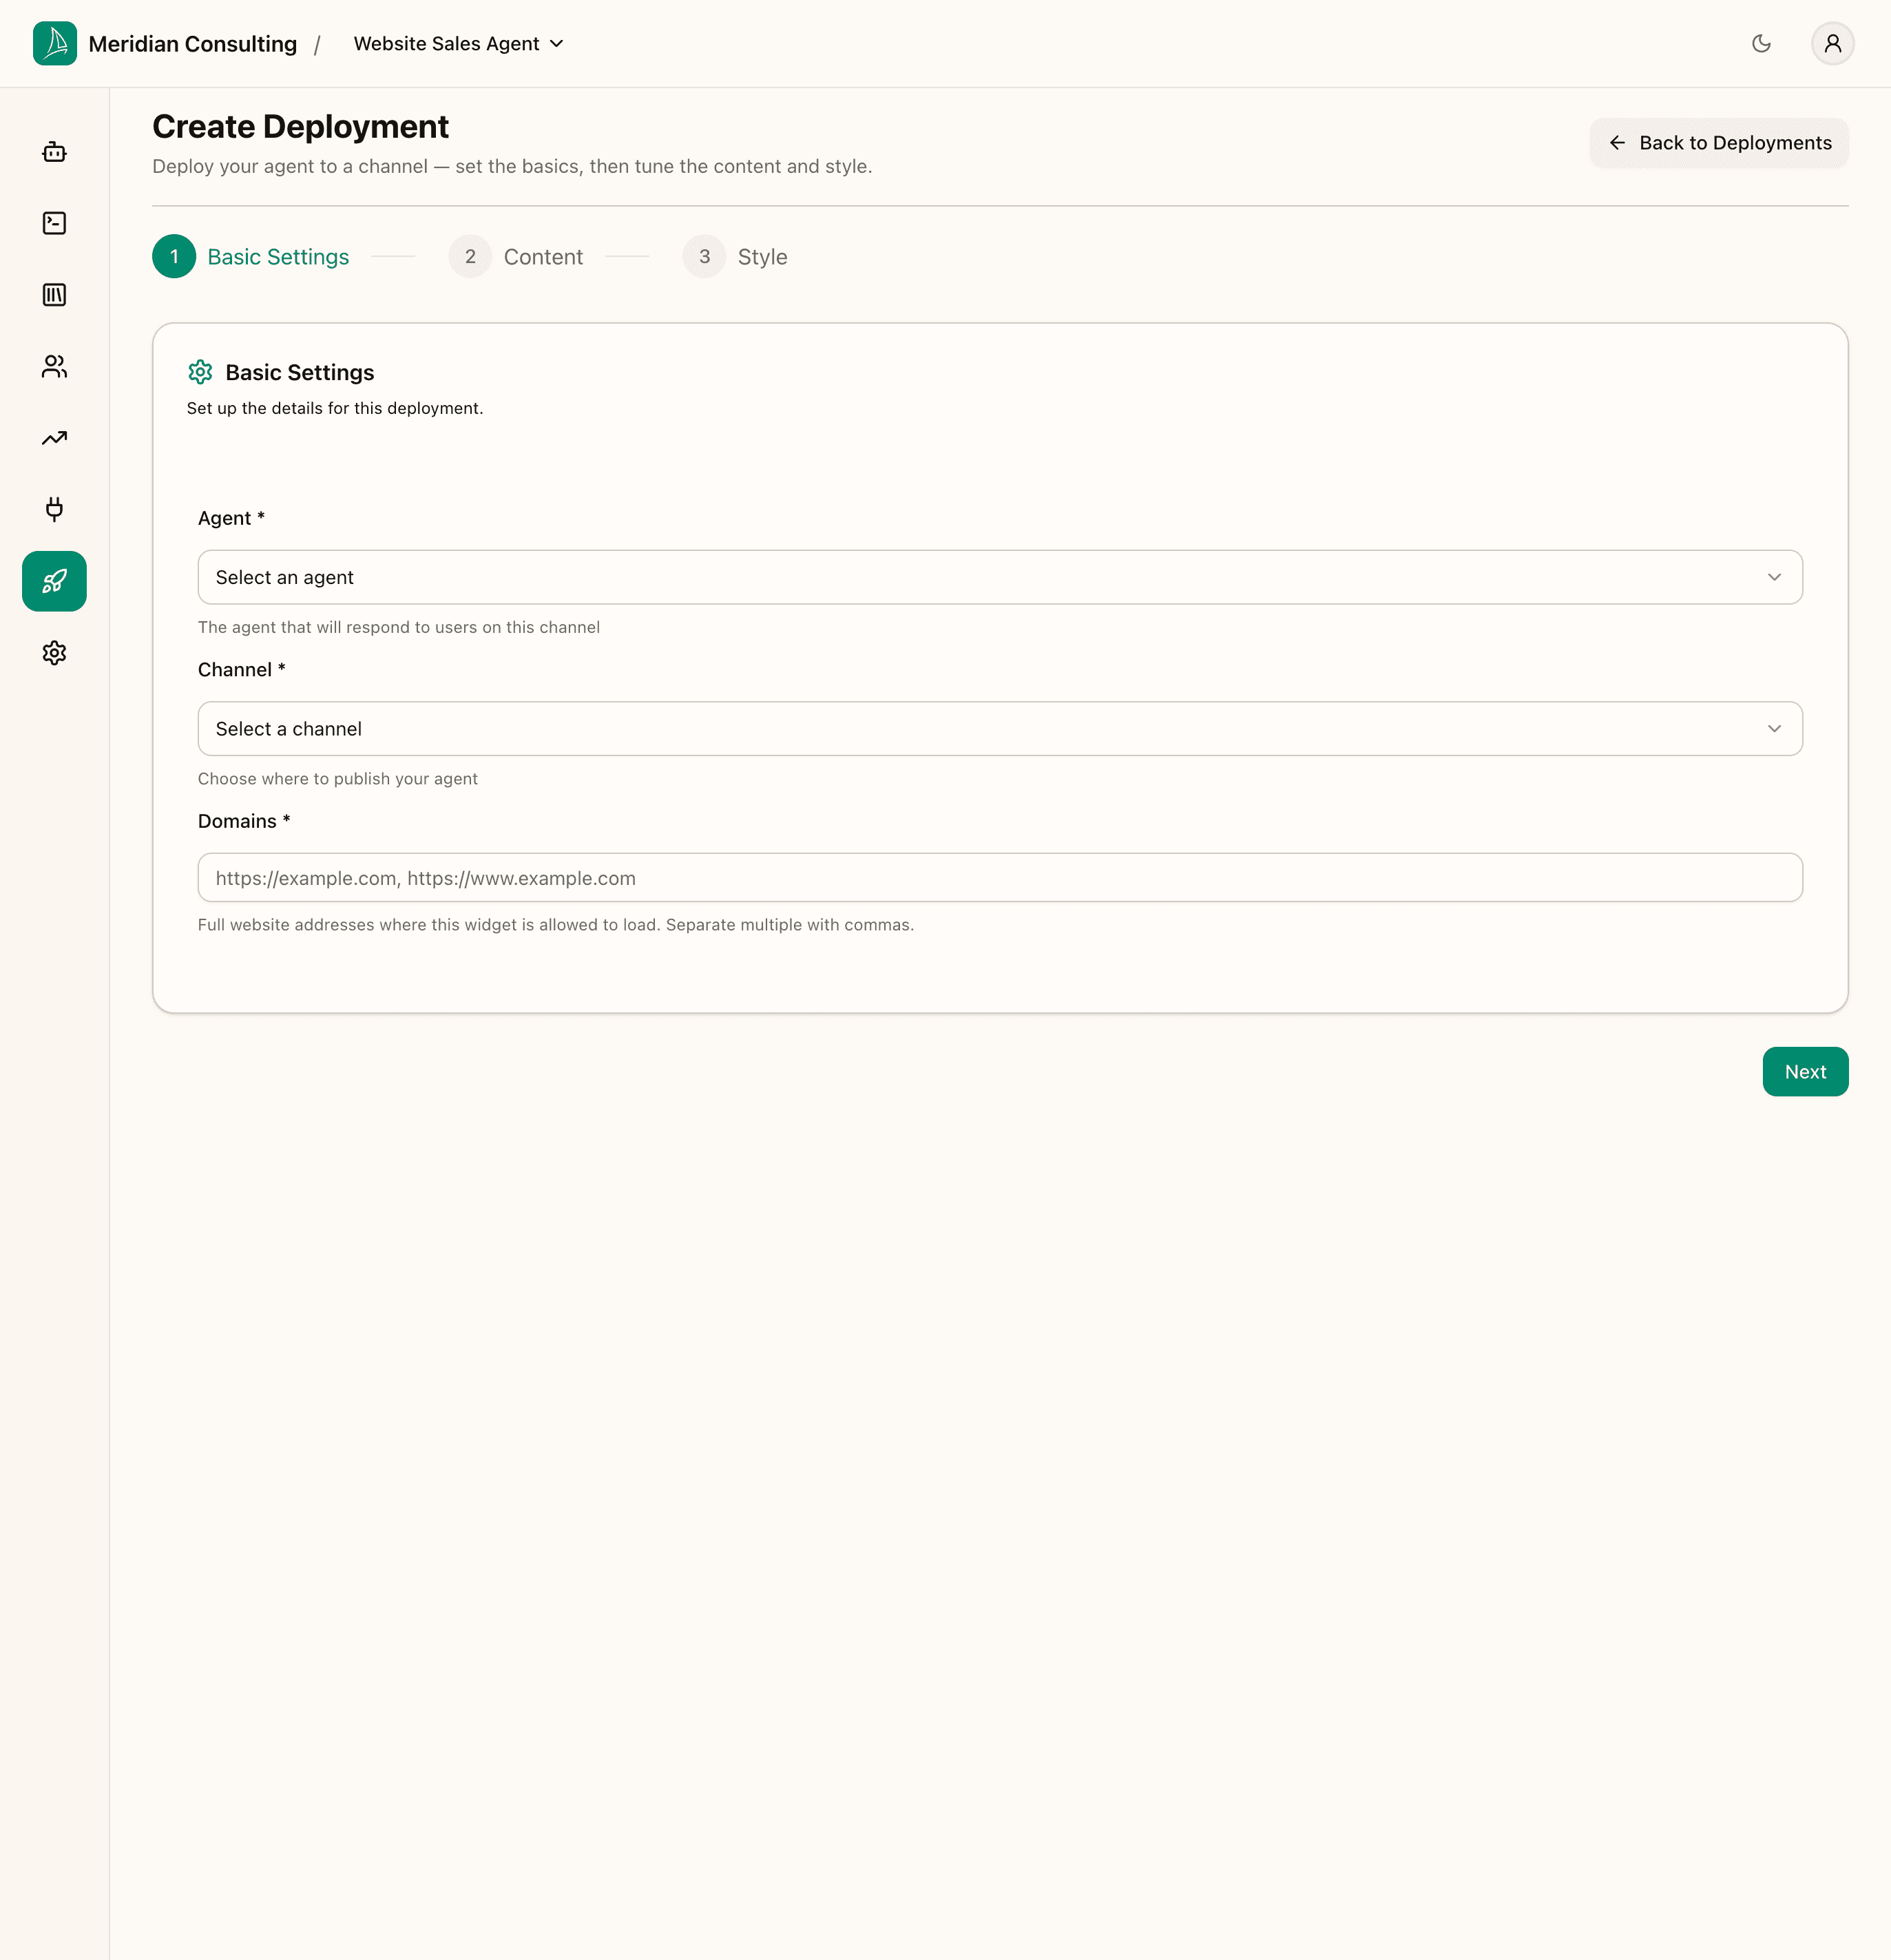
Three fields:
- Agent — the agent that will respond to messages on this deployment. The dropdown lists every agent in the team.
- Channel — where the agent will be published. Currently the only channel is Chat widget; more (Slack, Microsoft Teams, etc.) are on the roadmap.
- Domains — required. The exact URLs where the widget is allowed to load. Comma-separated for multiple. The widget refuses to render on any origin that isn't on this list — it's a security gate, not a hint.
The screenshot below shows the example deployment configured for the chat widget channel and pointed at a single domain.
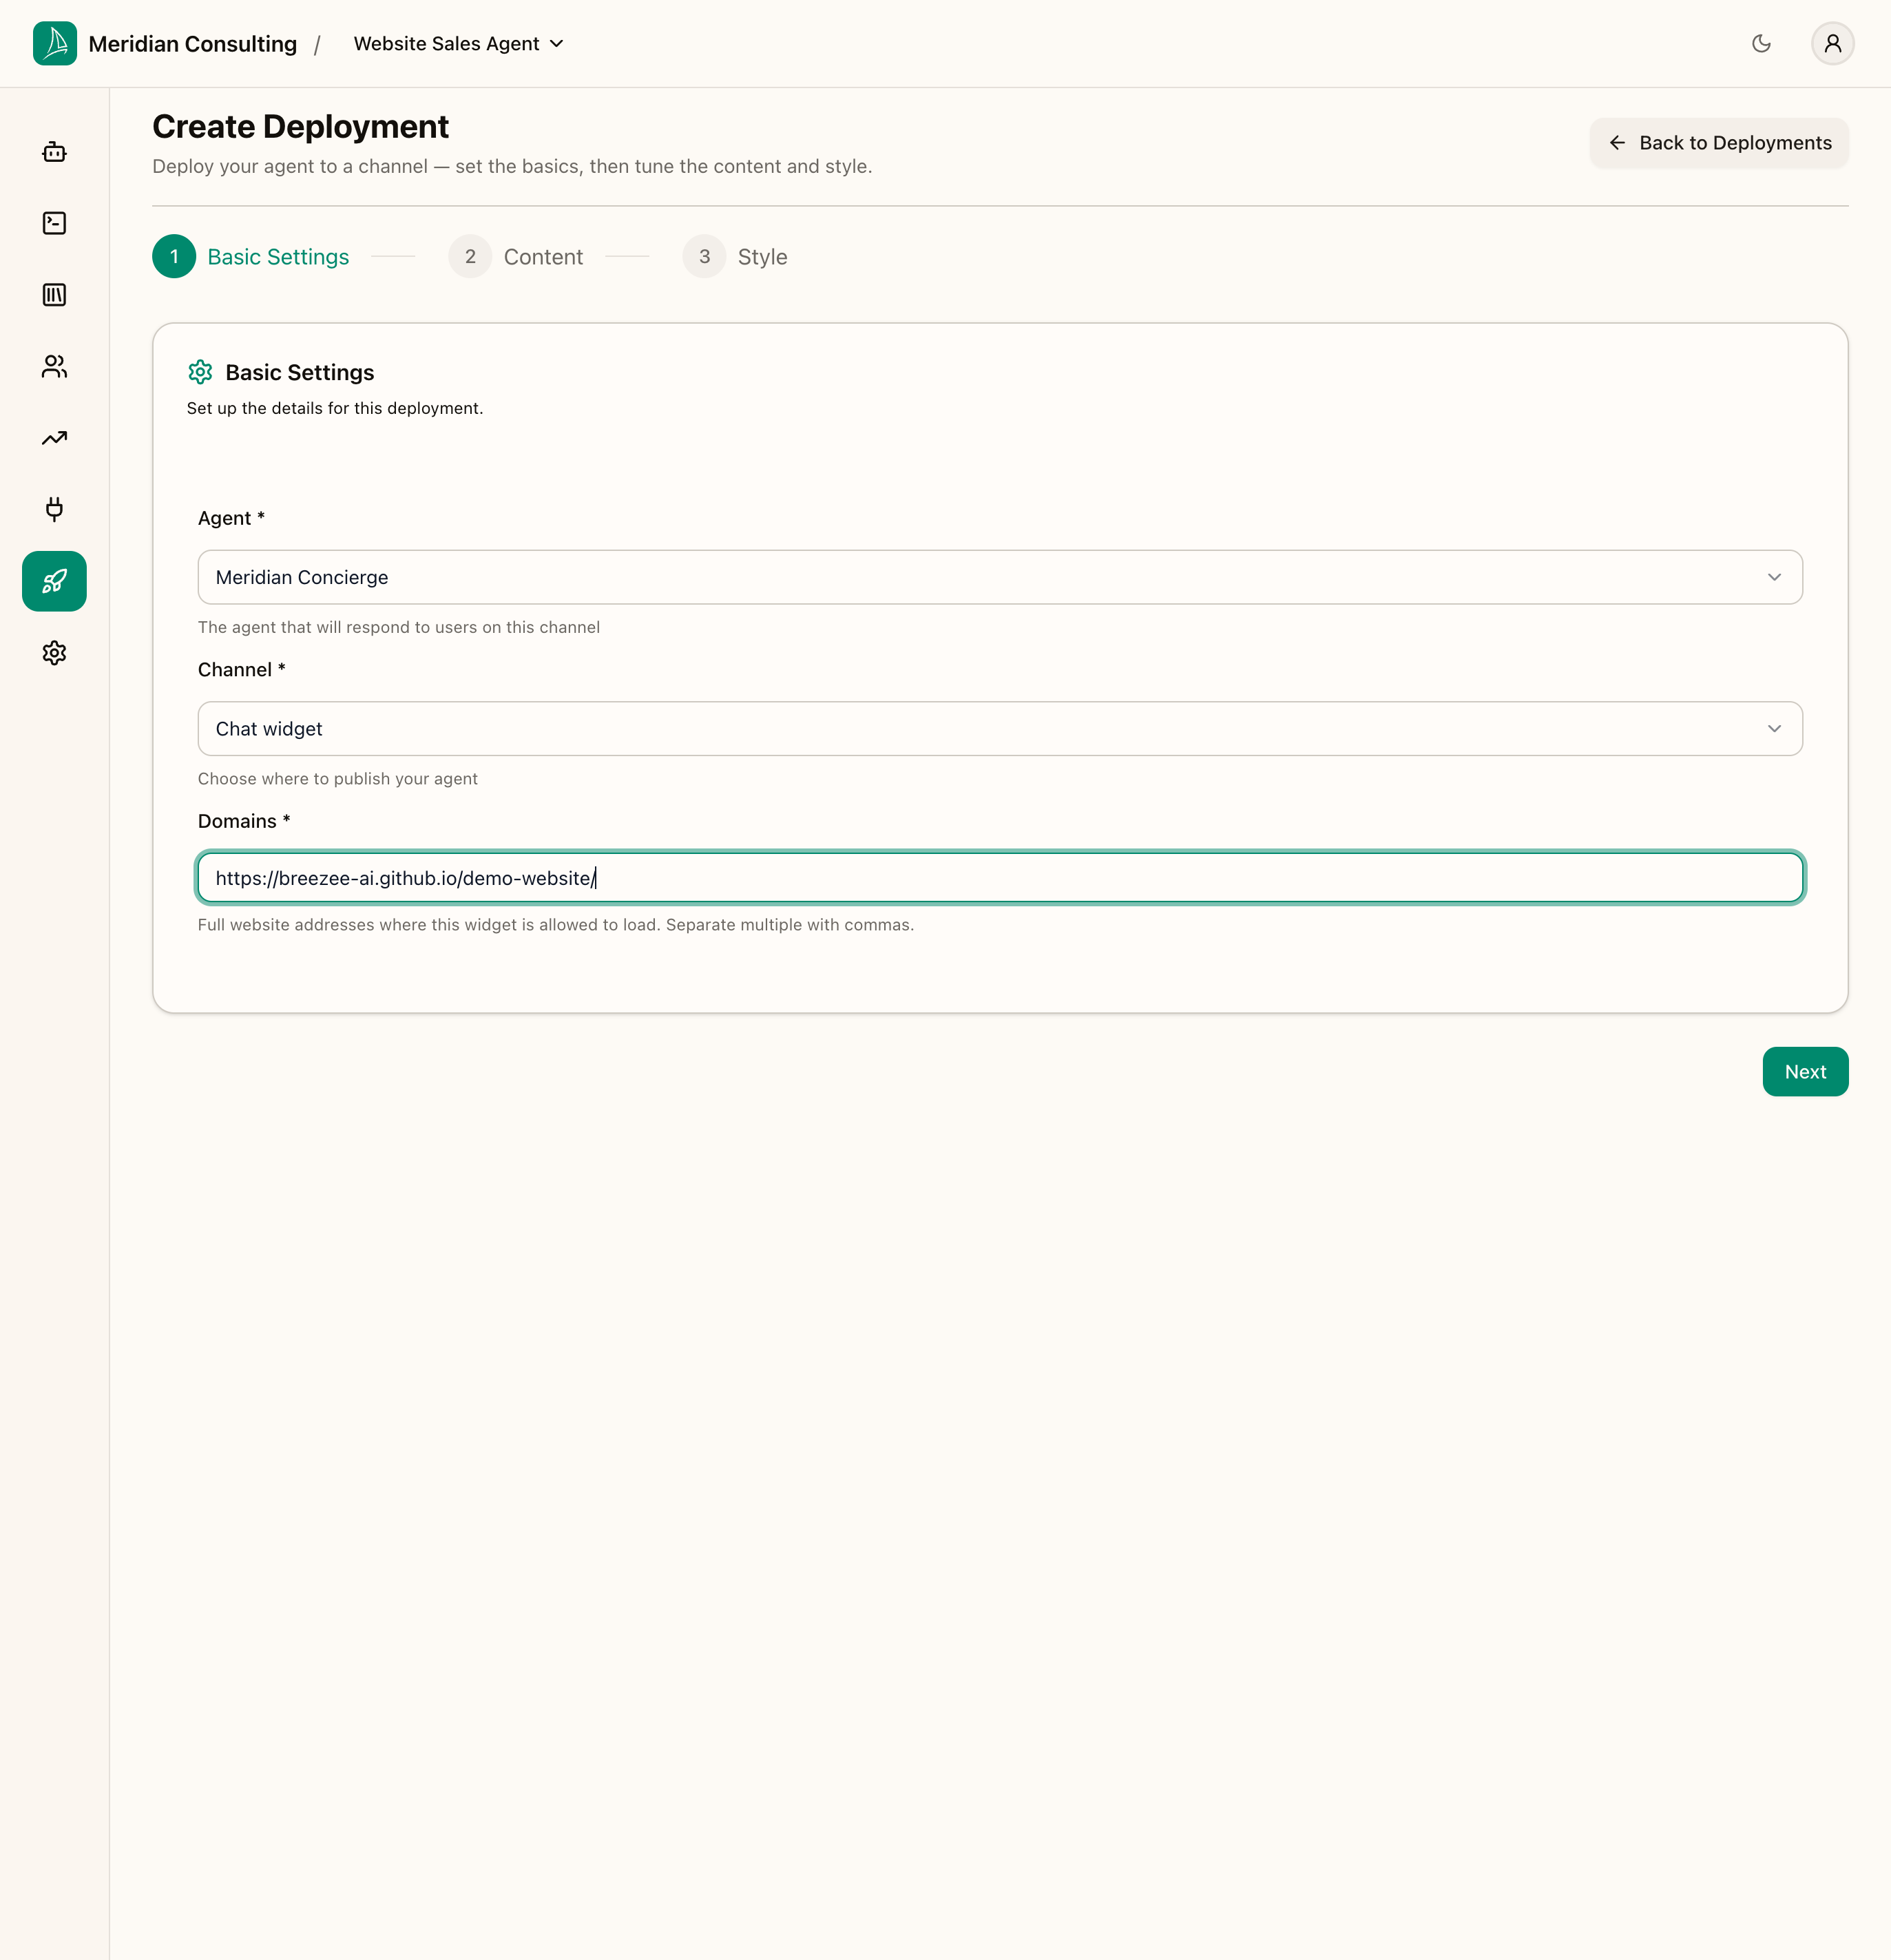
Click Next.
Why domains matter. The widget verifies the parent page's origin against this list before it'll initialise. If the deployment goes on multiple sites — staging at
staging.example.com, production atwww.example.com— list both. If you forget, the widget will silently fail to render on the missing origin and you'll be puzzled.
Step 2 — Content
This is where the deployment's user-facing copy lives. It mirrors the per-agent greeting from Building your first agent but is overridable per deployment — so the same agent can speak slightly differently on different sites.
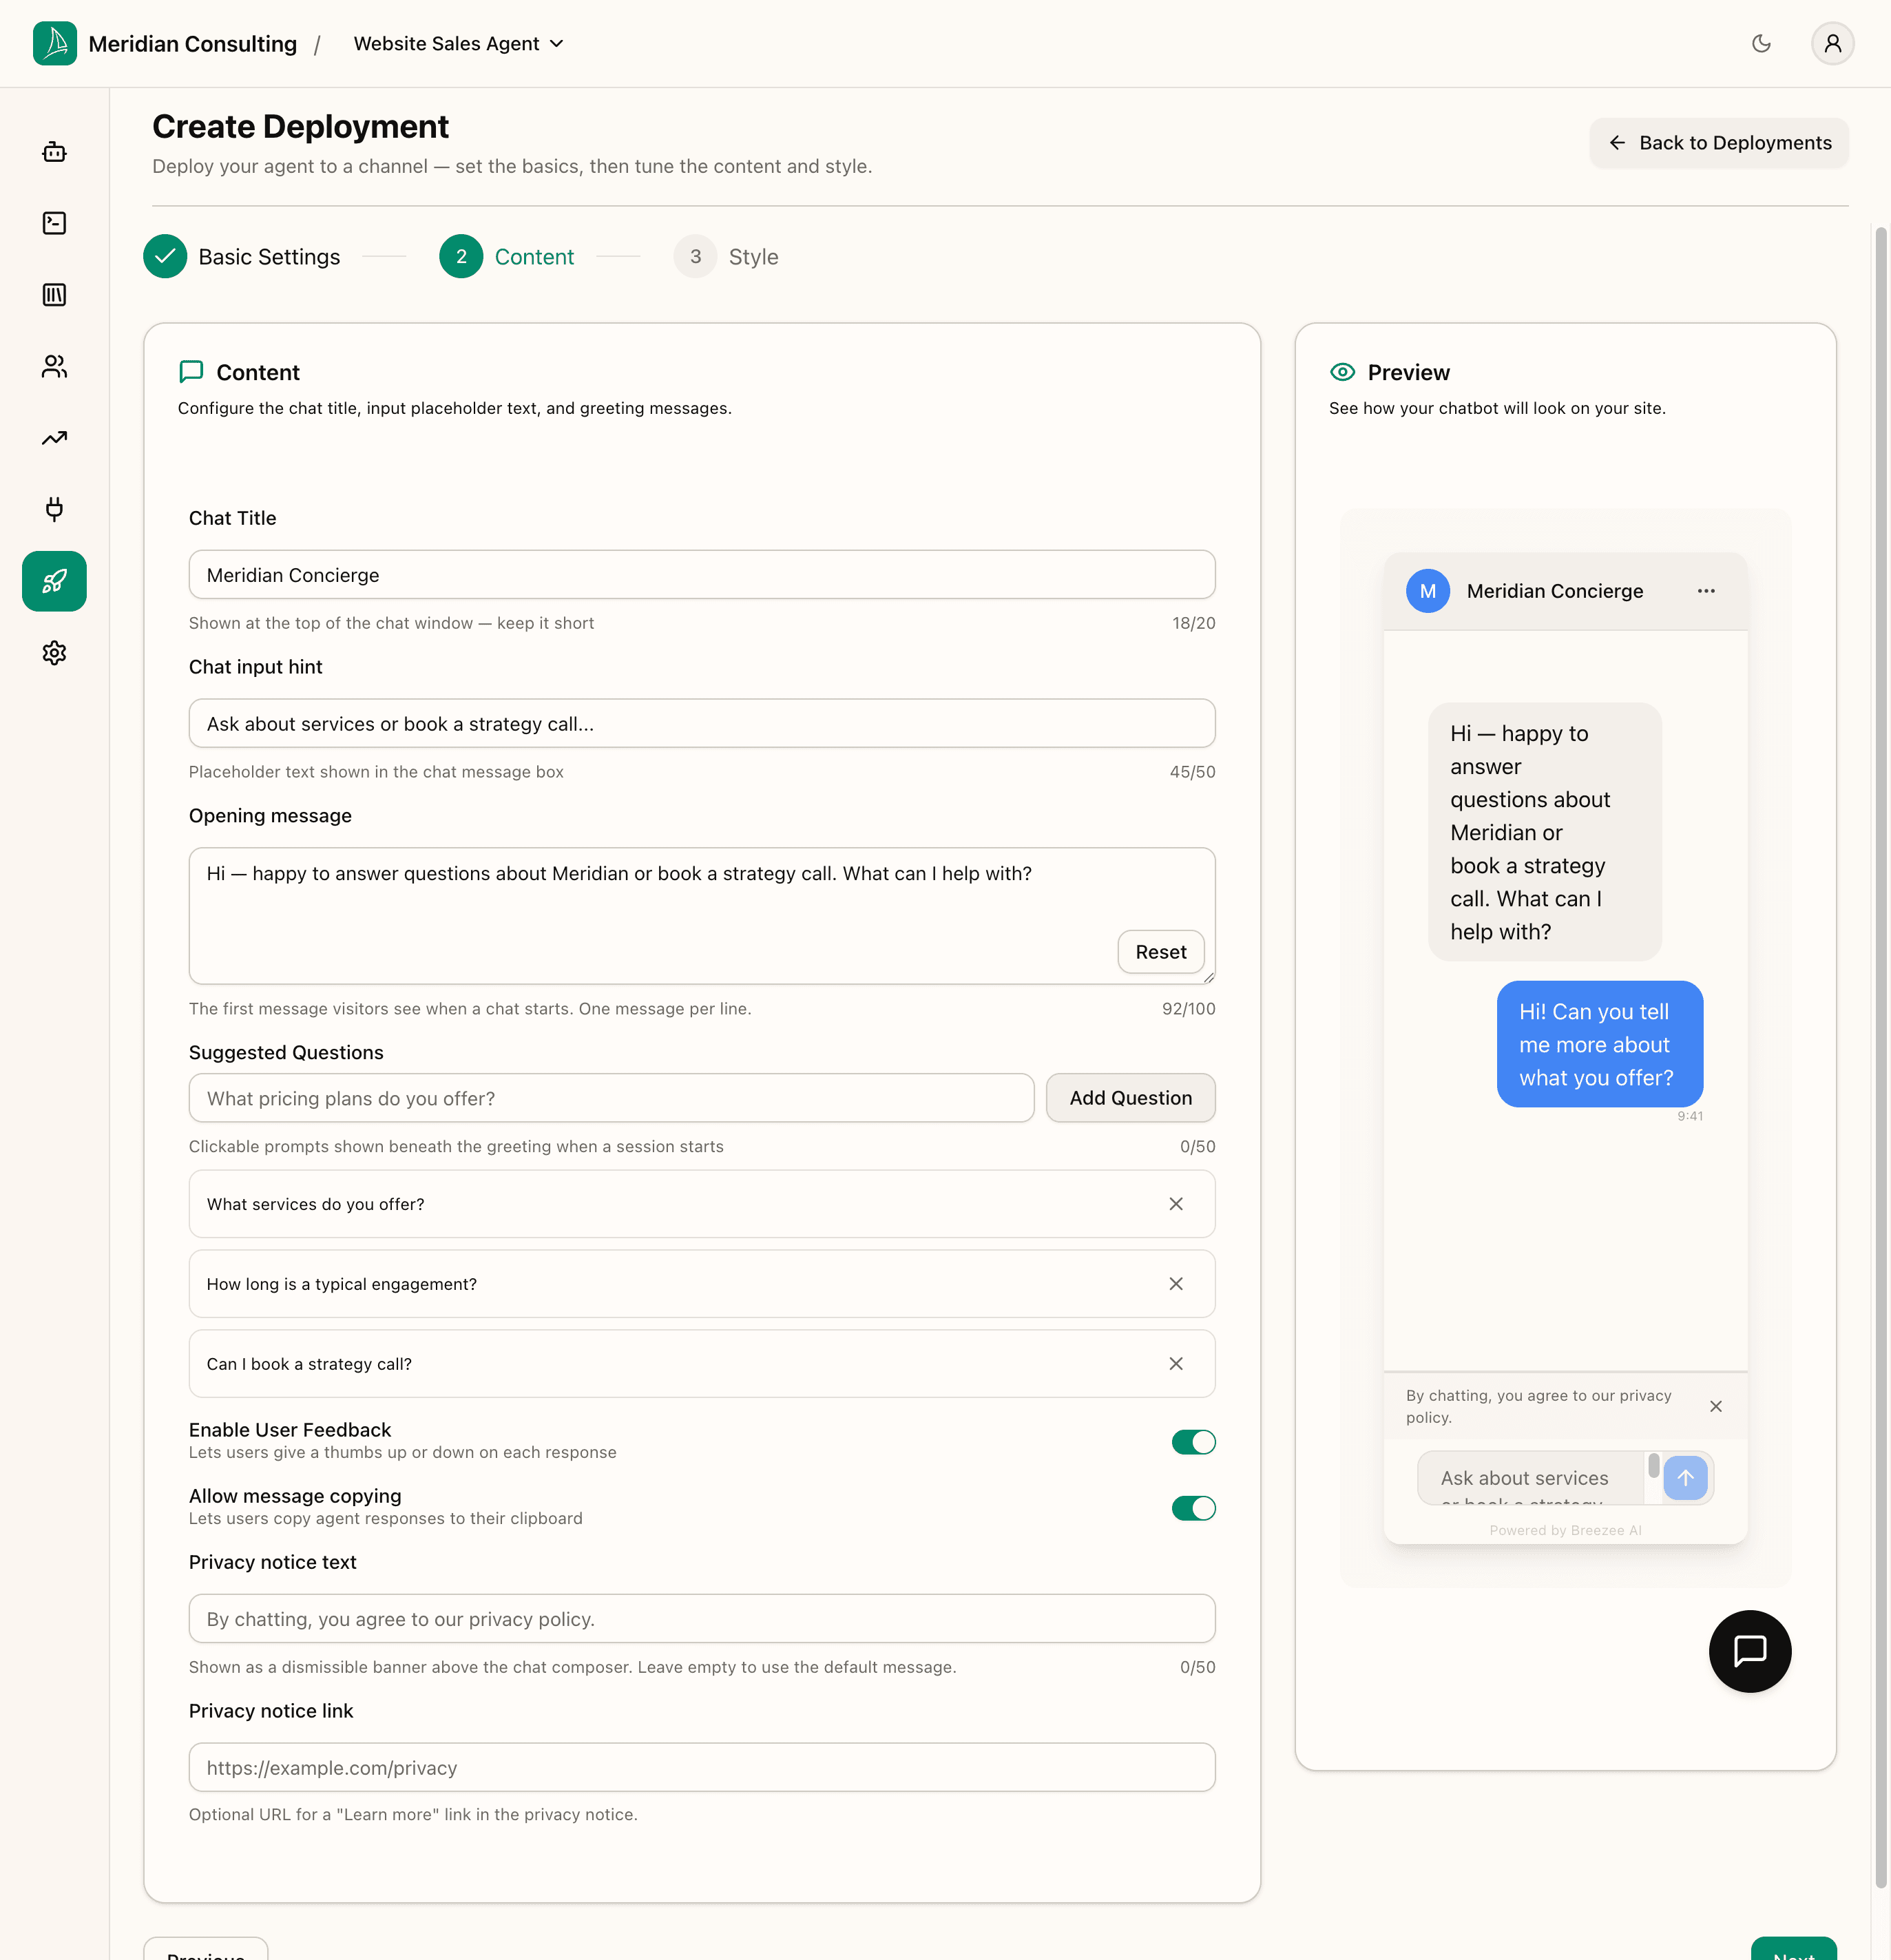
The fields:
- Chat Title — top of the chat window. Up to 20 characters.
- Chat input hint — placeholder text in the message box. Up to 50 characters. We use Ask about services or book a strategy call...
- Opening message — first message the agent sends. Up to 100 characters. We use the same greeting as the agent default.
- Suggested Questions — clickable chips below the greeting. Up to 50 characters each. We add three: What services do you offer?, How long is a typical engagement?, Can I book a strategy call?
- Enable User Feedback — thumbs-up/down on agent messages. Default on.
- Allow message copying — copy button on agent messages. Default on.
- Privacy notice text — dismissible banner above the composer. Leave empty for the default "By chatting, you agree to our privacy policy."
- Privacy notice link — optional URL for a Learn more link.
The Preview panel on the right of the form renders a live mini-widget that updates as you type — useful for sanity-checking the copy fits.
Click Next.
Step 3 — Style
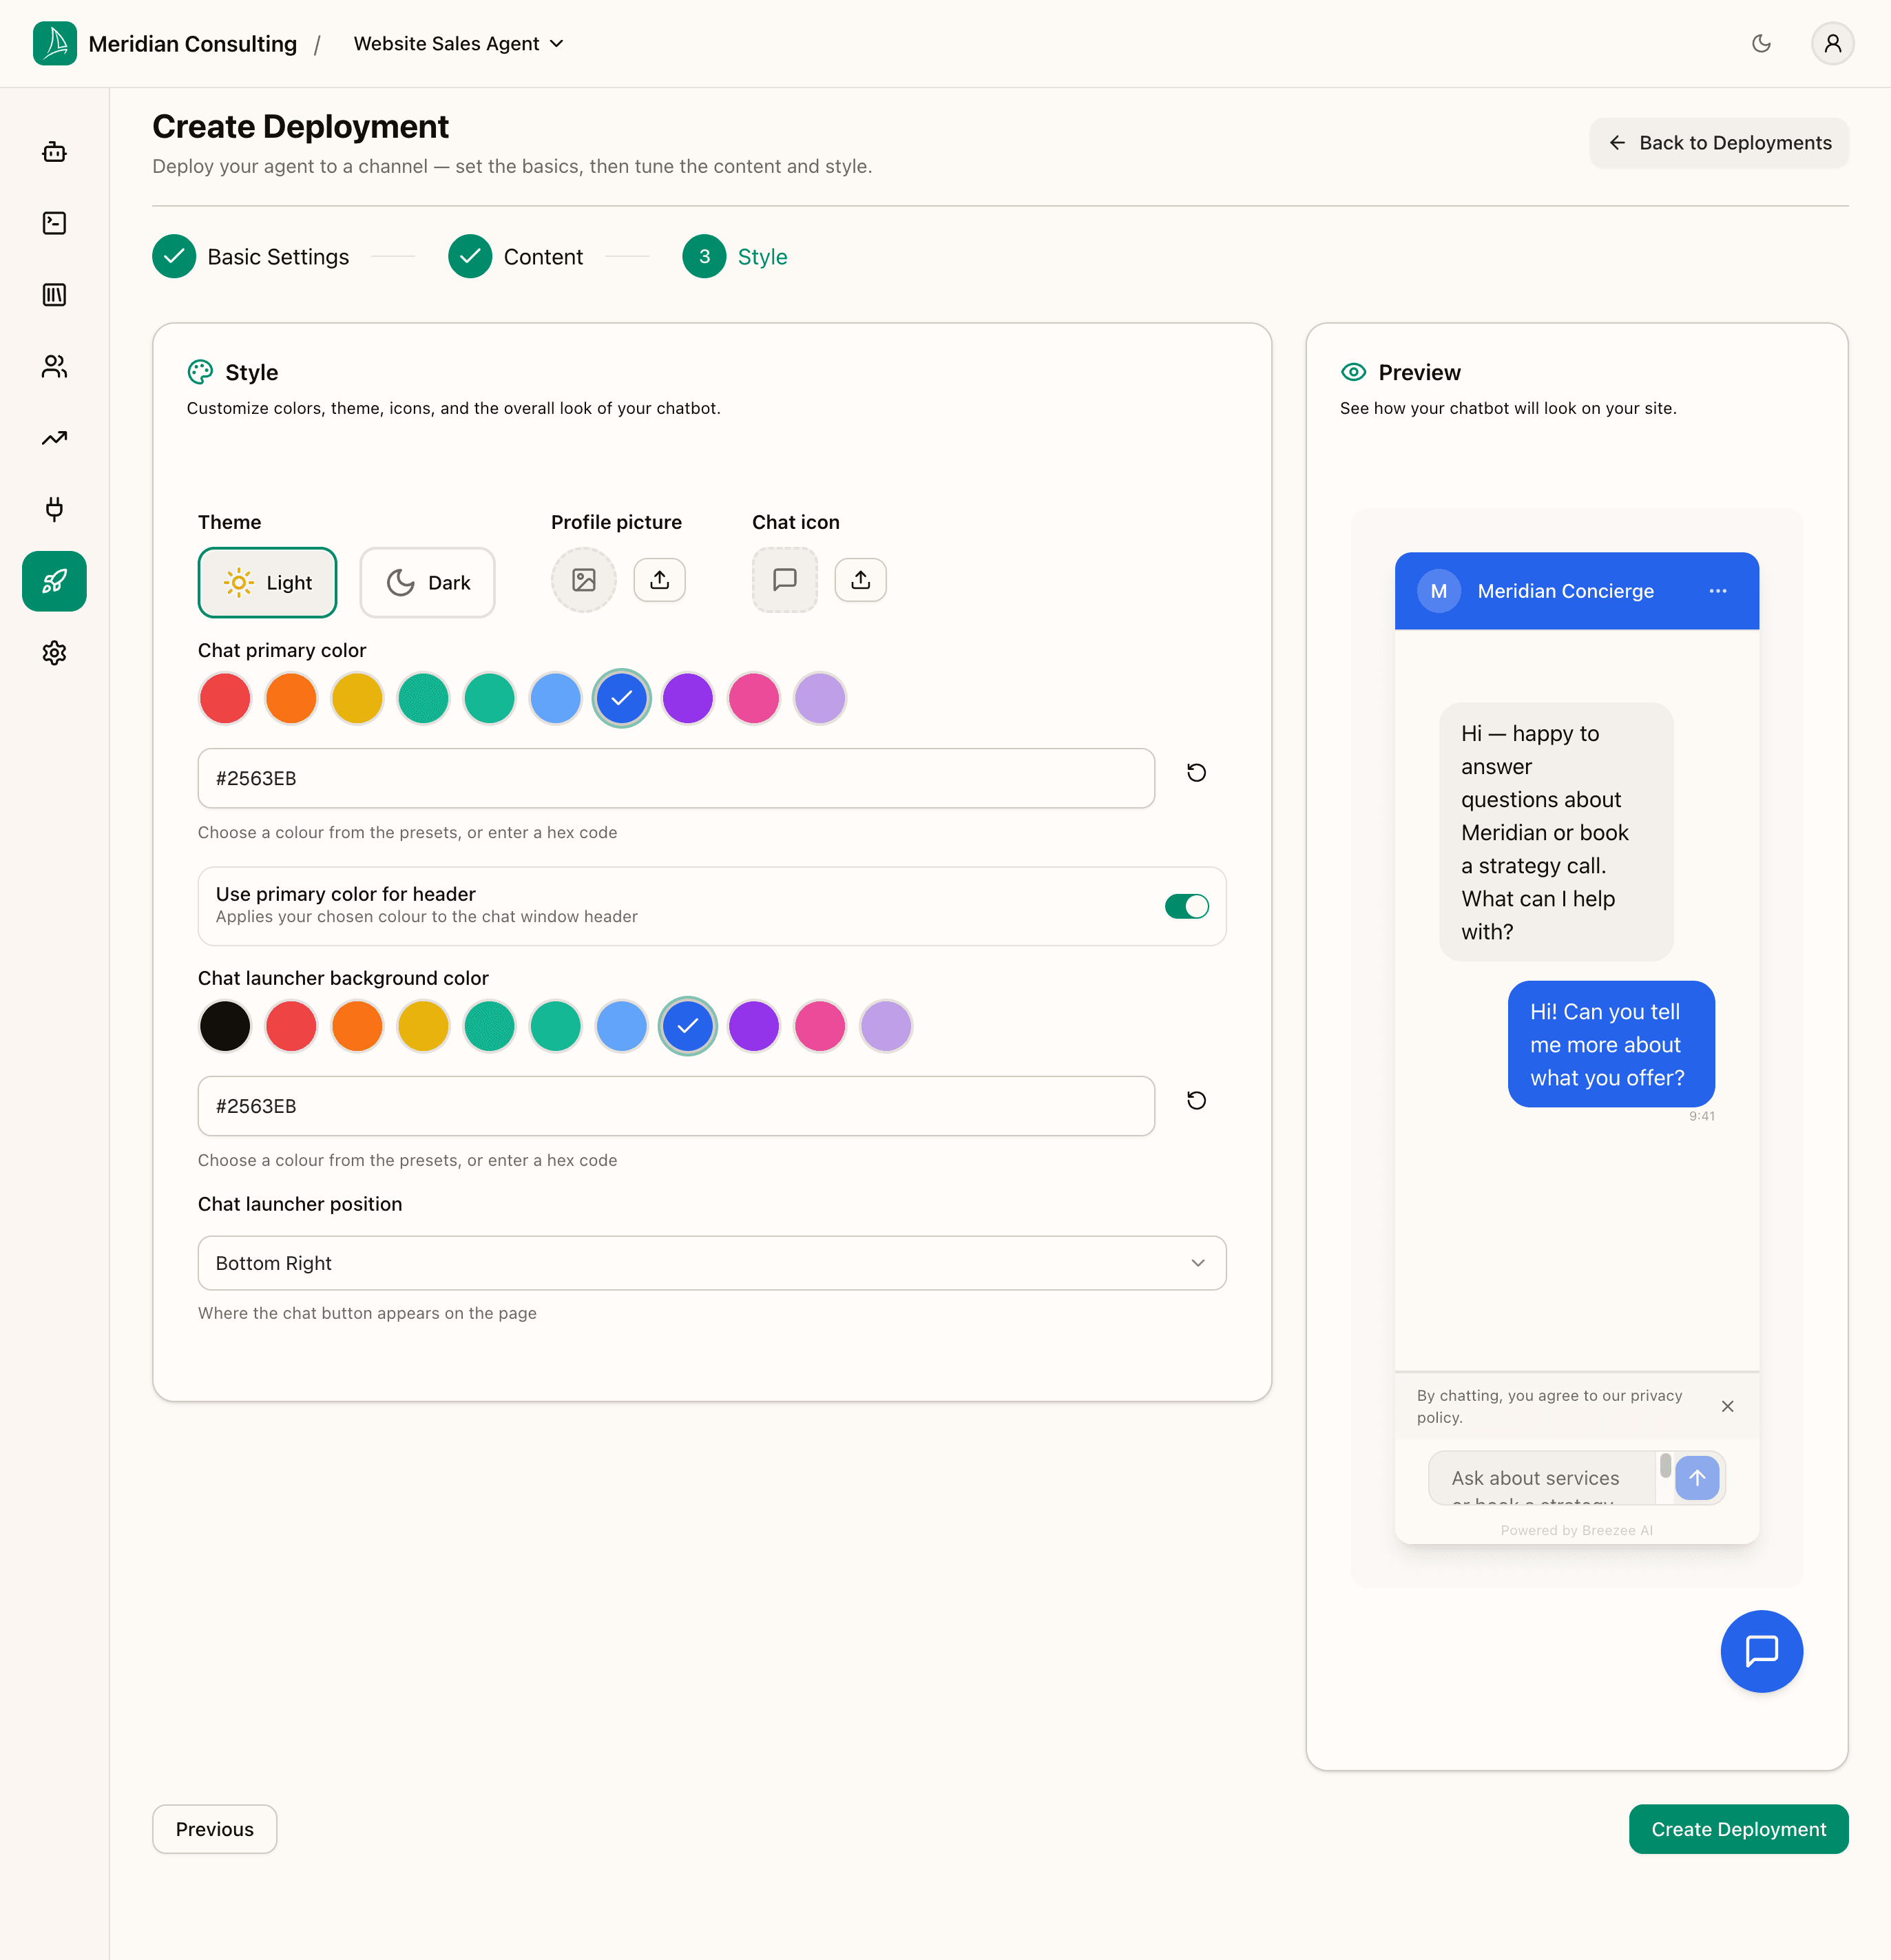
This controls the widget's visual presentation:
- Theme — Light or Dark mode for the chat surface.
- Profile picture — the agent's avatar.
- Chat icon — the icon shown on the launcher button.
- Chat primary color — colour swatches (Red, Orange, Yellow, Green, Teal, Light Blue, Dark Blue, Purple, Magenta, Lavender) plus a hex input for arbitrary brand colours.
- Use primary color for header — toggle. When on, the chat window header uses the primary colour rather than the theme default. Recommended on — it ties the widget visually to your brand.
- Chat launcher background color — the colour of the floating chat-bubble button on the page itself, with its own preset row plus hex input. Defaults to black.
- Chat launcher position — Bottom Right (default), Bottom Left, etc.
Pick colours that match your brand. The Preview panel reflects the choices in real time. Keep Use primary color for header on if your brand colour reads well as a header — it ties the widget visually to your site.
Click Create Deployment. The platform provisions the deployment and lands you on the Embed page.
The deployment's standalone settings pages
After creation the deployment has its own sub-navigation in the left rail with four pages — Basic, Content, Style, Embed — each one a standalone editor for the corresponding wizard step. The wizard is the green-field creation path; the standalone pages are how you tweak settings later.
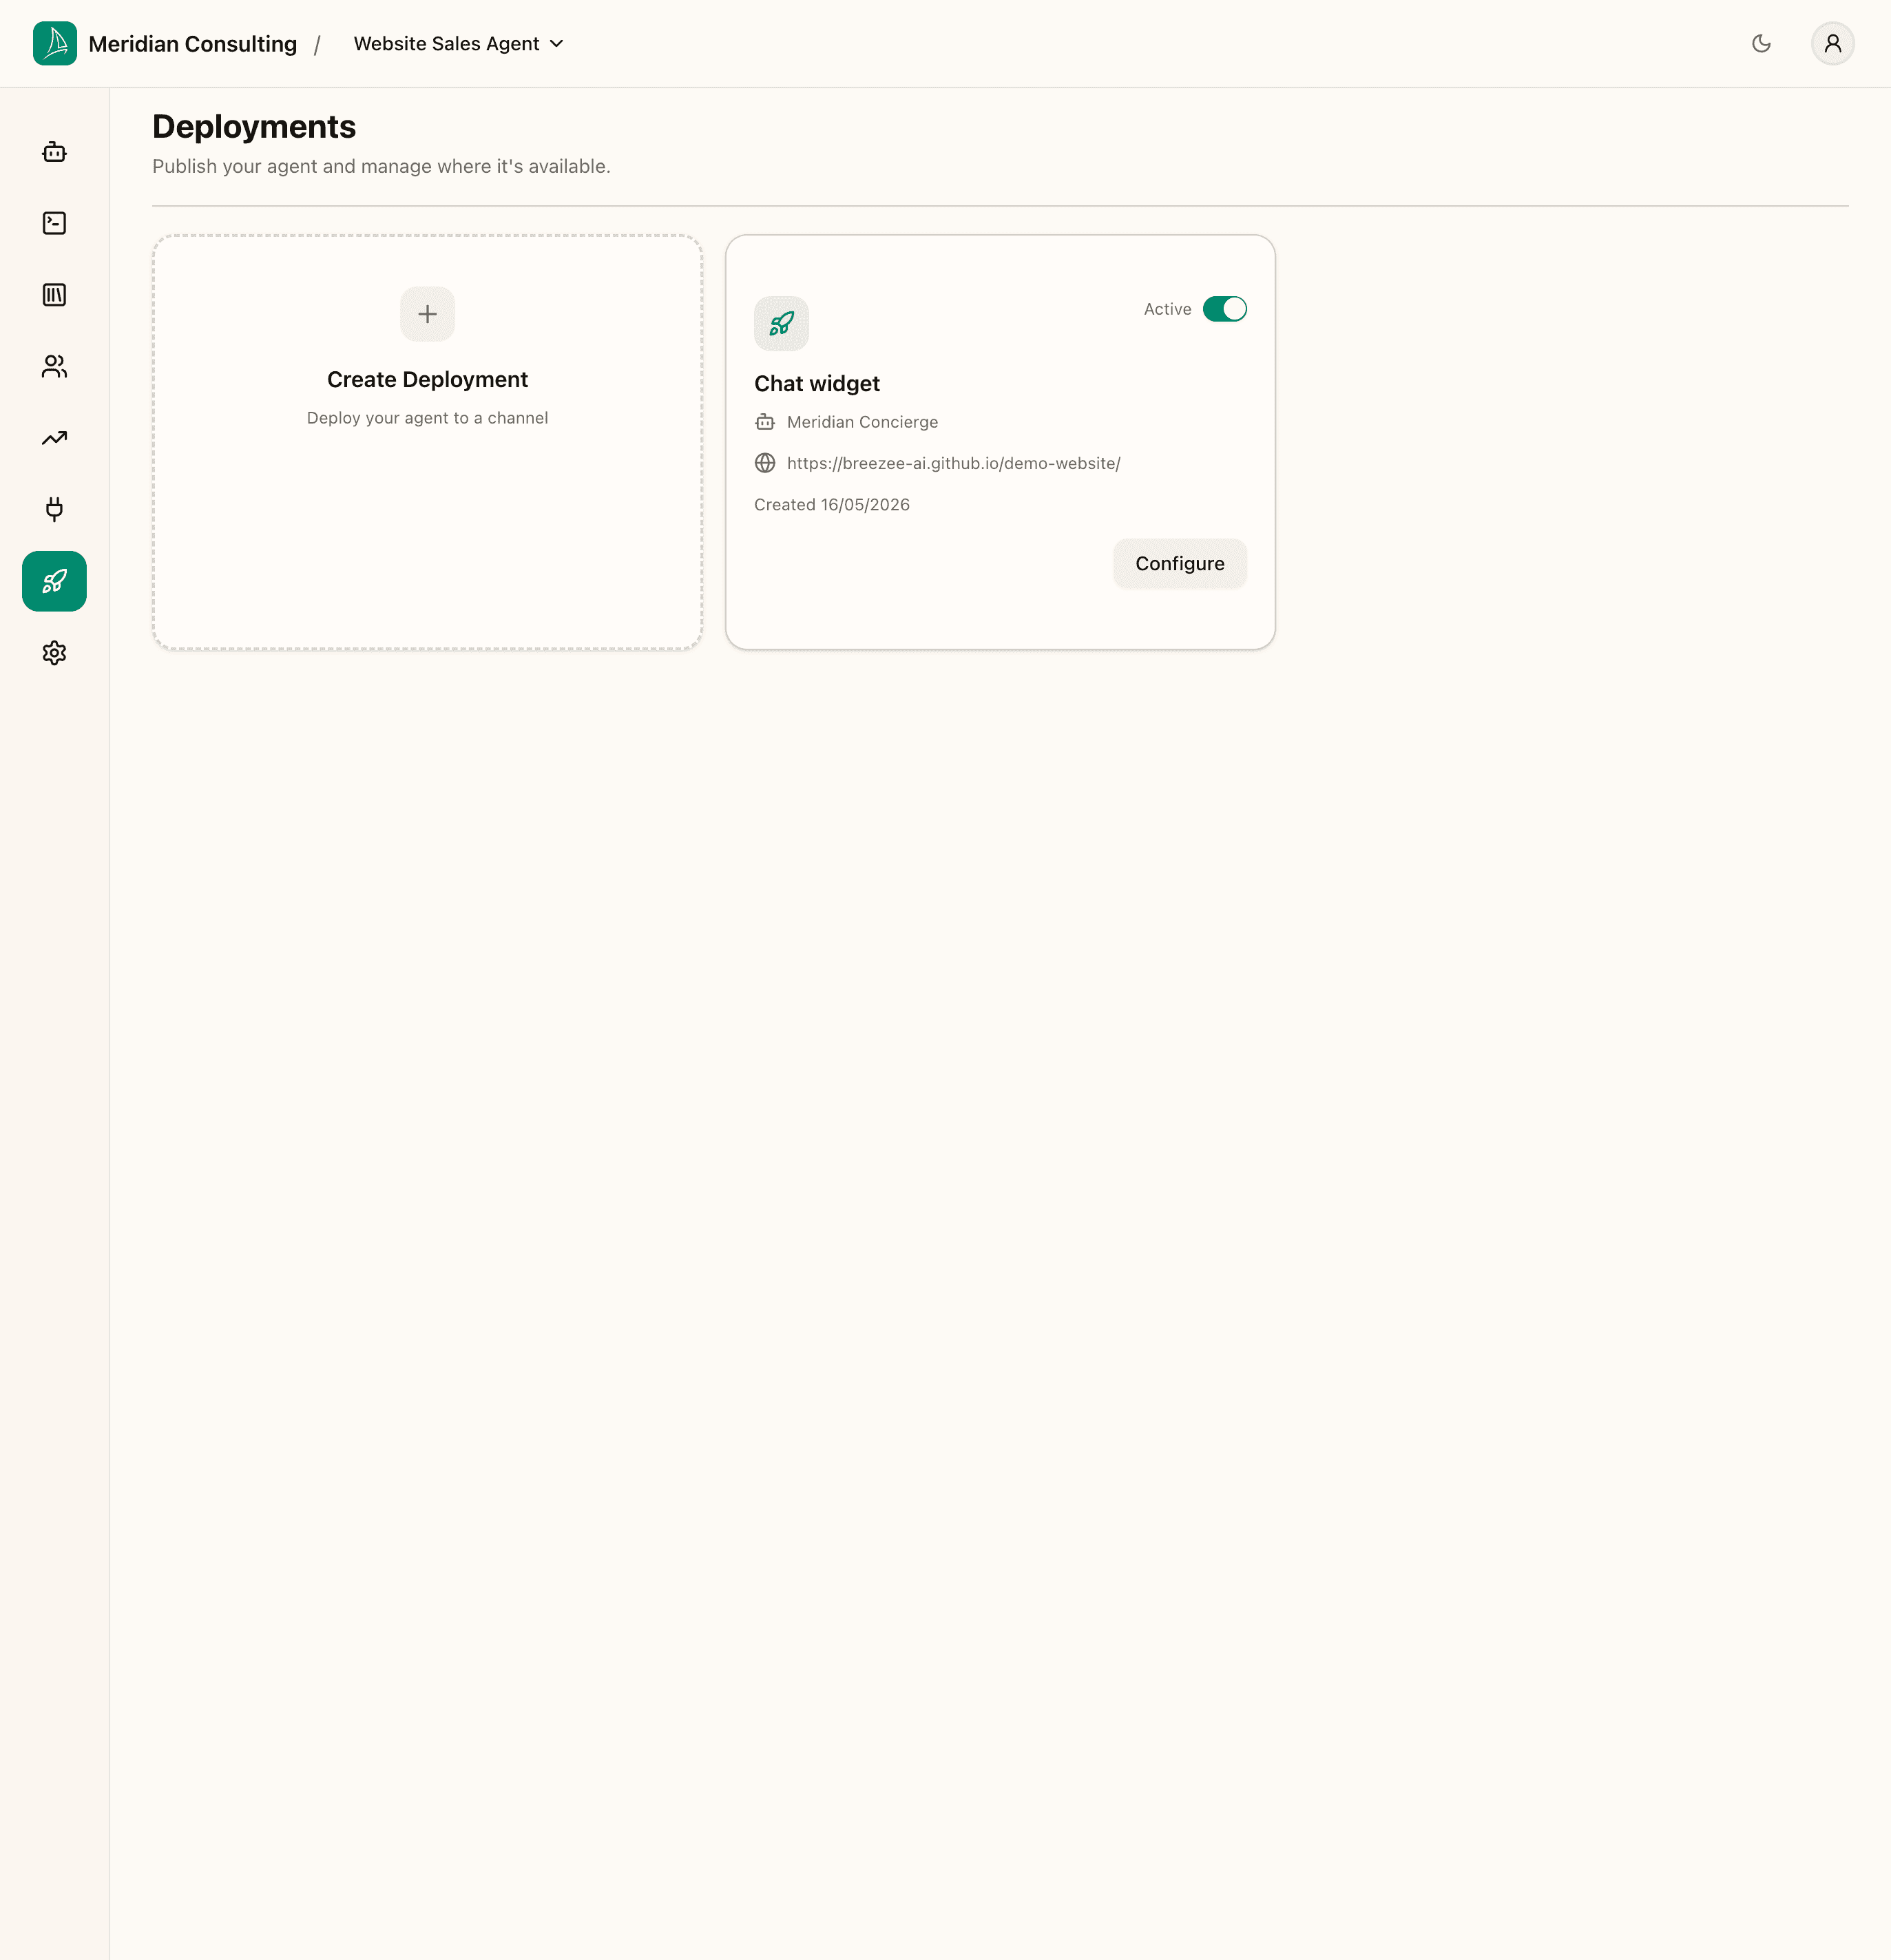
Each deployment in the list shows the agent name, channel, and a status indicator. Click into a deployment any time to edit its configuration.
The Embed page
This is what every deployment exists to produce: the snippet you paste into your site.
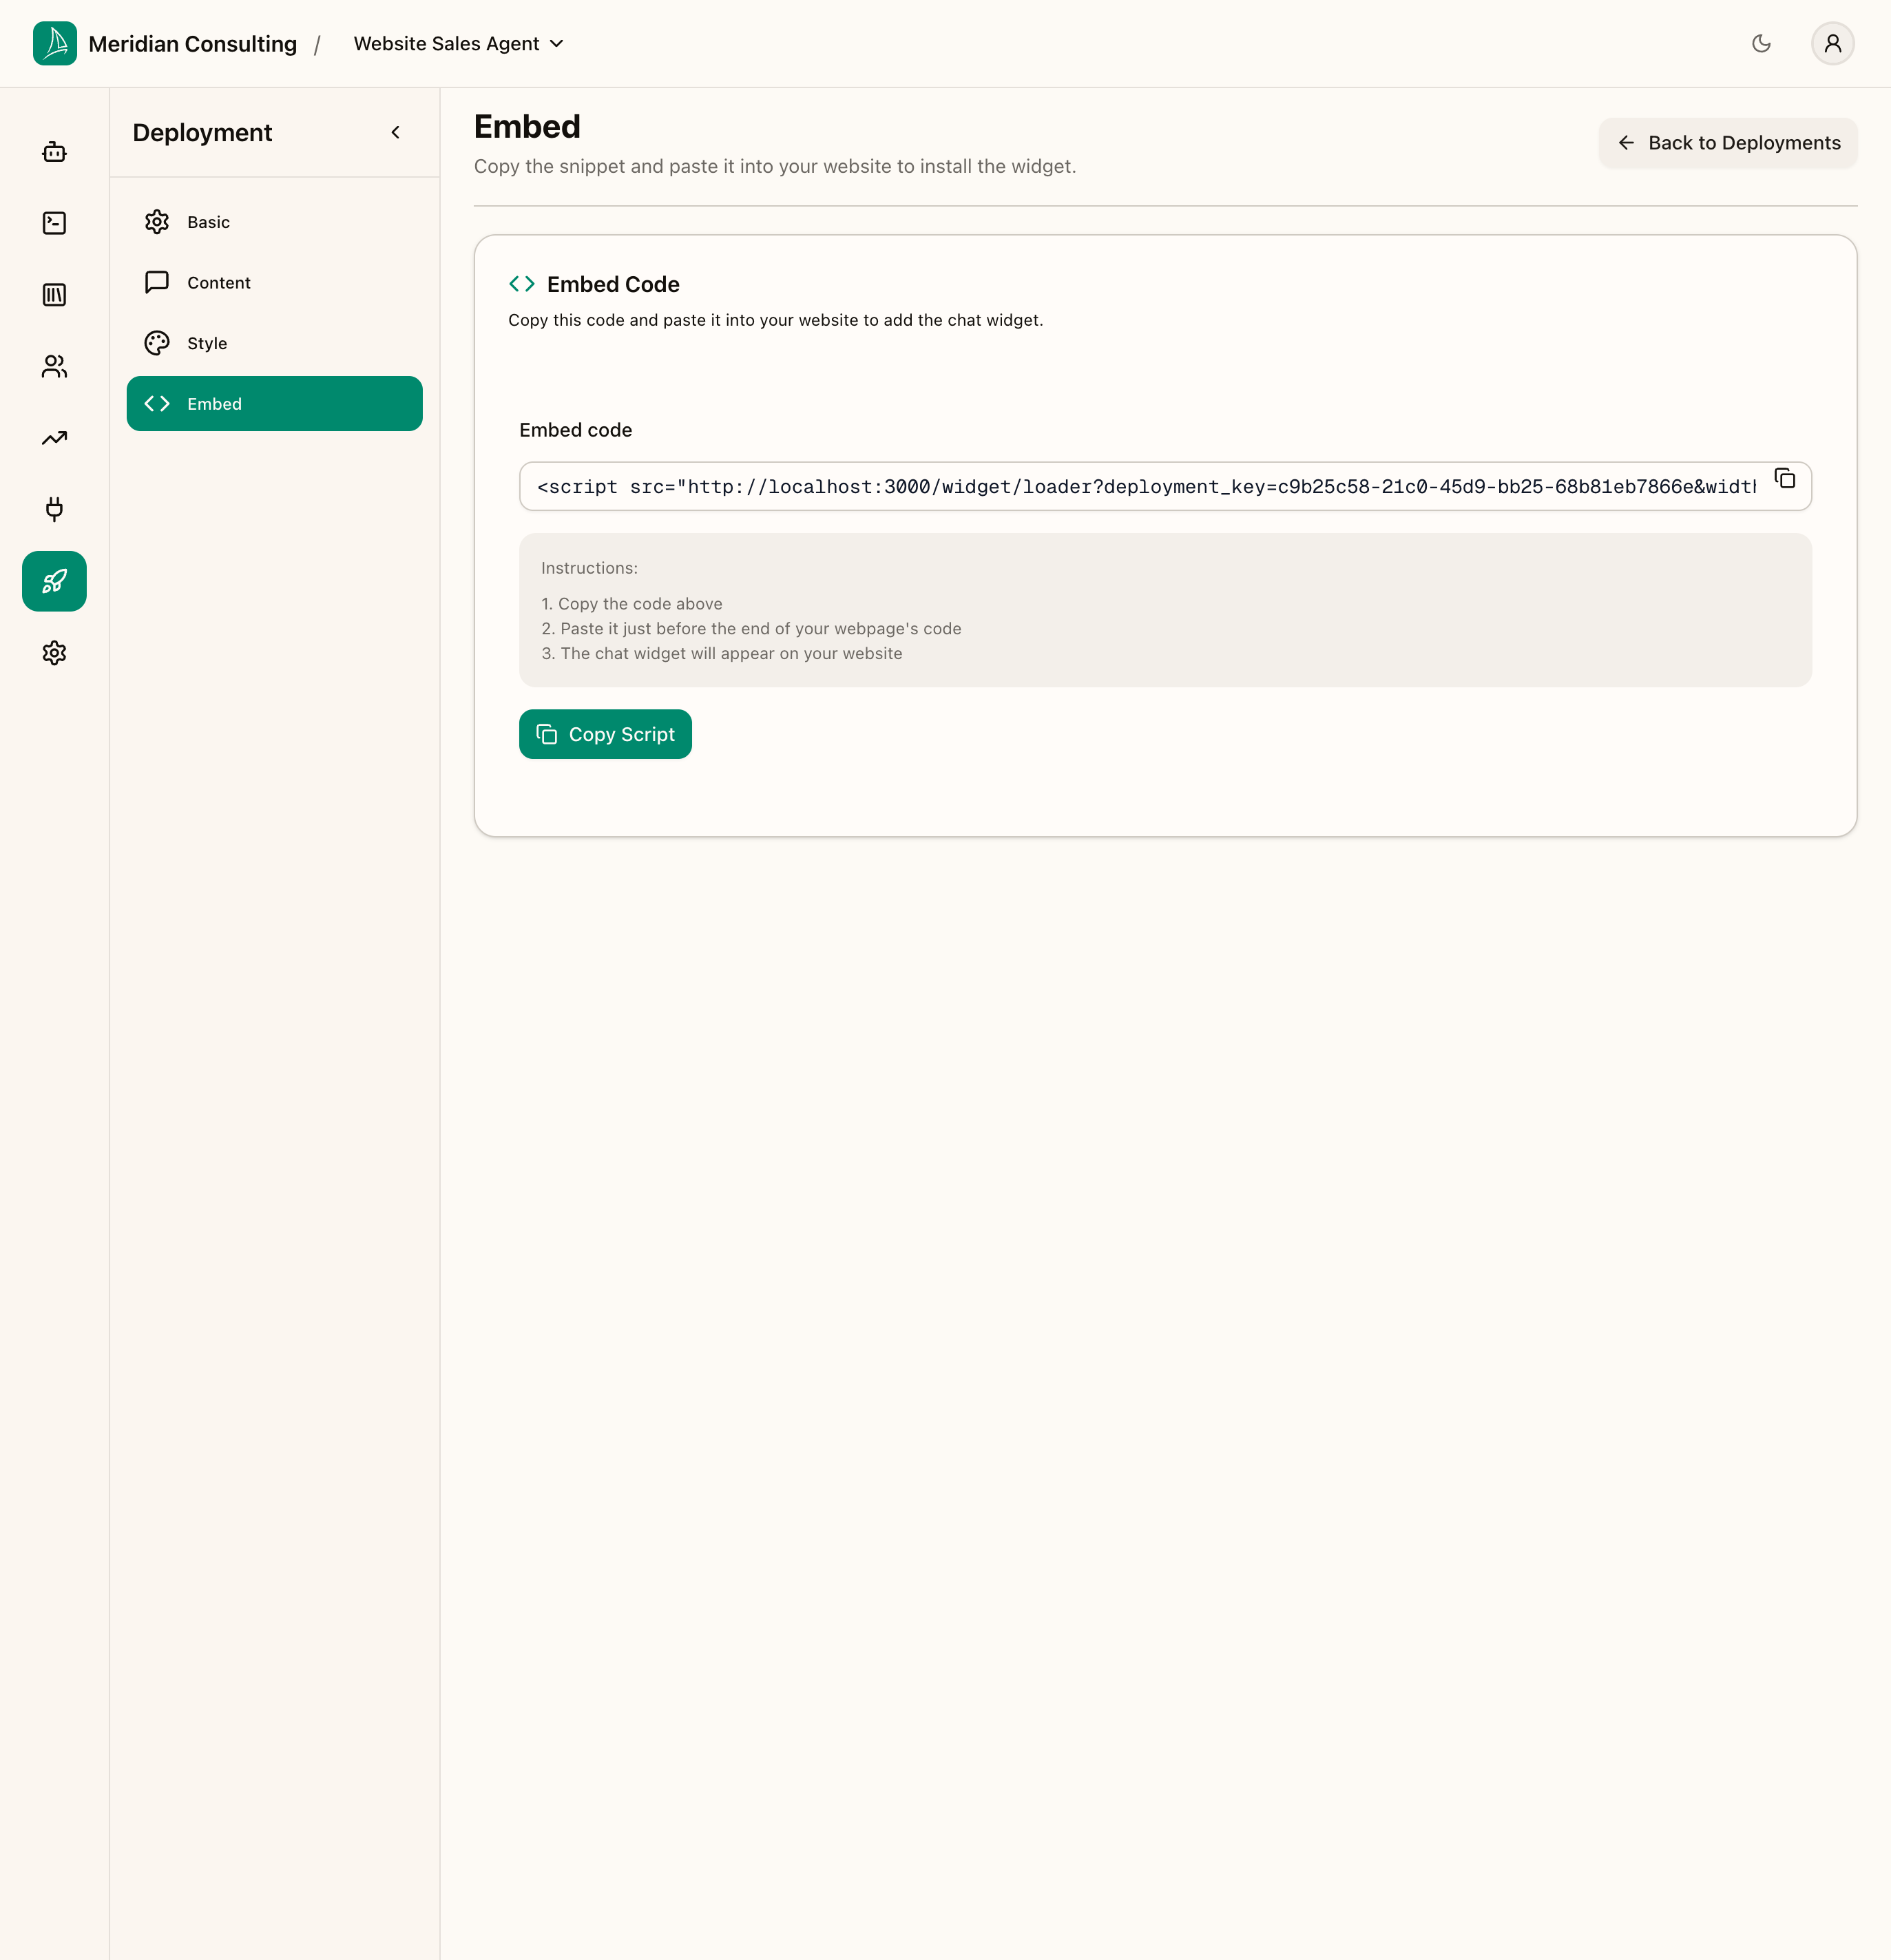
The snippet is a single <script> tag containing a unique deployment_key. Example:
Production note. In a real tenant the loader URL points at your production dashboard host, not
localhost:3000. The deployment we created here is for the manual's local development environment, so the snippet is bound to localhost. If you embed a localhost-bound snippet on a public HTTPS site, browsers will block the script with a mixed-content error — and external visitors can't reach your laptop anyway. Use the deployment whose loader URL matches the dashboard environment that will be live in production.
The two instruction steps
- Copy the snippet.
- Paste it just before the closing
</body>tag of your site (or anywhere late in the page — order doesn't matter for the widget's behaviour, it just affects when in page load it initialises).
That's it. No further configuration is needed in the website code. Everything about the agent — greeting, skills, routing, theme, allowed domains — is held server-side and identified by the deployment key.
Putting the widget on the live demo site
For this manual the snippet has been committed to the breezee-ai/demo-website GitHub Pages site. Once that goes live, visiting the site shows the chat launcher pinned to the bottom-right corner.
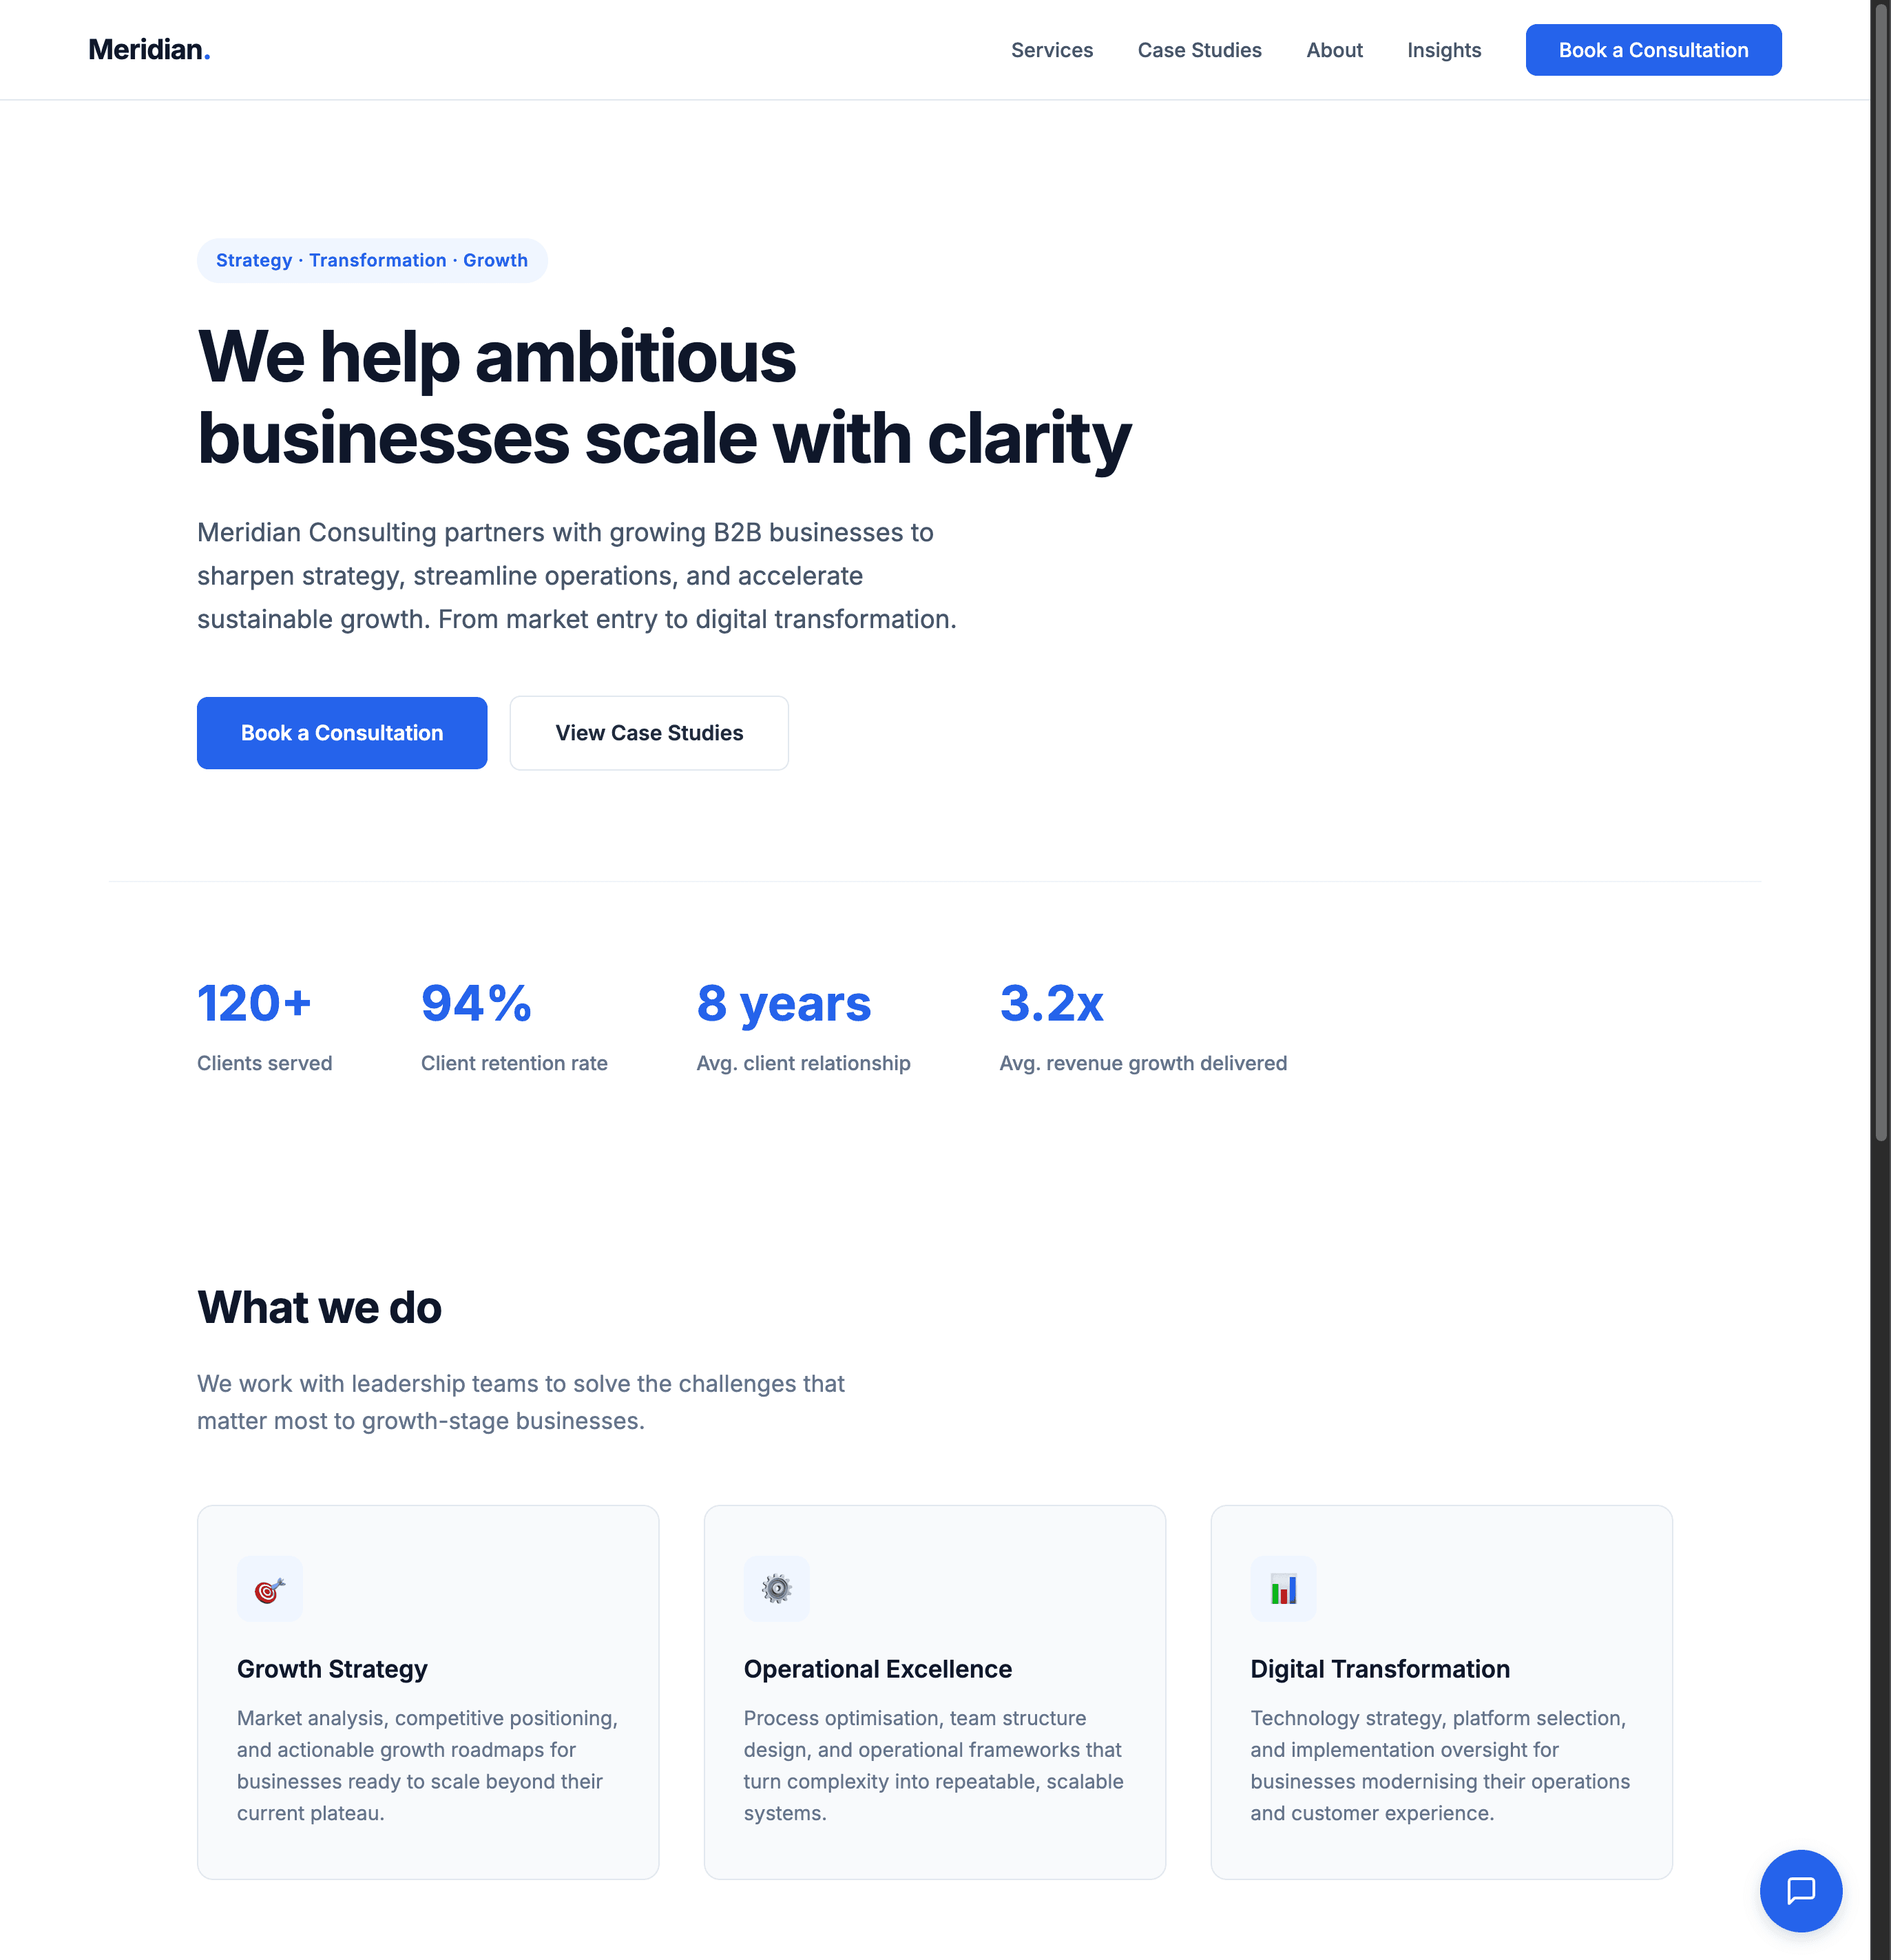
The launcher is the dark-blue bubble in the bottom-right. The page content above is the demo site itself — exactly the page from https://breezee-ai.github.io/demo-website/. The widget is rendered in an iframe that's positioned over the page; it can be open or minimised but doesn't otherwise interfere with the host site.
Opening the widget
Click the launcher. The widget expands into a panel with the chat title, the greeting, the suggested-question chips, the privacy notice banner, and the chat composer.
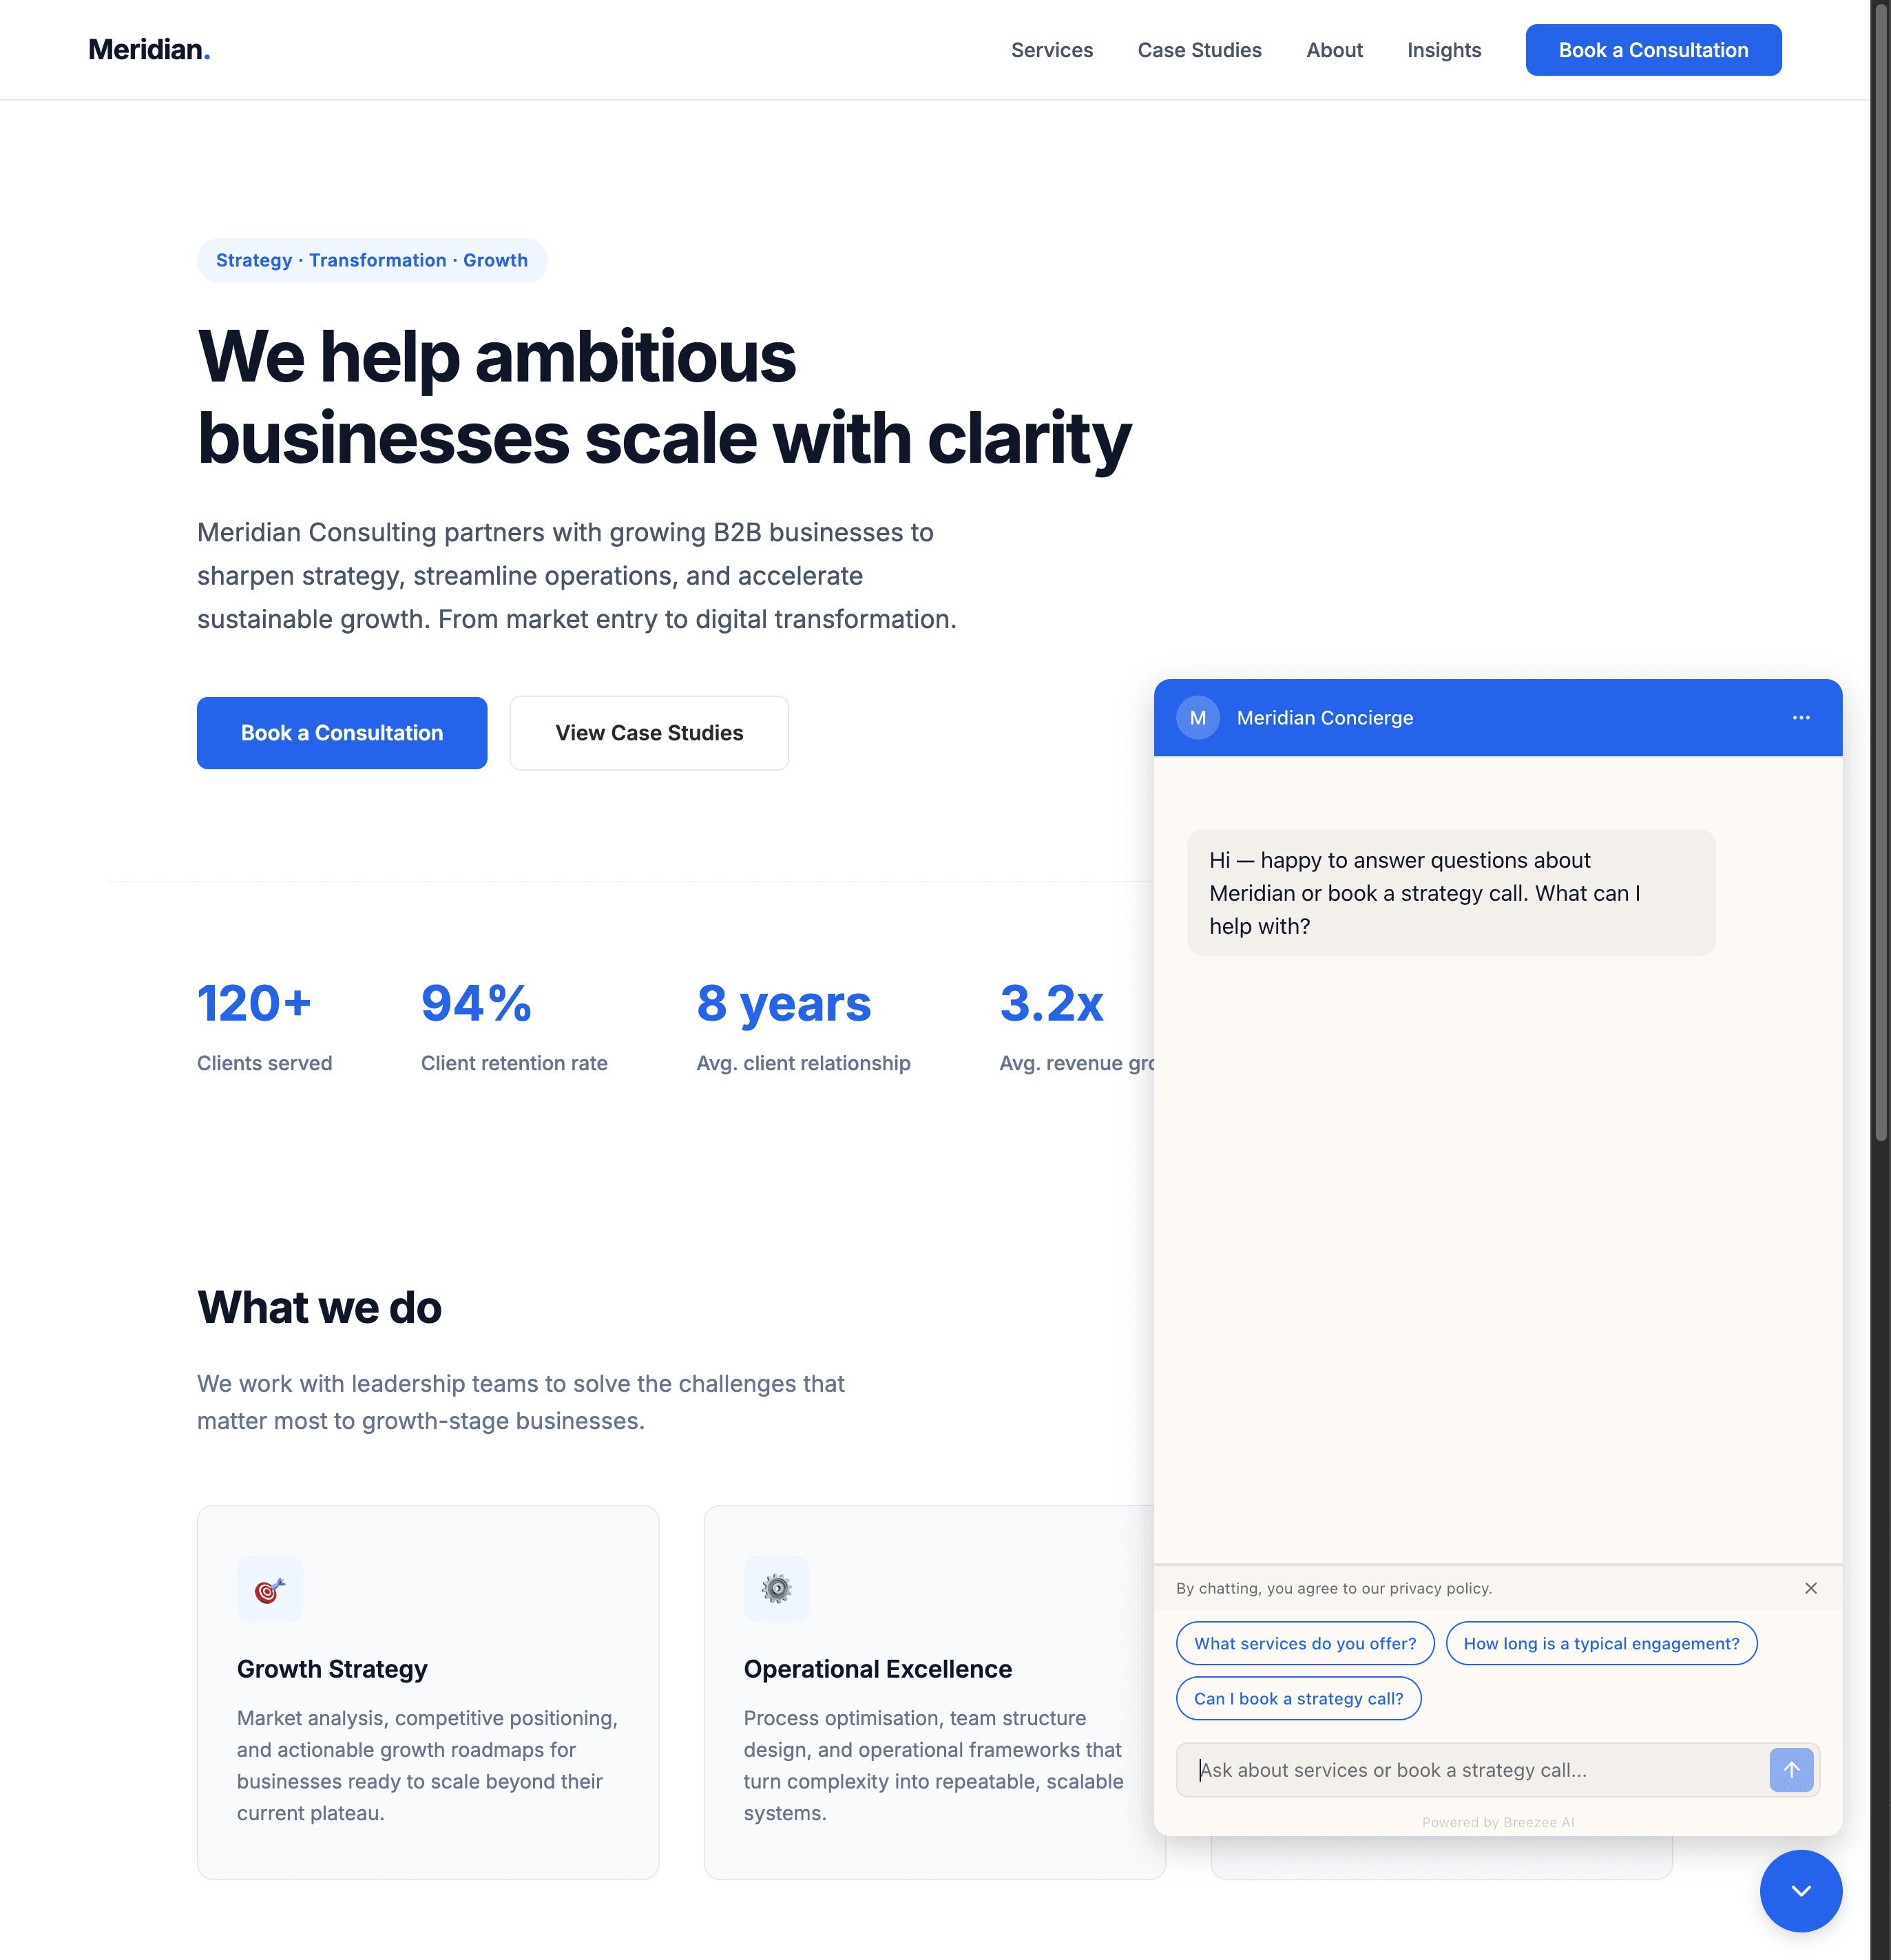
Notice three things:
- The header is dark blue — the Use primary color for header toggle from the Style step is in effect.
- The Chat Title matches what was typed in the Content step.
- A privacy notice sits just above the composer — the platform's default text, dismissible by the visitor.
Sending a message
Pick a suggested question — for this run, What services do you offer? — or type freely. The agent responds:
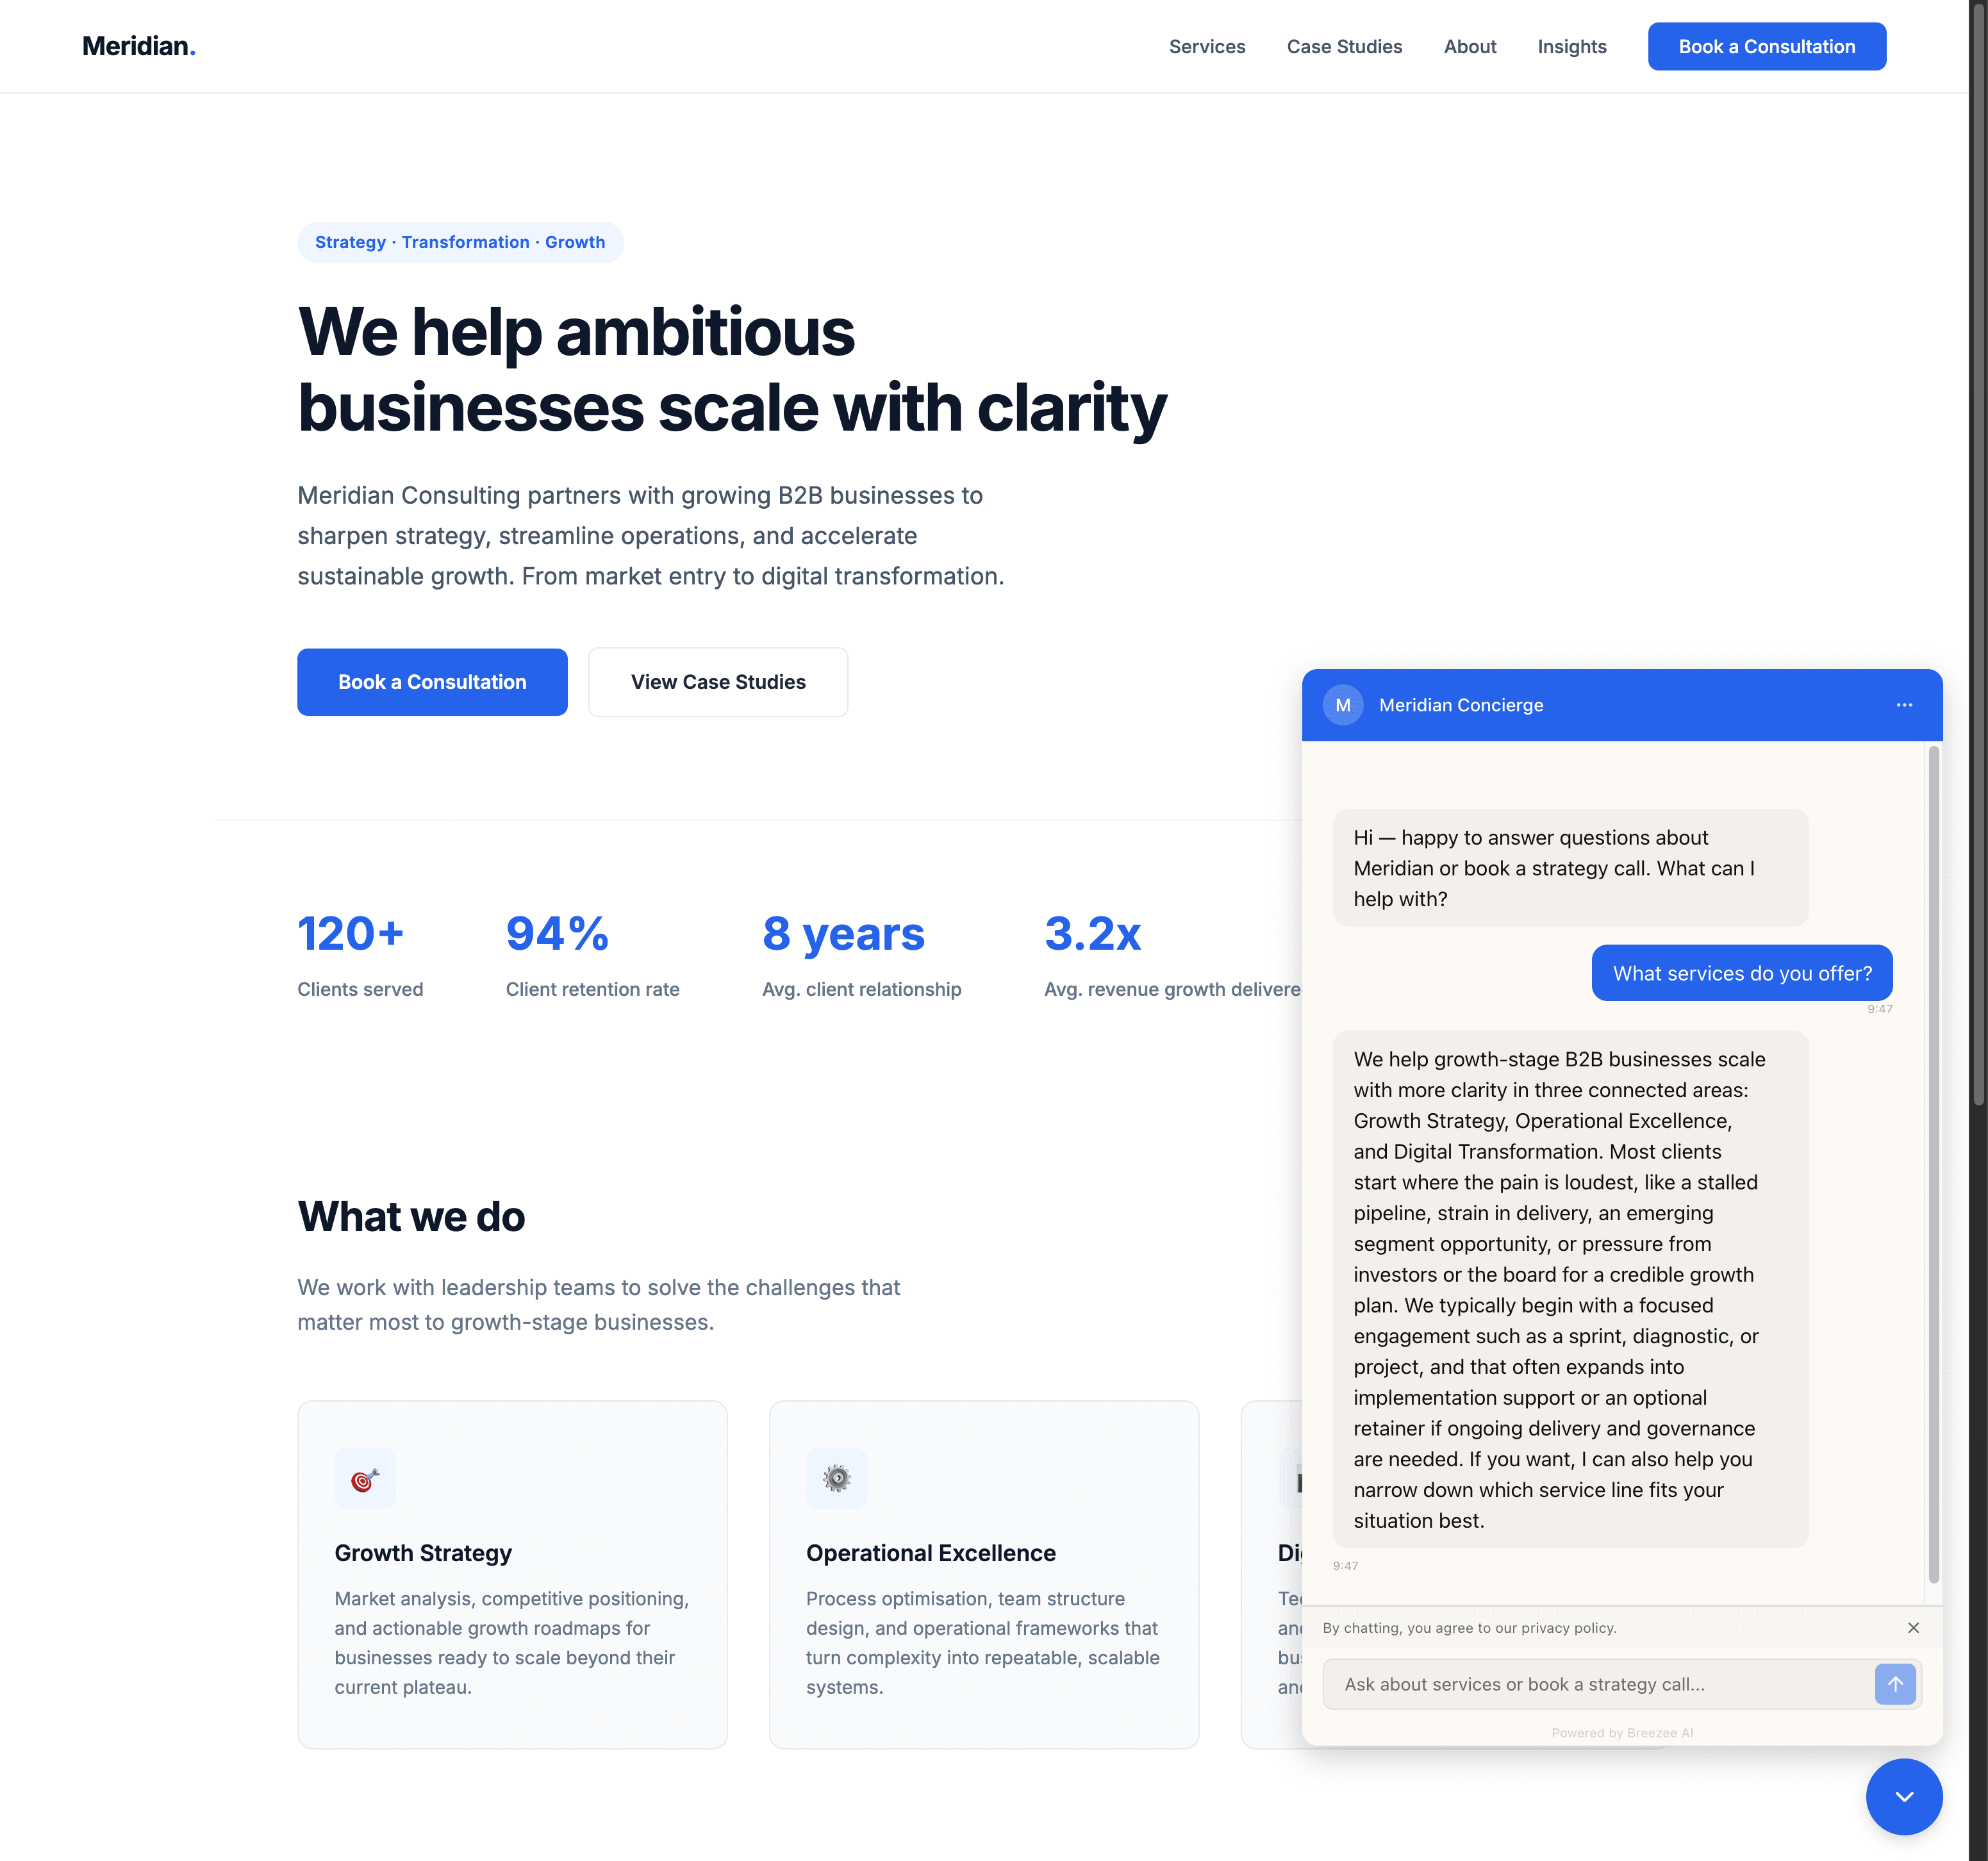
The reply draws on the content uploaded in Ingesting knowledge, summarises it, and offers to narrow further. The visitor experience is identical to the playground — the only difference is they're on your customer's website rather than your dashboard.
What's coming through the widget's GDPR flow
The widget's GDPR consent flow works the same way as in the playground:
- The privacy notice is shown by default and can be dismissed.
- After four messages, or immediately after a personal-data-bearing event (booking, contact form), the widget surfaces the "Remember me" prompt.
- The visitor accepts or declines per session.
- A Manage data menu is always reachable from the widget's menu icon (the three dots in the chat header); from there the visitor can review what's stored about them and request erasure.
The deployment doesn't have separate GDPR configuration — the behaviour is baked into the widget runtime and respects the per-visitor consent state in their browser's localStorage. If a visitor declines on one session and returns later, they're still declined until they actively change that.
Multiple deployments per agent
A single agent can power multiple deployments. Common reasons:
- Multi-brand. The same agent backs a primary brand site and an acquired sub-brand site, each with its own colours and copy.
- Multi-region. Different opening messages and suggested questions per locale.
- Staging vs. production. The same agent in two environments, with the staging deployment locked to a
staging.example.comdomain. - A/B testing. Two deployments of the same agent with subtly different greetings, embedded on different traffic slices.
Each deployment carries its own embed snippet, allowed domains, and content/style — but inherits the agent's skills, routing, and content. Changes to the agent propagate to all of its deployments instantly.
What's next
The widget is live and answering questions. From here on the manual covers what happens because the widget is live — prospects, analytics, and integrations.