Configuring skills
Skills are the agent's repertoire — the kinds of conversation it knows how to have. Out of the box your agent comes with the full sAIlsbot skill catalogue pre-attached. Skills that work without per-tenant setup ship enabled; skills that need configuration first ship disabled so the agent never reaches for something it can't deliver. In this chapter you'll:
- Tour the skills list, disable any that don't fit, and enable the ones you'll configure
- Configure the Qualify Prospect skill end-to-end, including how it consumes the memory types you set up in Memory types & prospect profiles
- Configure Book Meeting with a Cal.com booking link, then enable it
- Configure Contact Request with custom form copy
No standalone Actions UI. Earlier versions of the platform had a separate Actions section. That UI has been removed. The actions a skill needs — display a form, render a button, embed a Cal.com widget, search the knowledge base — are now auto-instantiated as part of skill configuration. This chapter touches them where they appear inline under each skill; there's nothing else to configure separately.
The skills list
Open the agent settings (left-hand rail → Agents → click the agent), then click Skills in the agent-settings sub-sidebar.
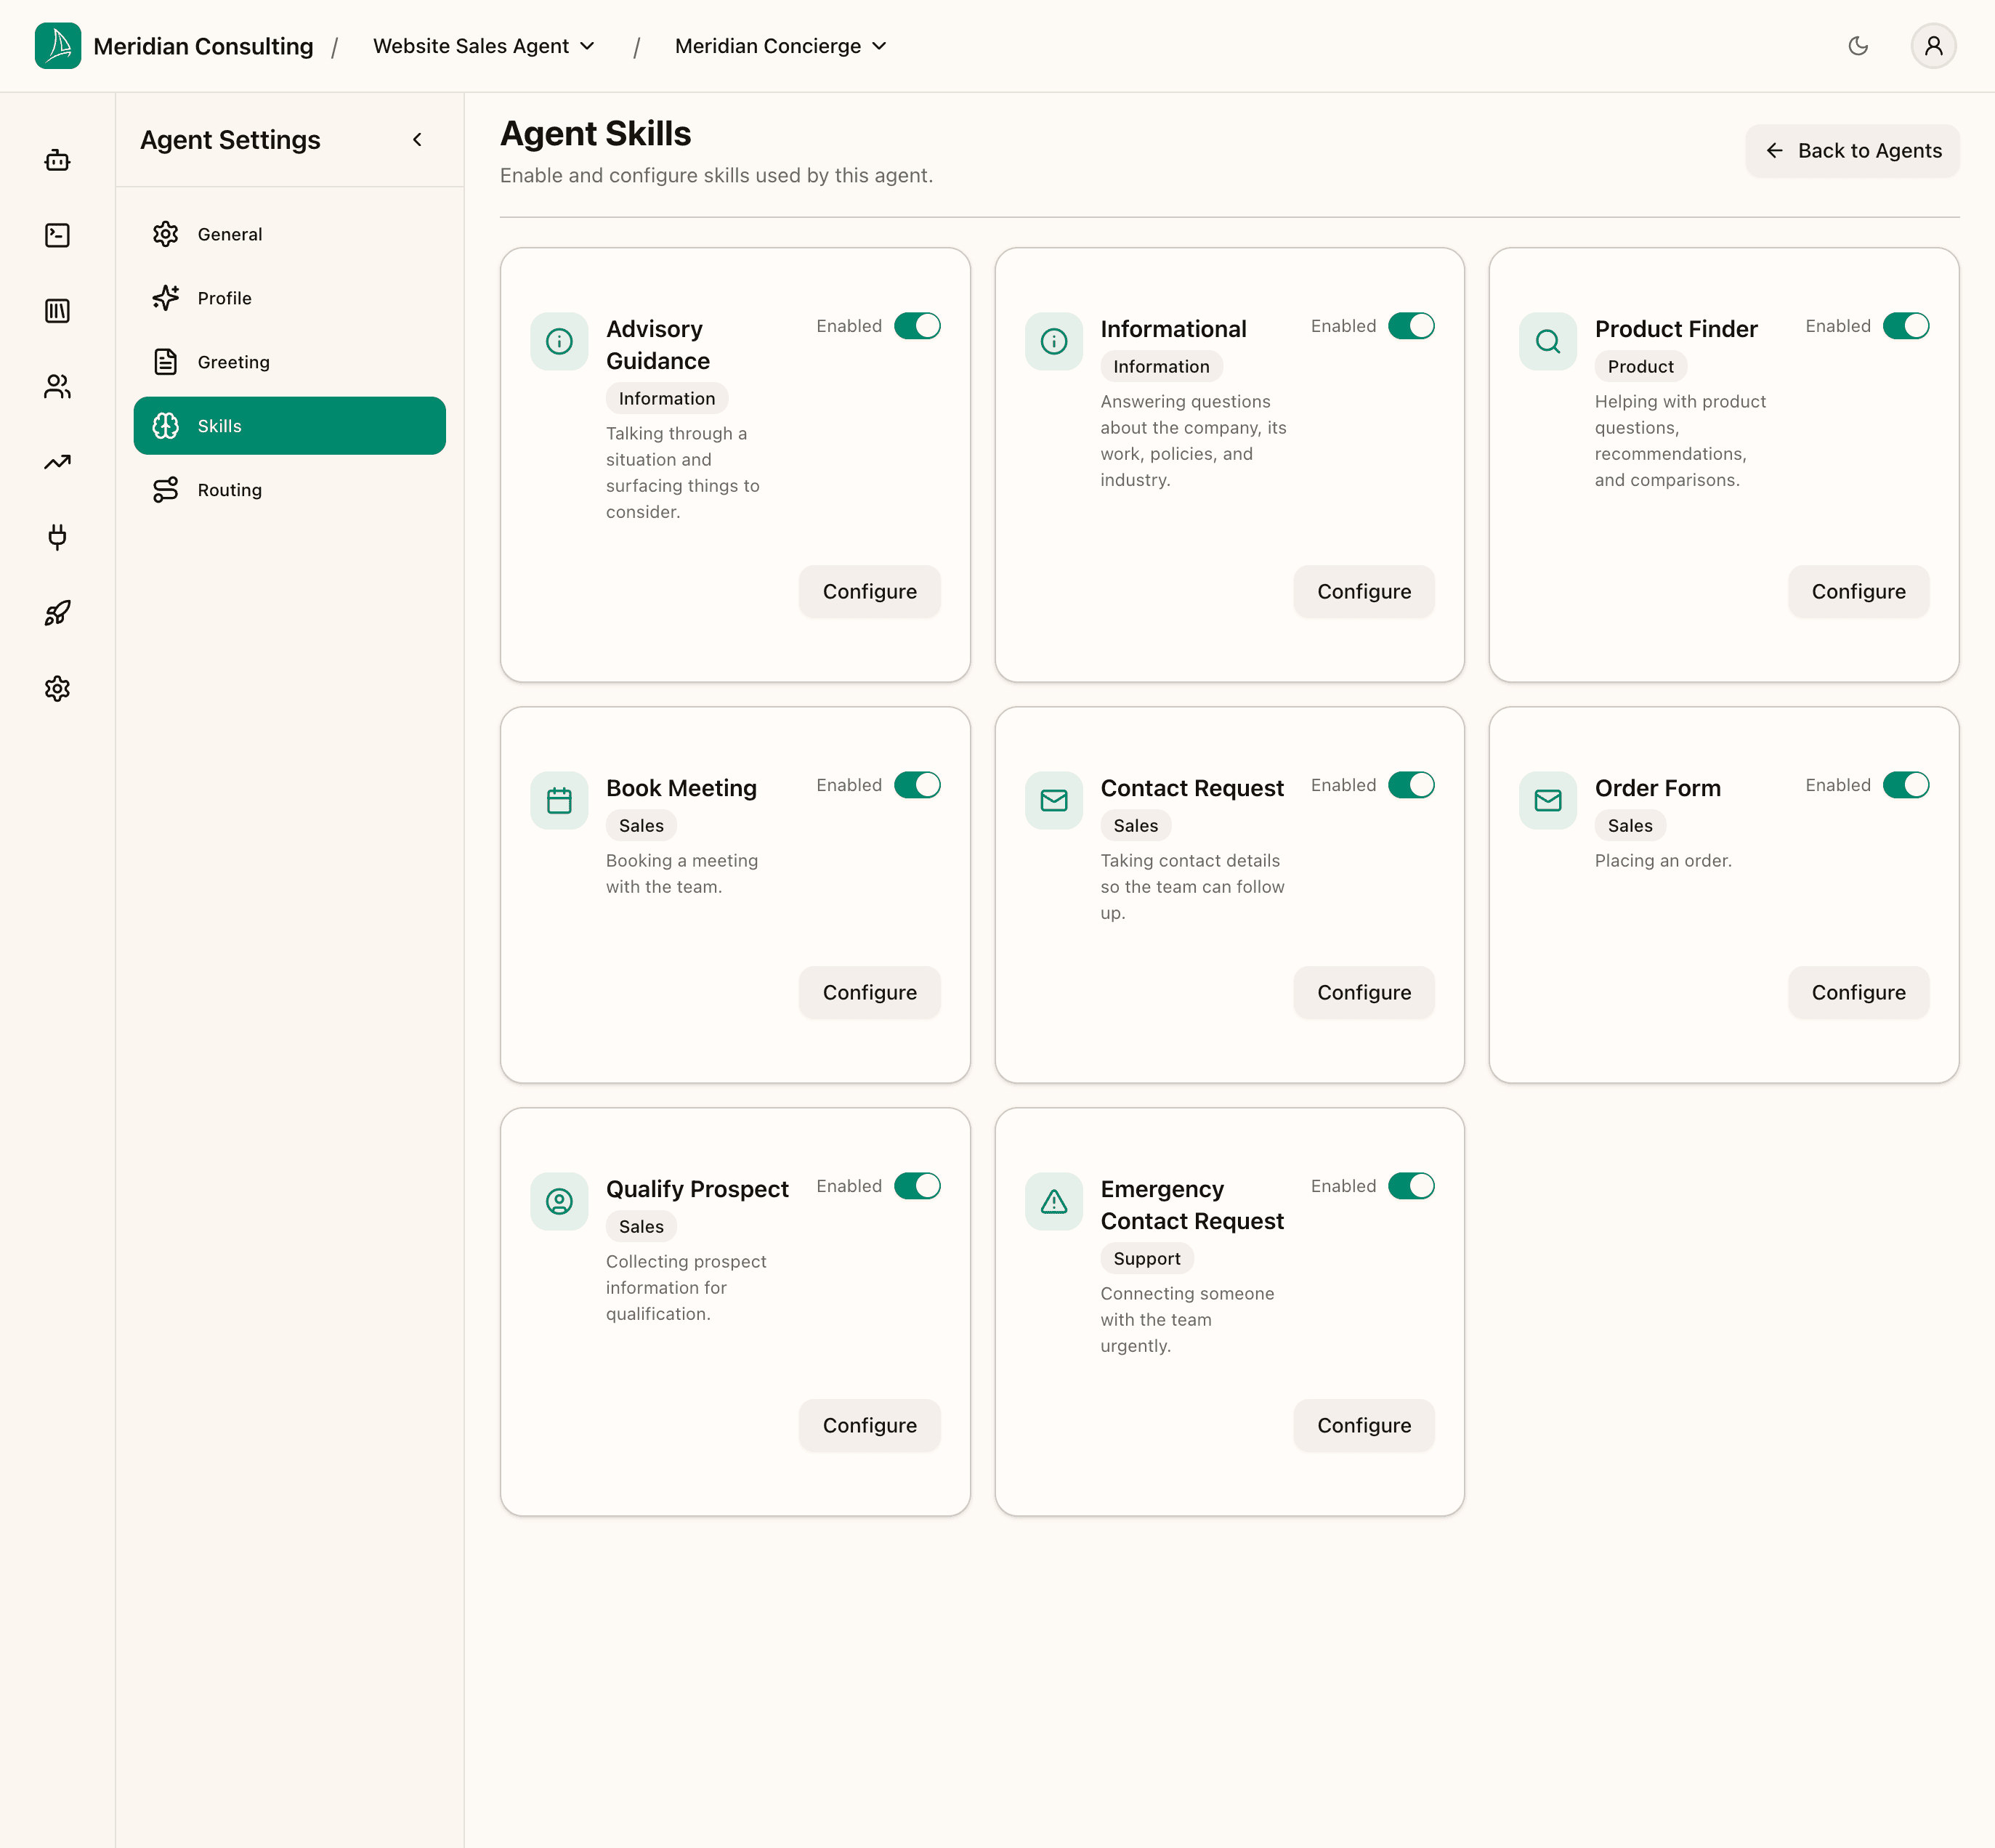
A new sAIlsbot agent ships with eight skills pre-attached. Four are enabled by default; four ship disabled because they need configuration before they can run:
| Skill | Category | Default | What it does |
|---|---|---|---|
| Advisory Guidance | Information | Enabled | Talks the visitor through a situation and surfaces things to consider. |
| Informational | Information | Enabled | Answers questions about the company, services, policies, industry. |
| Product Finder | Product | Disabled | Helps with product questions, recommendations, comparisons. |
| Book Meeting | Sales | Disabled | Books a meeting with the team via Cal.com. |
| Contact Request | Sales | Enabled | Takes contact details so the team can follow up. |
| Order Form | Sales | Disabled | Places an order. |
| Qualify Prospect | Sales | Enabled | Collects prospect information for qualification. |
| Emergency Contact Request | Support | Disabled | Connects someone with the team urgently. |
Each skill card shows its category, description, an enabled/disabled toggle, and a Configure button.
Deciding which skills to use
Before you configure anything, decide which skills are actually relevant. Leaving an unused skill enabled doesn't break anything, but it gives the planner more options to consider and dilutes the agent's focus.
The four enabled-by-default skills — Advisory Guidance, Informational, Contact Request, Qualify Prospect — work without per-tenant configuration and fit most tenants. Disable any that genuinely don't apply.
The four disabled-by-default skills need configuration before they can run; the rest of this chapter walks through Book Meeting end-to-end and points at what the others would need. Enable each one only after you've configured it:
- Product Finder suits catalogue-style businesses where visitors choose between concrete products with structured attributes (size, colour, plan tier). Needs product attributes configured (see Ingesting knowledge). Services-led businesses should leave it disabled.
- Book Meeting needs a Cal.com event URL. Configure it below if your team takes meetings off the chat.
- Order Form is for placing an order through the chat. Configure and enable it if you want orders captured inline; otherwise leave it disabled.
- Emergency Contact Request is for urgent inbound support contact. Leave it disabled unless you have a "page someone immediately" use case.
Click the toggle on any skill to enable or disable it.
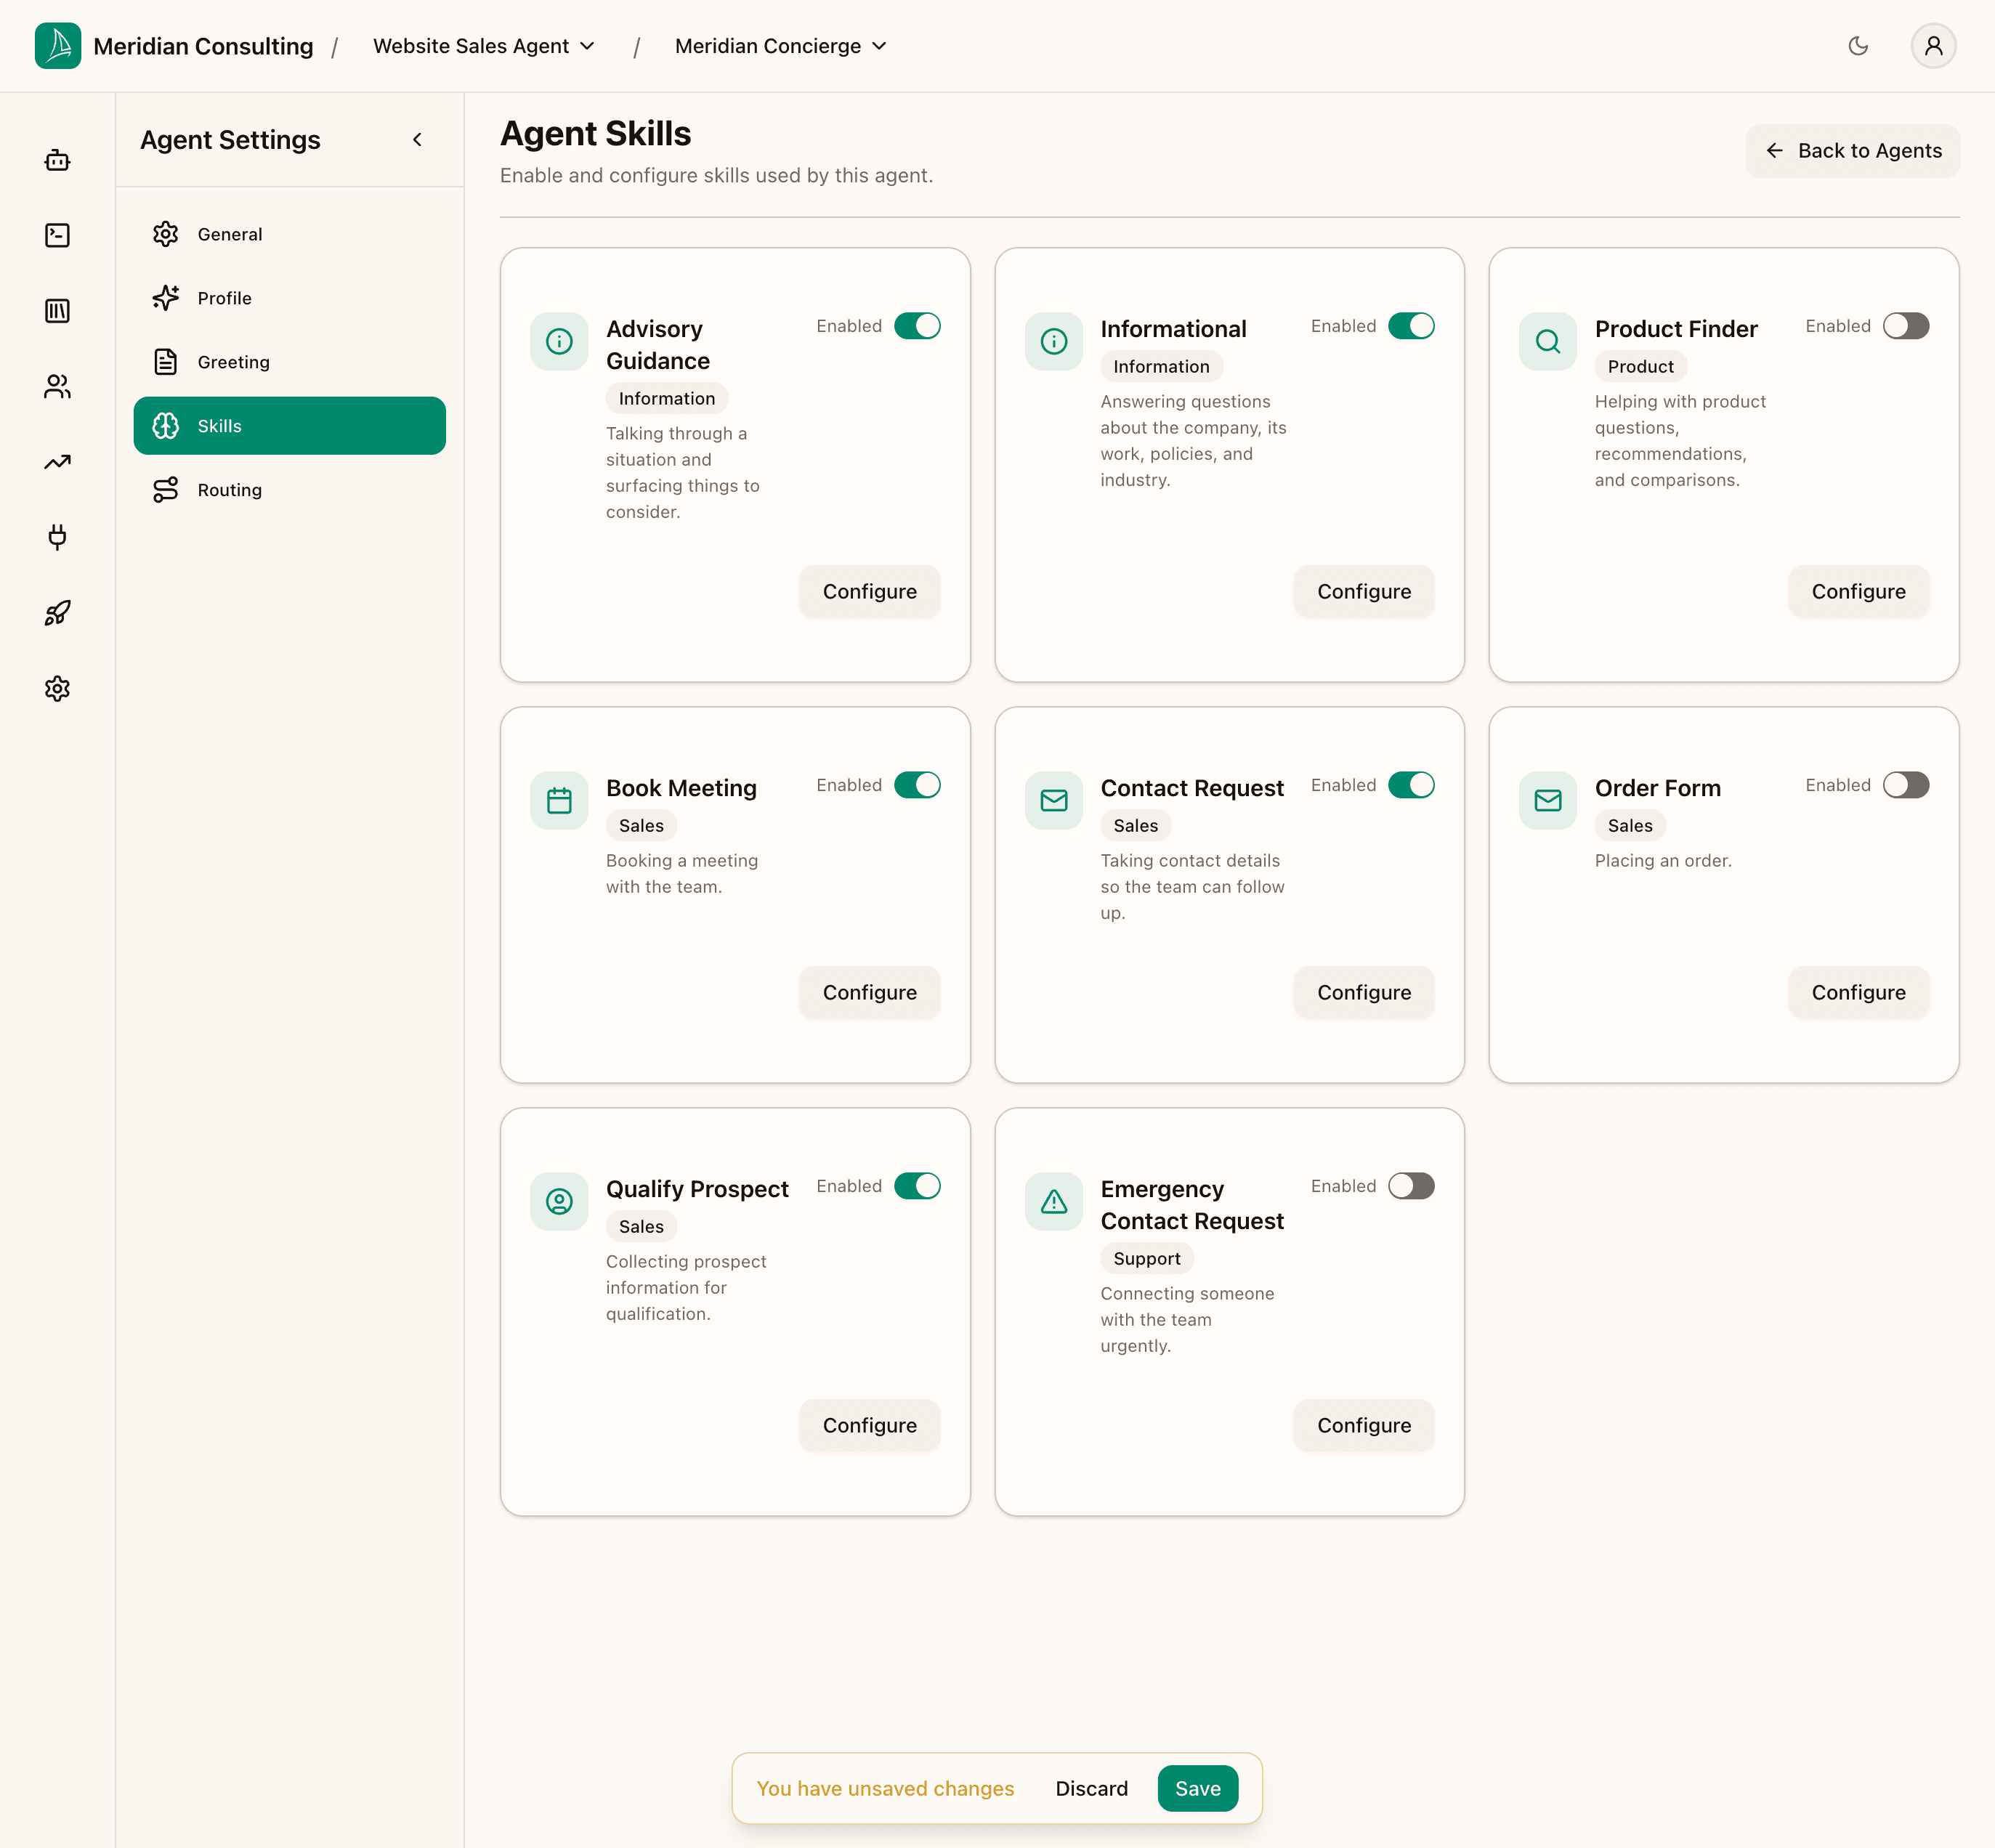
Disabling vs. detaching. Disabling a skill keeps its configuration intact but prevents the agent from using it at runtime. Re-enable any time. There's no separate "remove" — disabled is the off state.
Configuring Qualify Prospect — the memory-consuming skill
Qualify Prospect is the skill that most directly uses what you set up in Memory types & prospect profiles. Click Configure on the Qualify Prospect card.
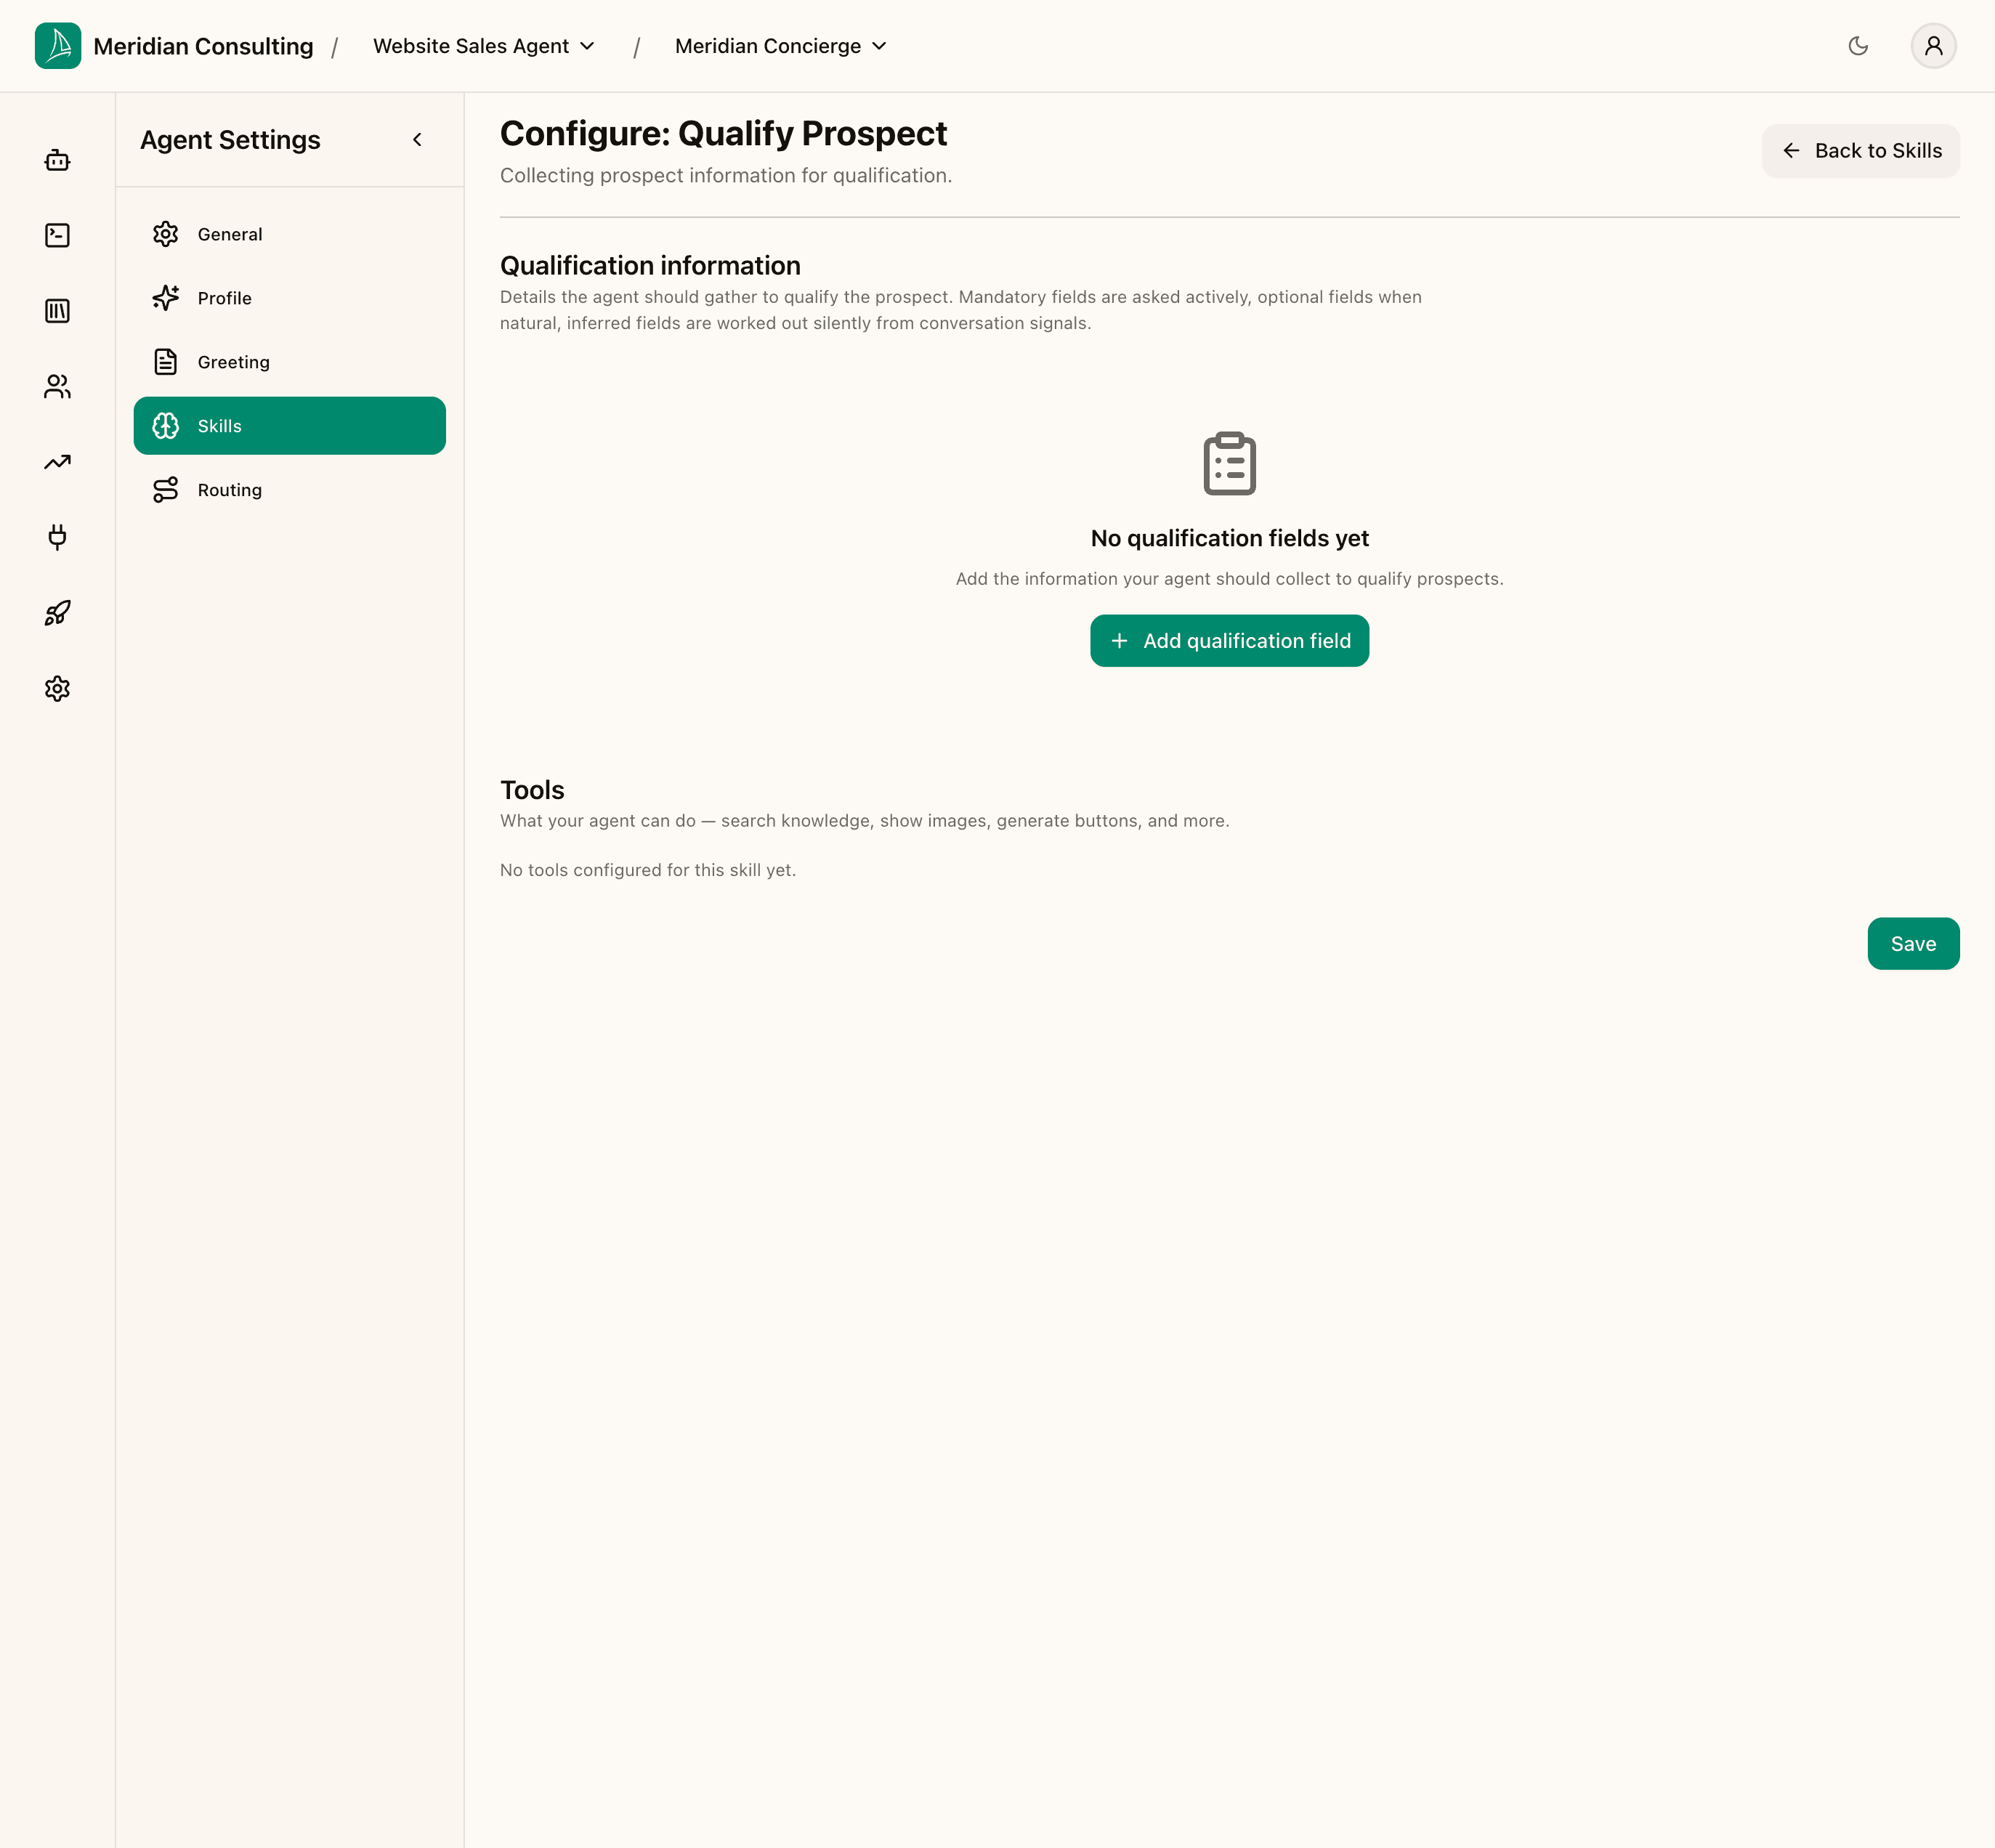
The page has two sections:
- Qualification information — the list of memory types the agent should gather while qualifying.
- Tools — what the agent can do during the qualification flow (currently empty for this skill).
Adding qualification fields
Click Add qualification field. A picker appears with two parts: a memory field dropdown and an Add button.
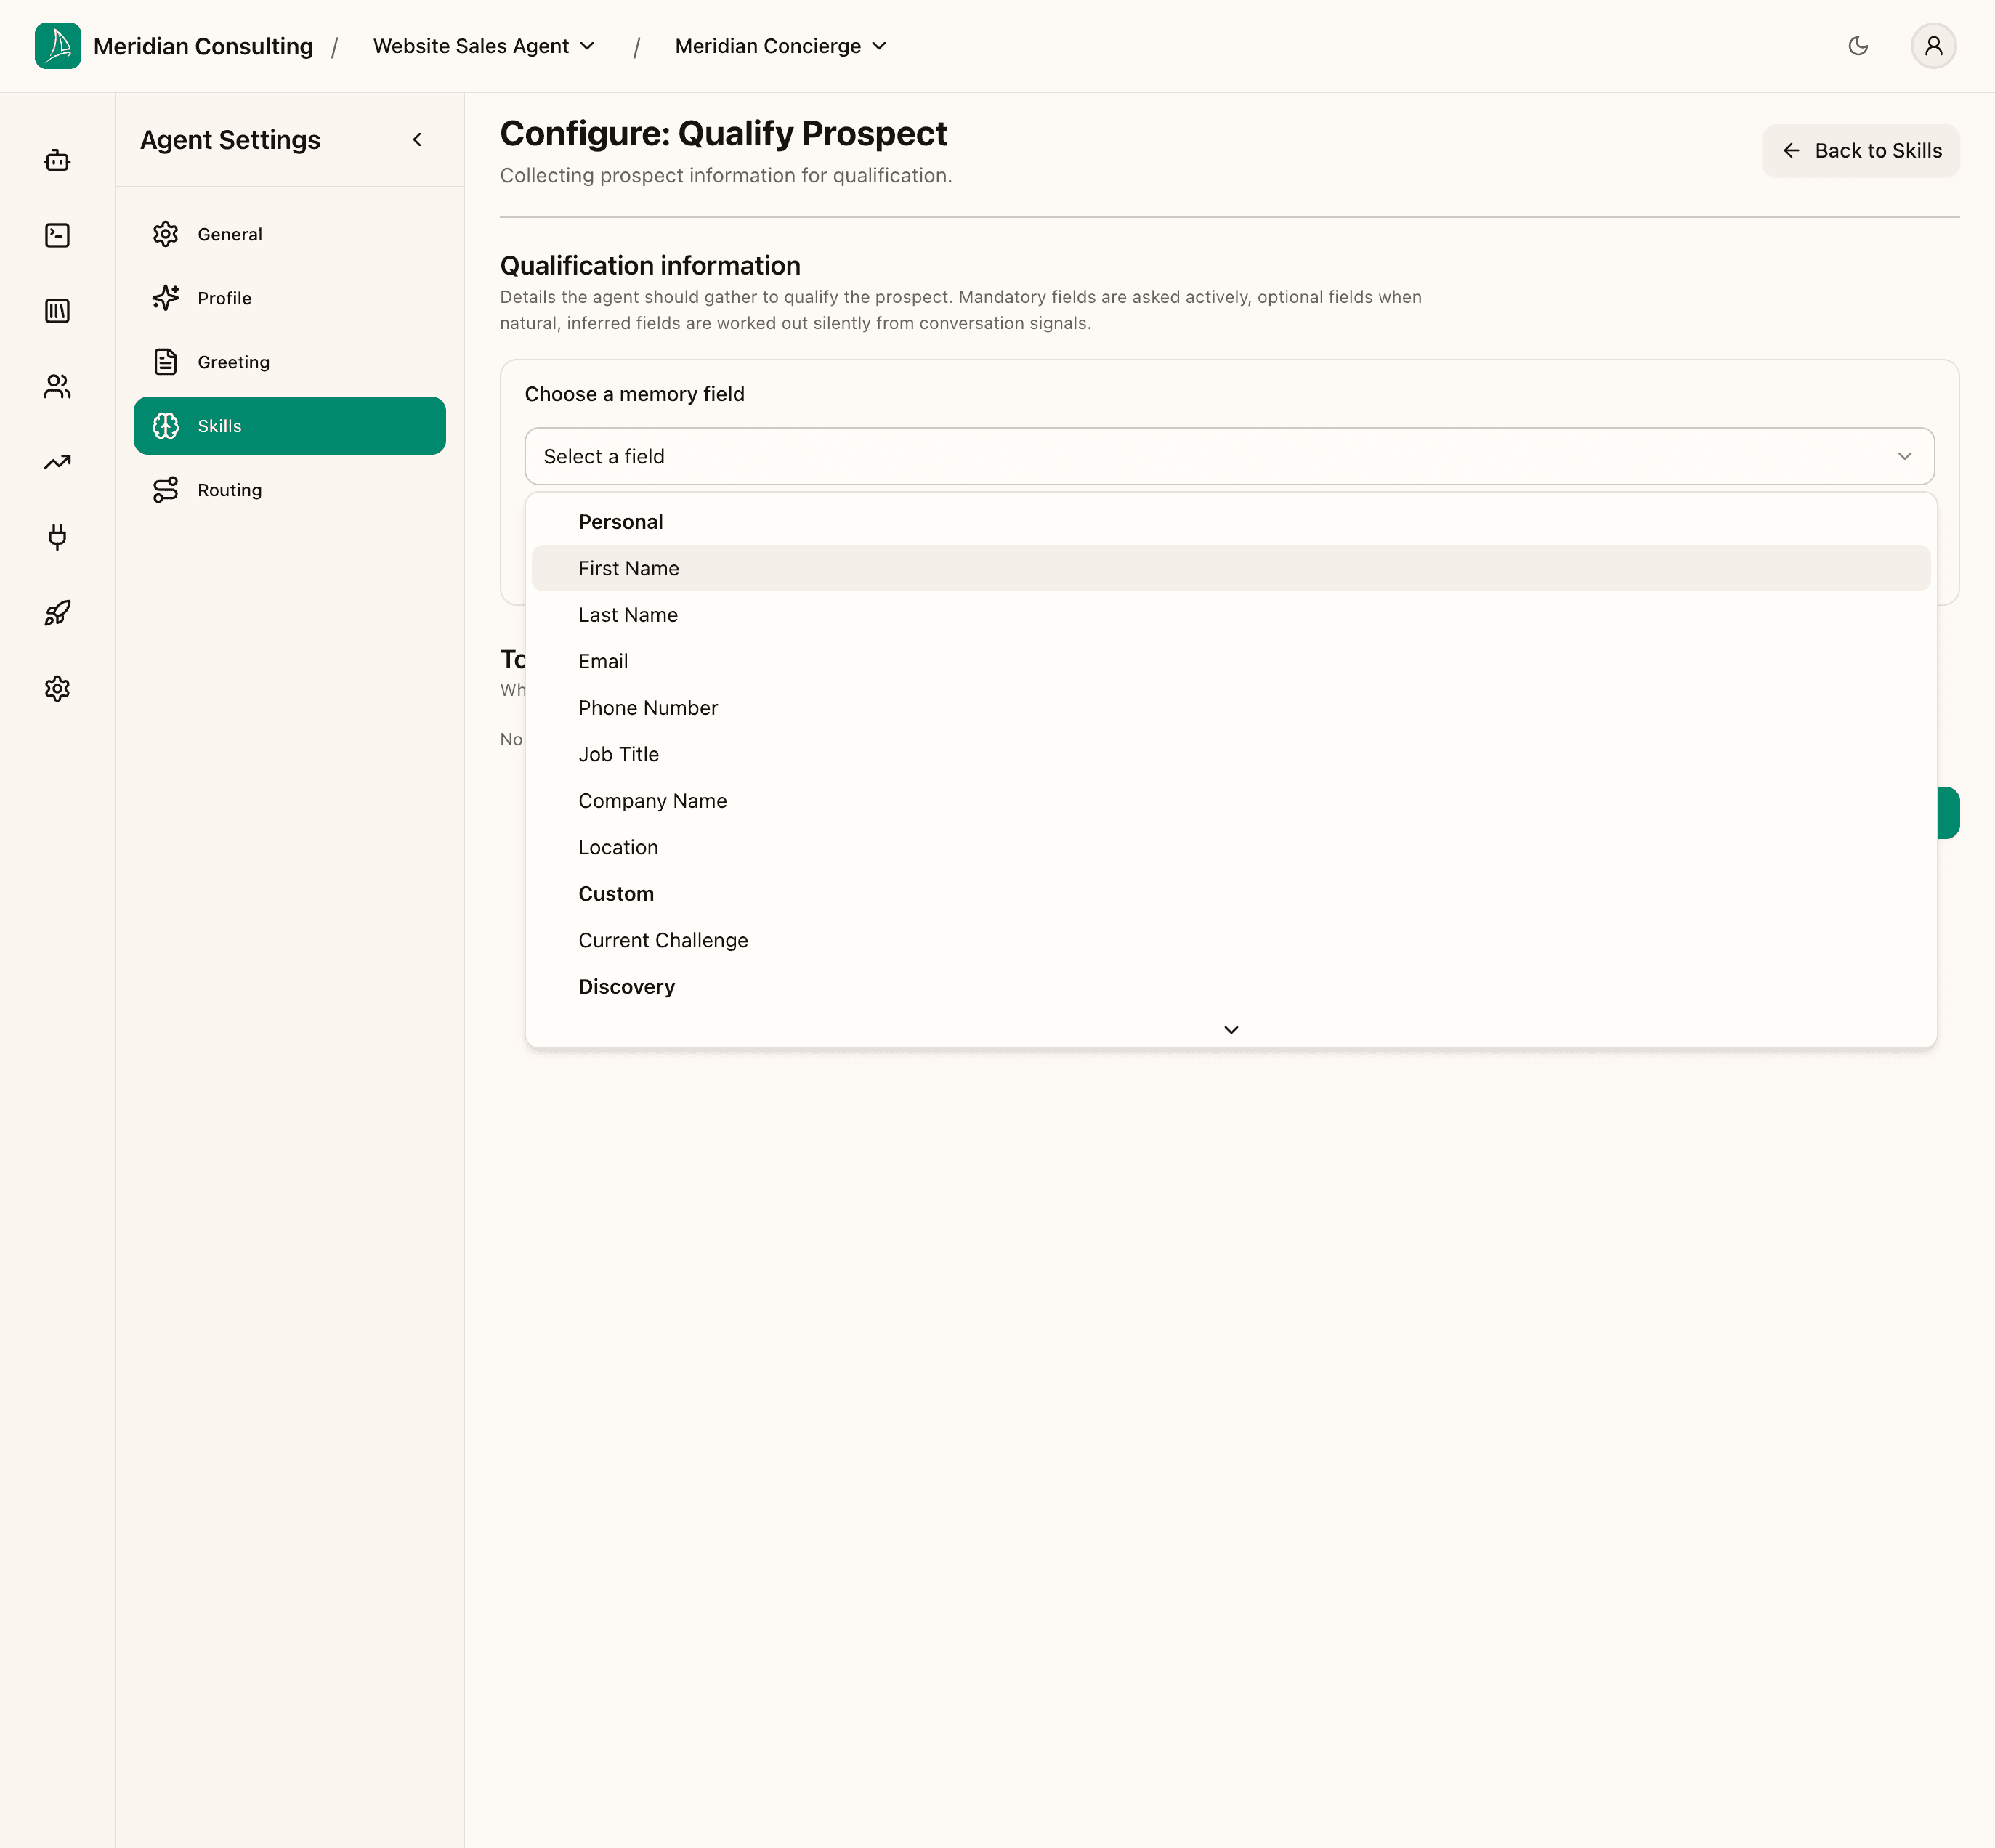
Only enabled memory types show up. The dropdown reads from the memory configuration in Memory types & prospect profiles — if you don't see a memory type you expected, check it's enabled at
/prospects/memory. The page includes a Manage memory types link for that exact round-trip.
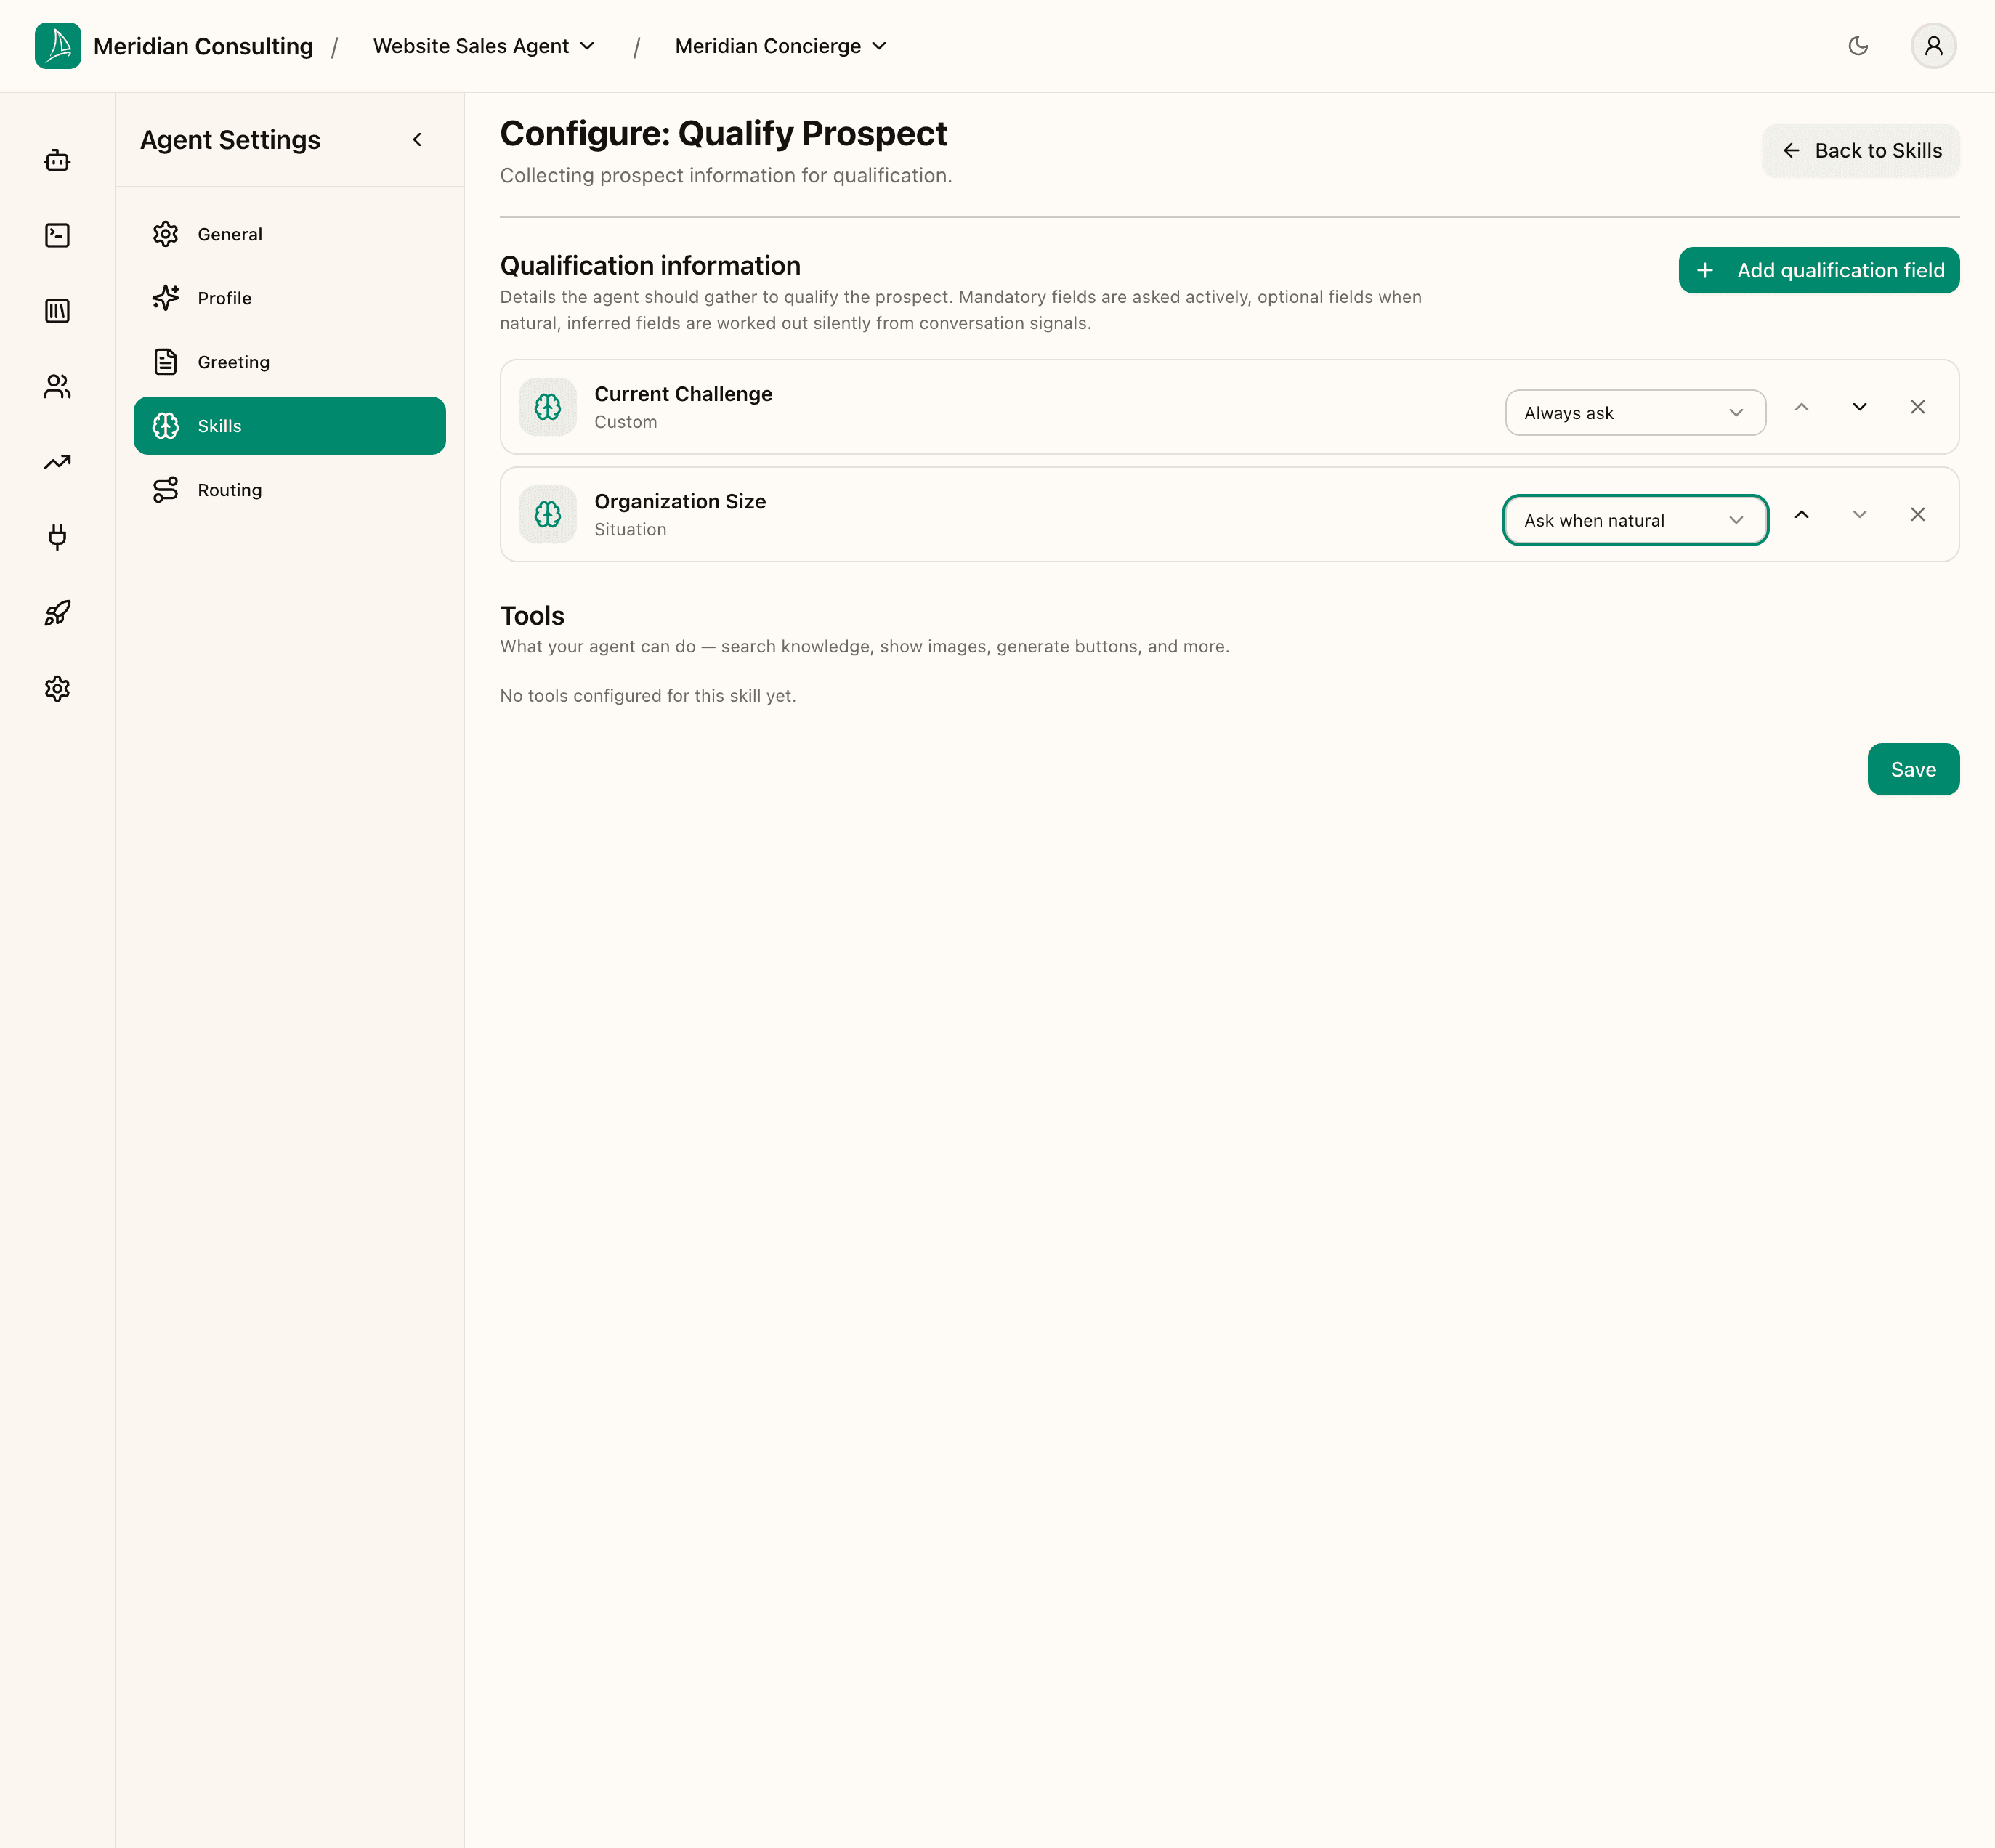
Add the memories that genuinely matter for qualification. The screenshot shows two:
- A custom memory (here, Current Challenge) — the qualifying signal that the visitor has articulated what they're trying to fix.
- Organization Size — a built-in memory that lets you filter against your ideal-customer size range.
After picking each field, the row appears with three controls:
- Mode selector with three options
- Move up / Move down for ordering
- Remove
Field modes — Always ask, Ask when natural, Infer silently
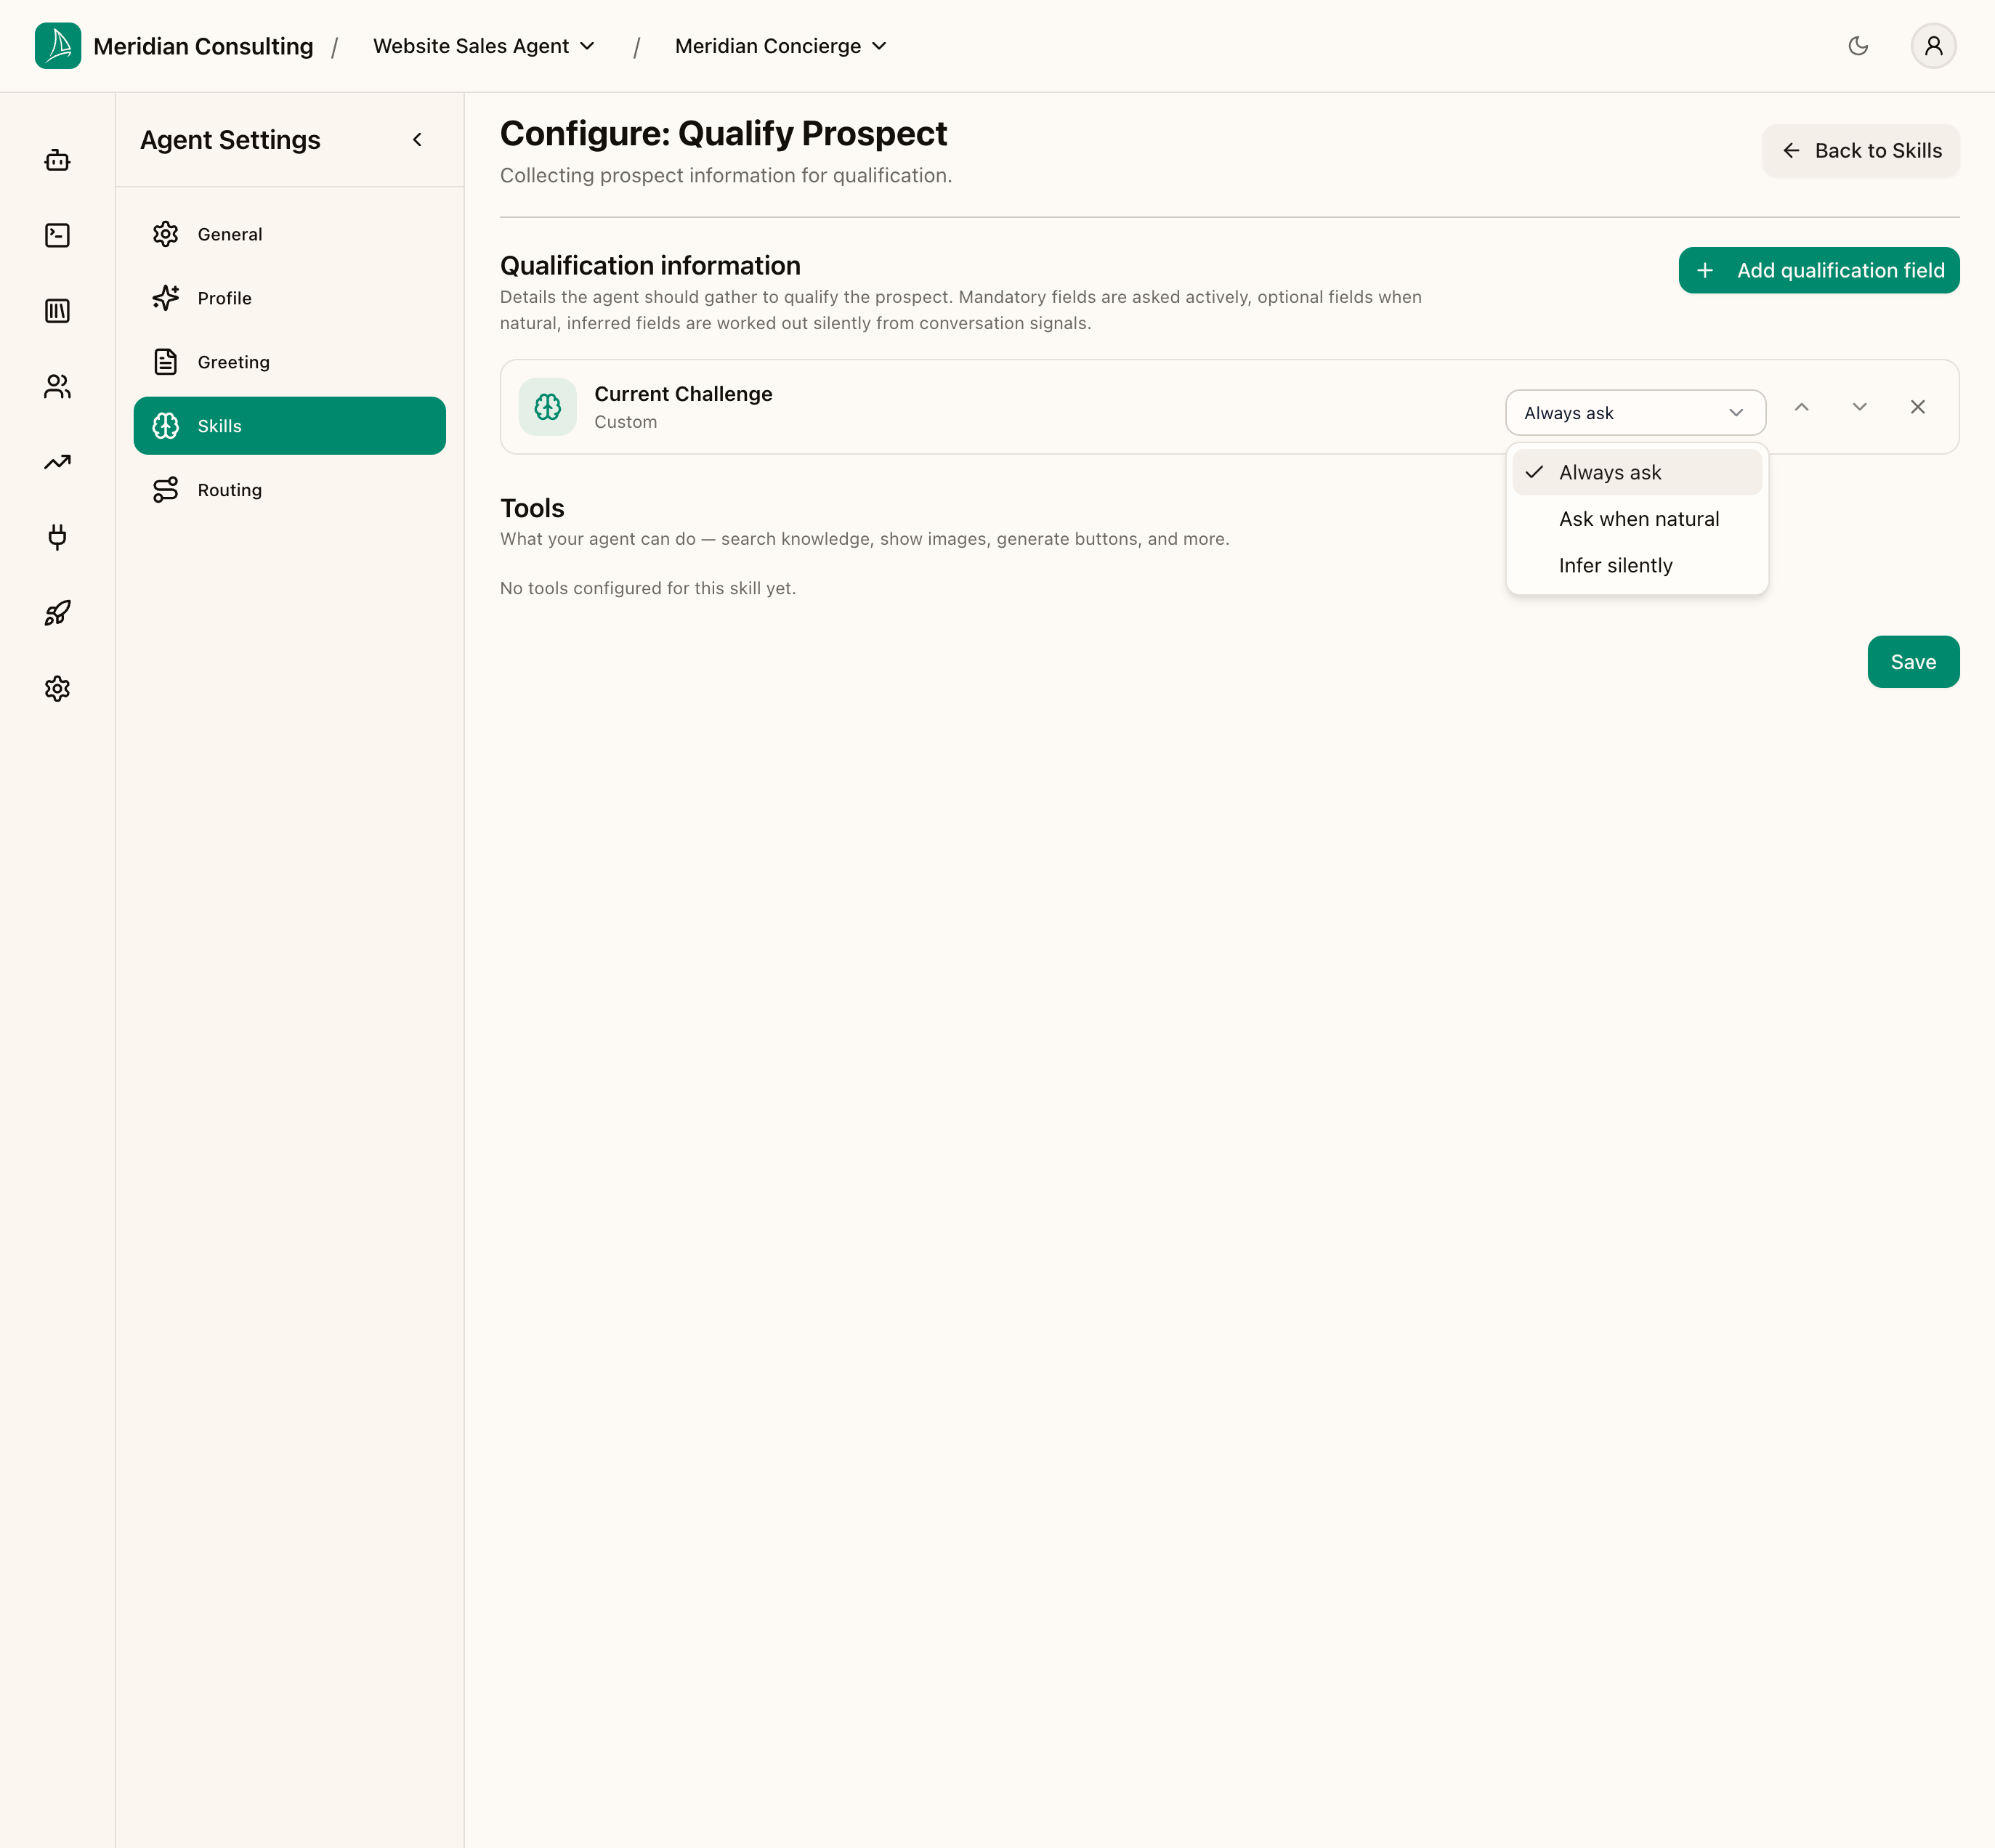
This is the "how forcefully should the agent ask" control. Three modes:
- Always ask — the agent will actively pursue this information, asking direct questions if necessary. Use for the small set of memories that the engagement genuinely depends on knowing.
- Ask when natural — the agent captures the value when it surfaces in conversation organically, but won't push for it. Use for nice-to-have memories that should be opportunistic.
- Infer silently — the agent never asks for the memory but tries to derive it from conversation signals. Use for memories the visitor would find weird to be asked about directly (e.g. inferring
urgencyfrom how often they mention a deadline).
The order matters too: when the agent decides what to ask for next, it works top-down through this list. Move the most important fields up.
A typical mix:
- The one or two memories at the heart of qualification → Always ask
- Nice-to-have context → Ask when natural
- Things that would feel intrusive to be asked about directly → Infer silently
Click Save to commit. The change becomes effective for new conversations immediately.
Two fields — with mode dropdown set

Iterating in production. A reasonable starting point for a B2B consultancy is two or three Always ask fields and four or five Ask when natural ones. Resist the temptation to mark everything Always ask — the agent will become an interrogator and visitors will bounce. Watch real conversations in the playground and on the live widget, then tune the list based on what actually surfaces in conversation.
Configuring Book Meeting — the booking link
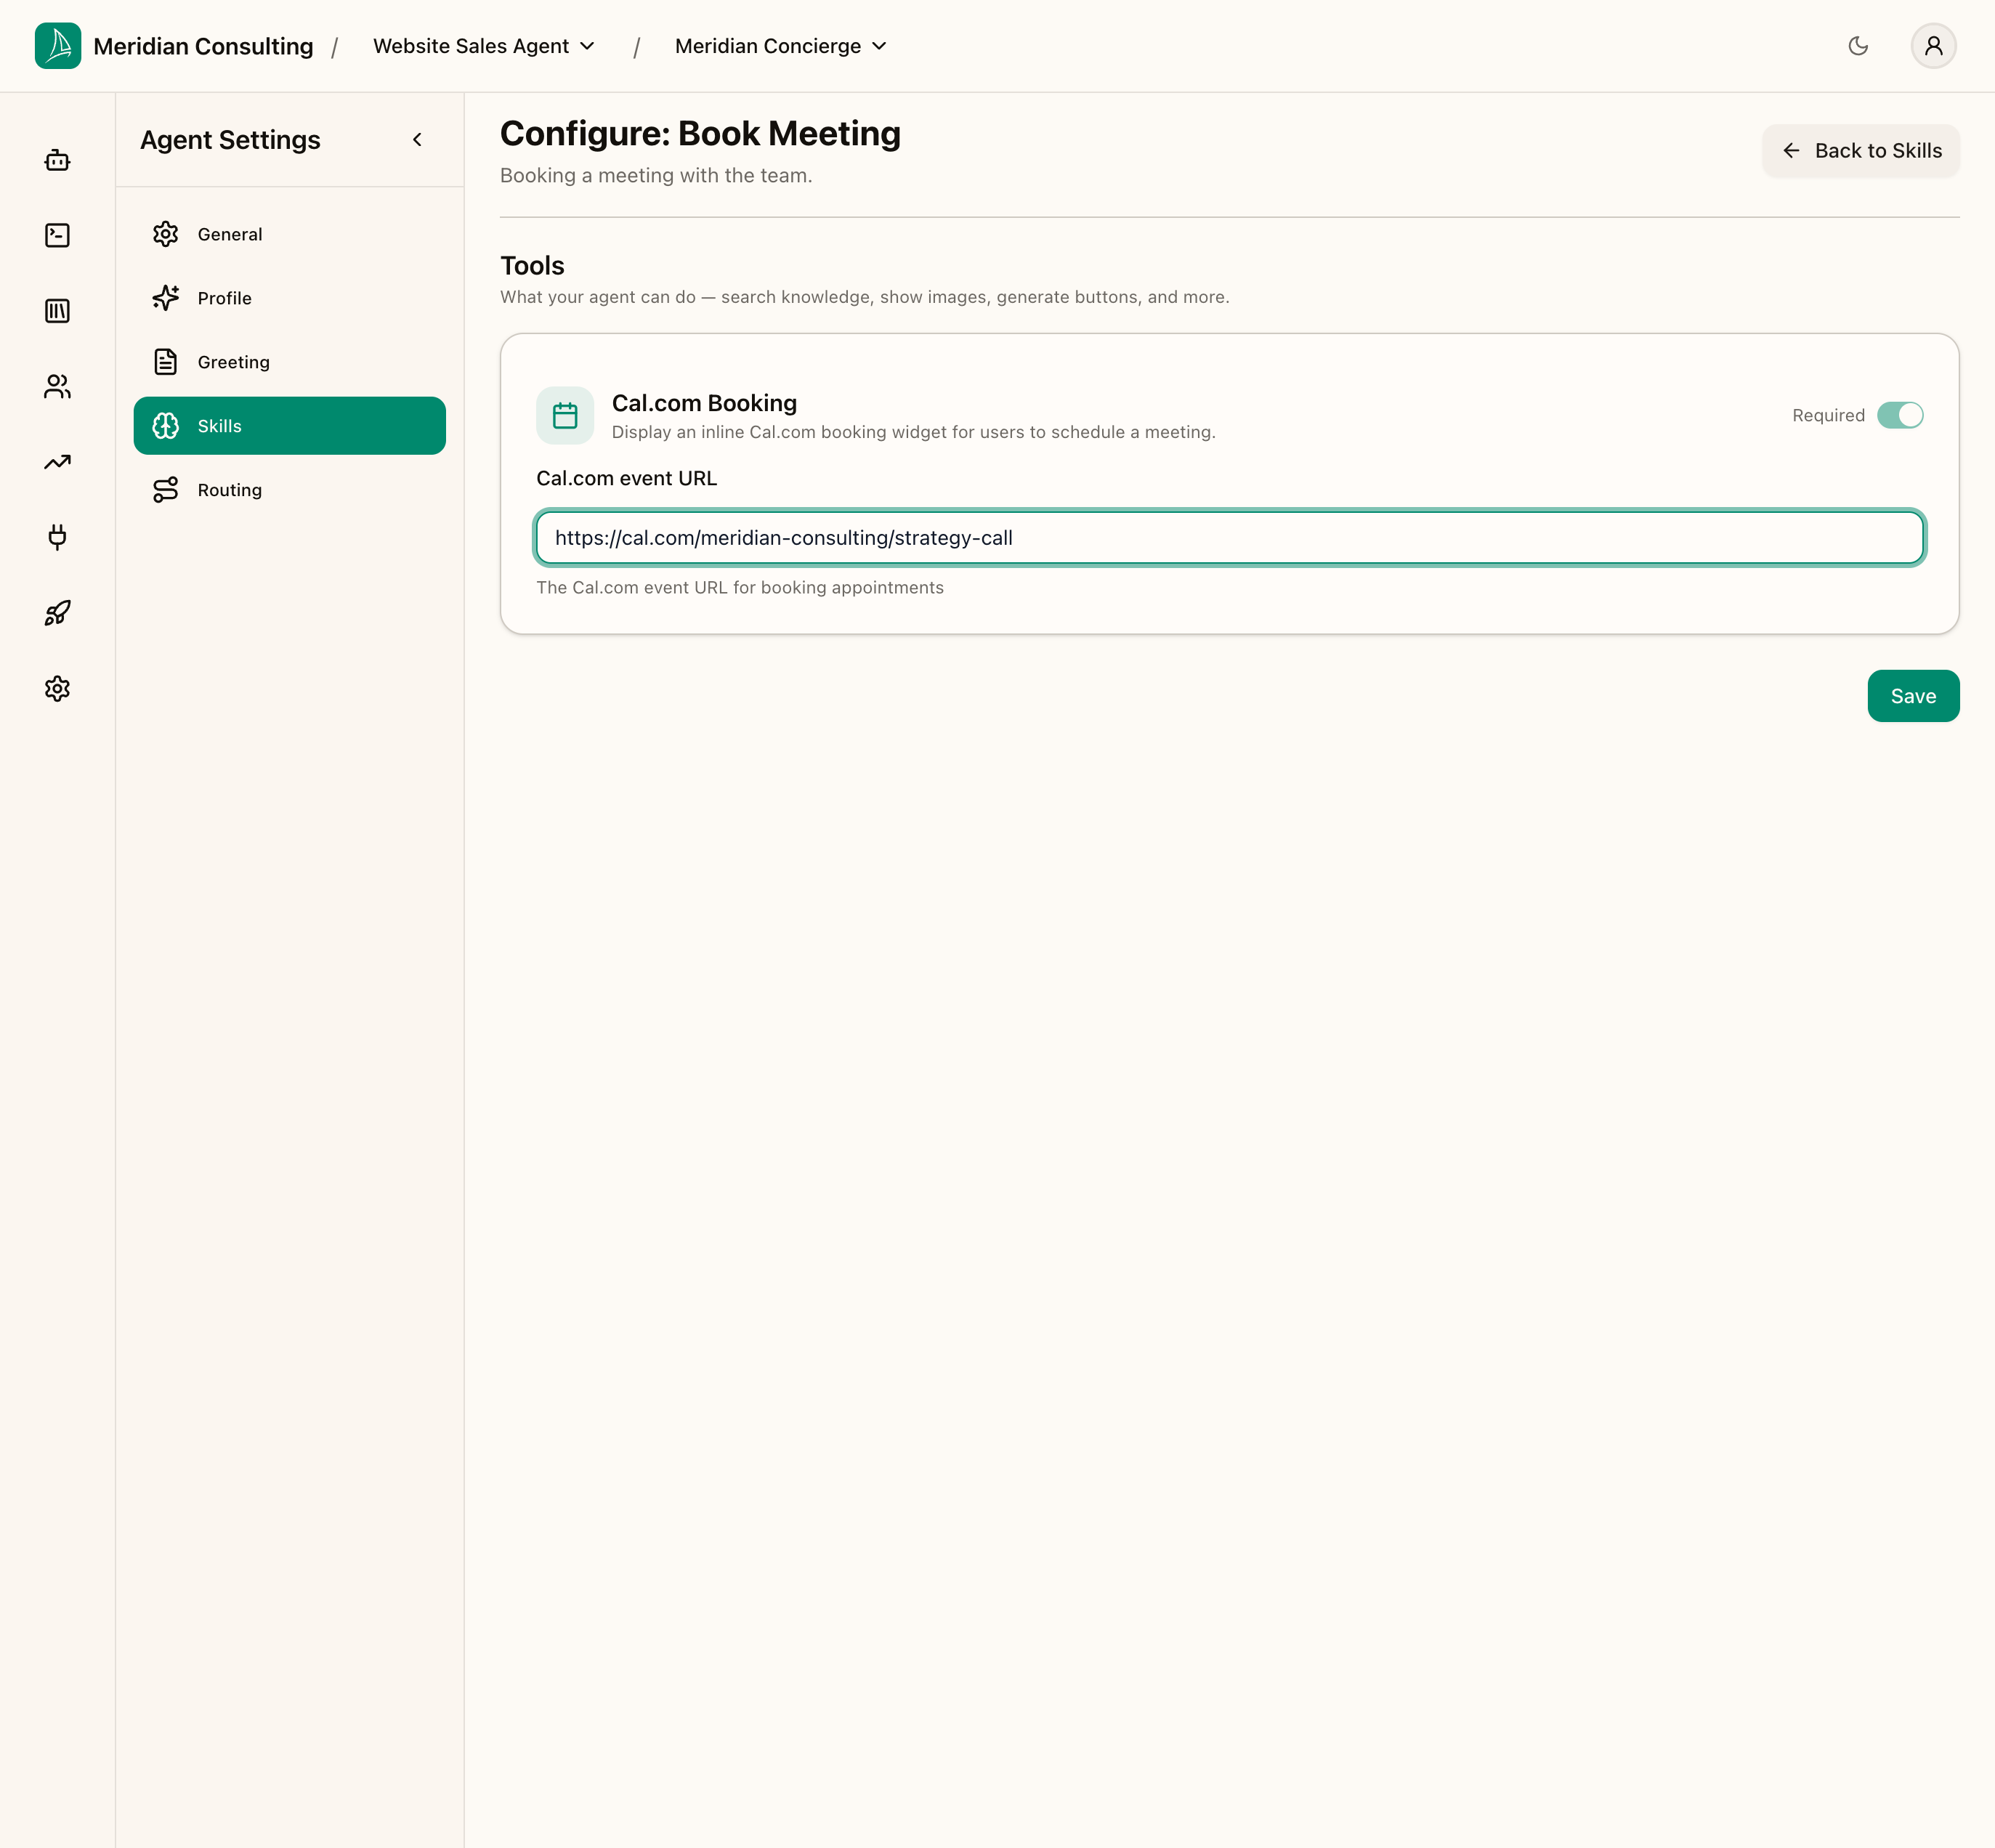
Back on the skills list, click Configure on Book Meeting.
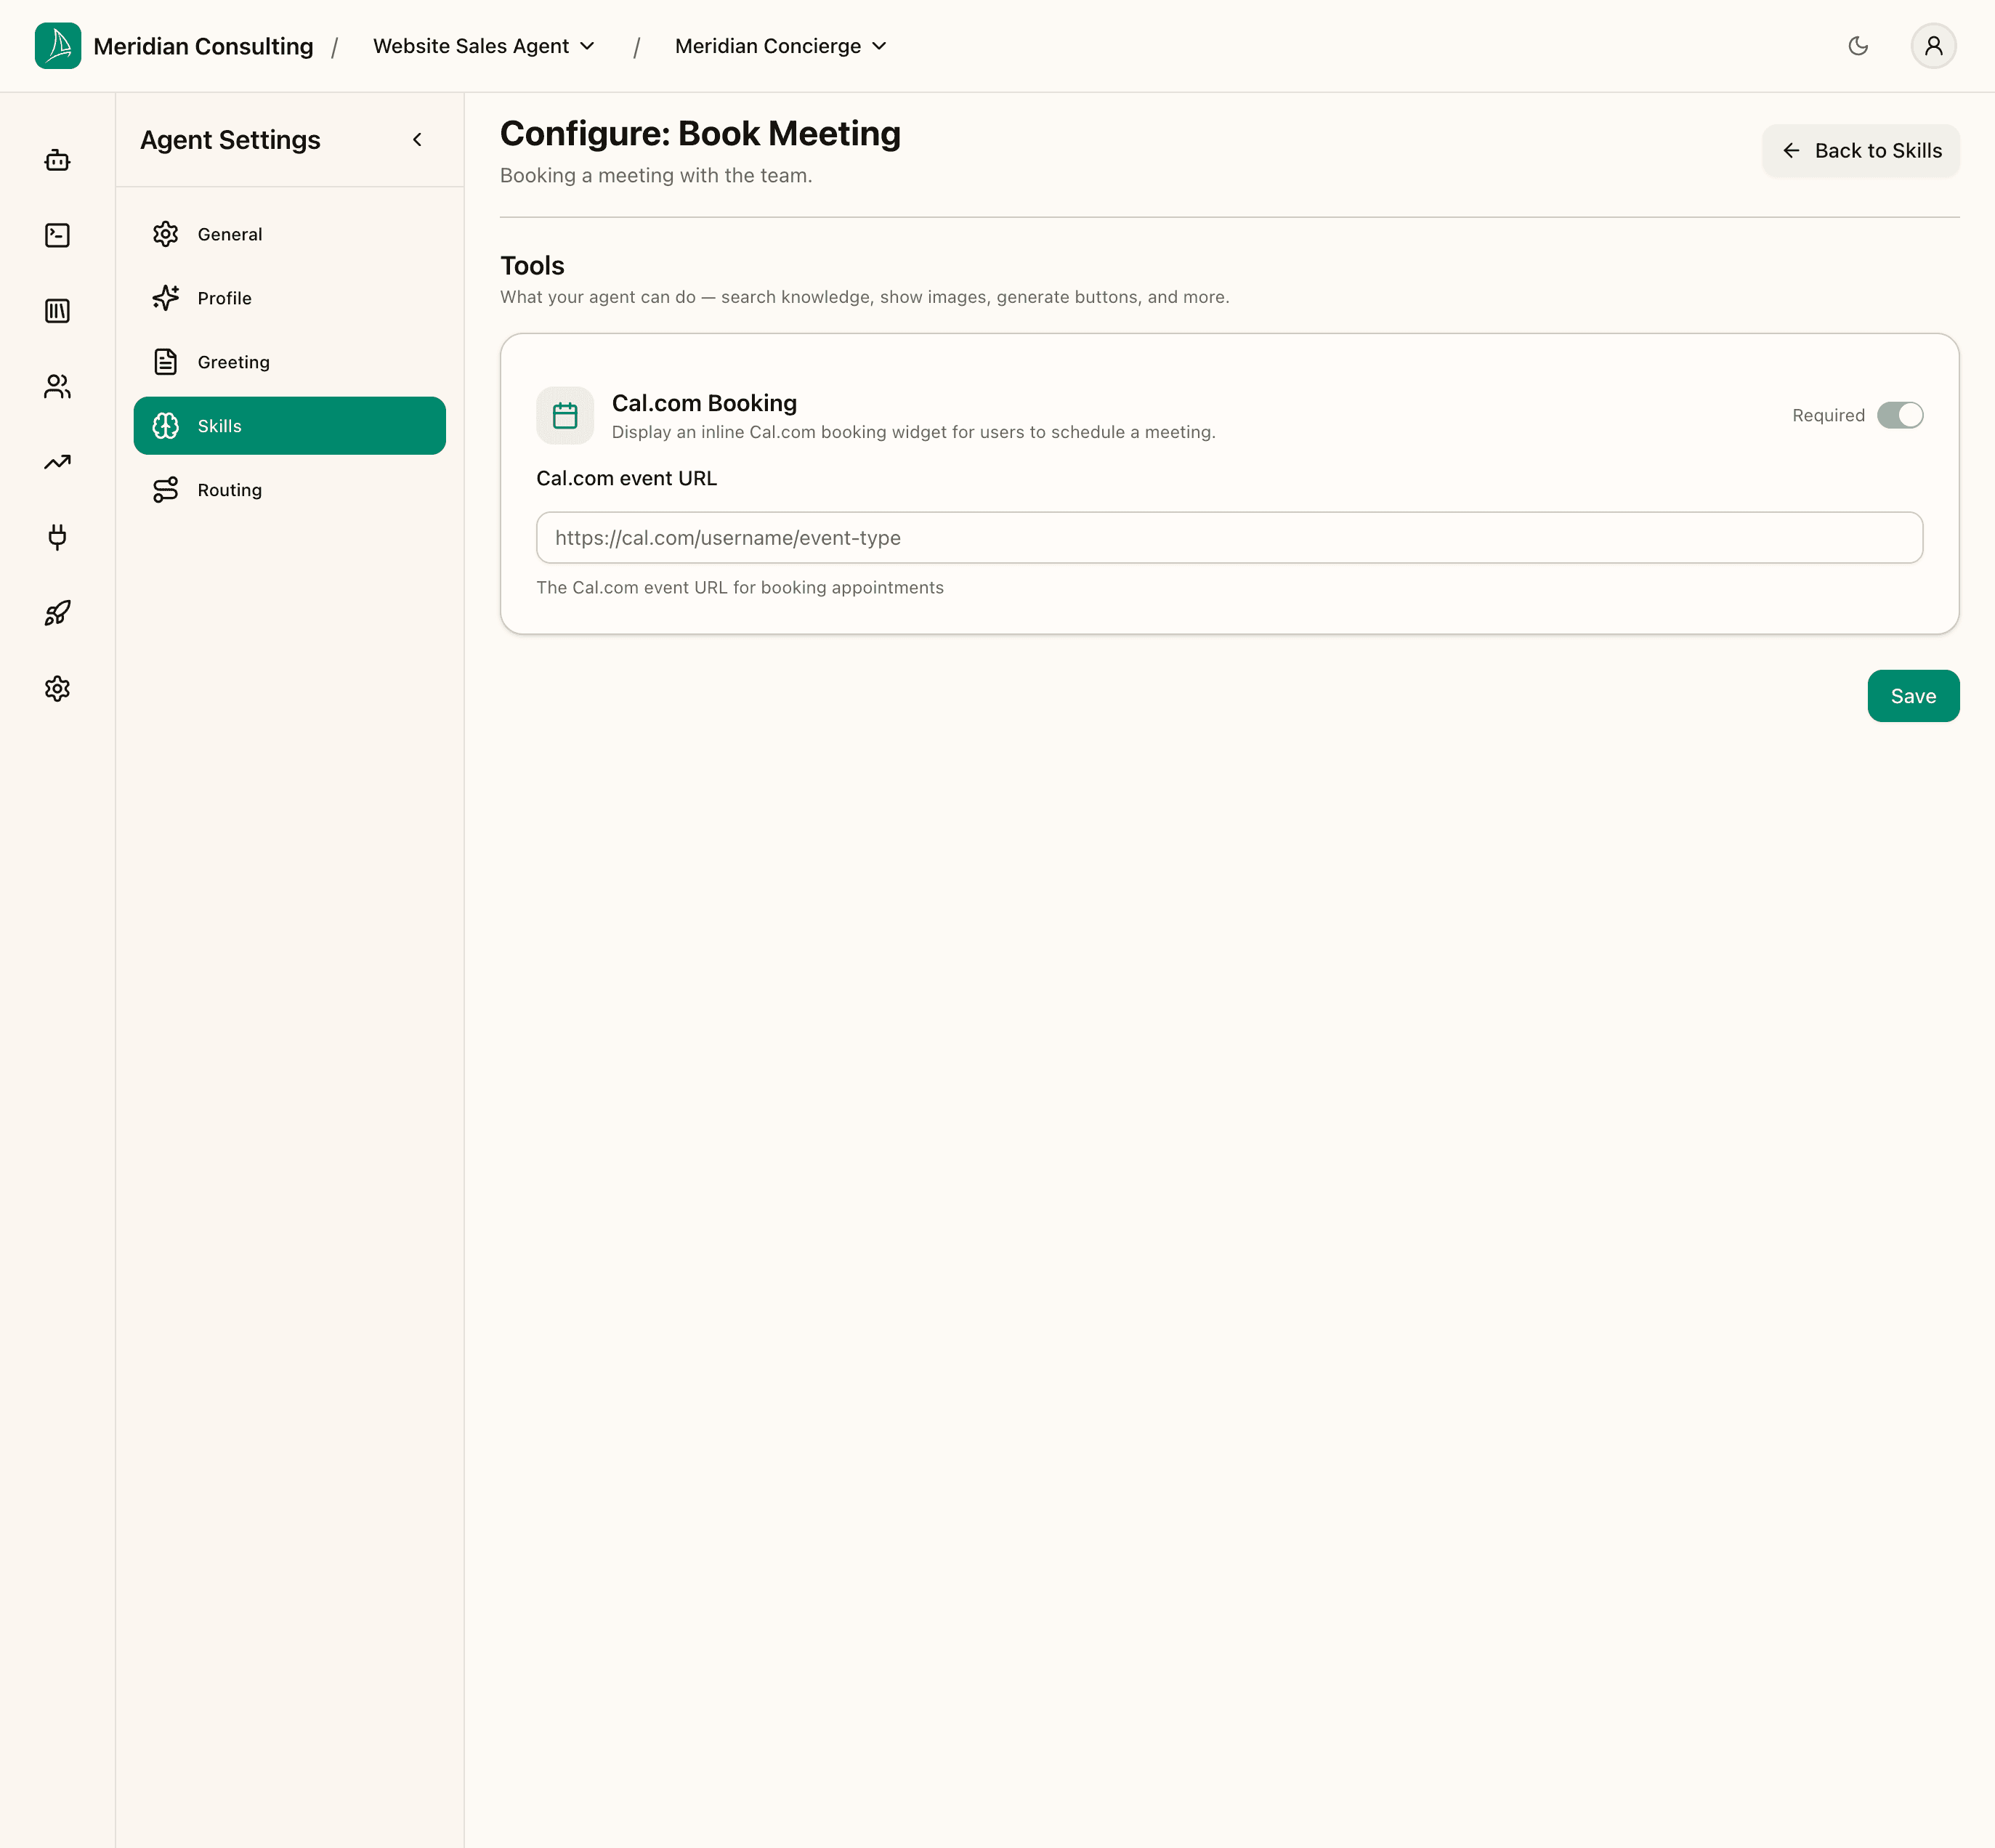
Book Meeting has no qualification fields. It has one tool — the Cal.com Booking widget — and it needs a single piece of configuration: the Cal.com event URL.
When the agent decides to surface a booking opportunity, it embeds this Cal.com event inline in the chat. The visitor picks a time without leaving the conversation.
Cal.com event URL
The URL is the public link to a specific event type in your Cal.com account — for example, https://cal.com/yourhandle/30min for a 30-minute event.
For this manual, we use a fictitious URL: https://cal.com/meridian-consulting/strategy-call.
Click Save, then return to the skills list and flip the Book Meeting toggle on. The skill ships disabled by default — saving the URL configures it; the toggle is what lets the agent actually reach for it.
Booking won't work in the playground or the live widget unless the Cal.com link is real. The fictitious URL in this manual lets us screenshot the configuration but the embedded booking interface will show a 404 from Cal.com. For your real tenant, paste a working event URL from a Cal.com account that belongs to whoever fields the bookings.
Configuring Contact Request — the form-based fallback
Contact Request is the skill the agent uses when a visitor wants follow-up but isn't ready to book a meeting on the spot. It surfaces an inline form, captures details, and submits them — a softer alternative to a meeting booking for visitors who'd rather have someone reach out to them.
Click Configure on Contact Request.
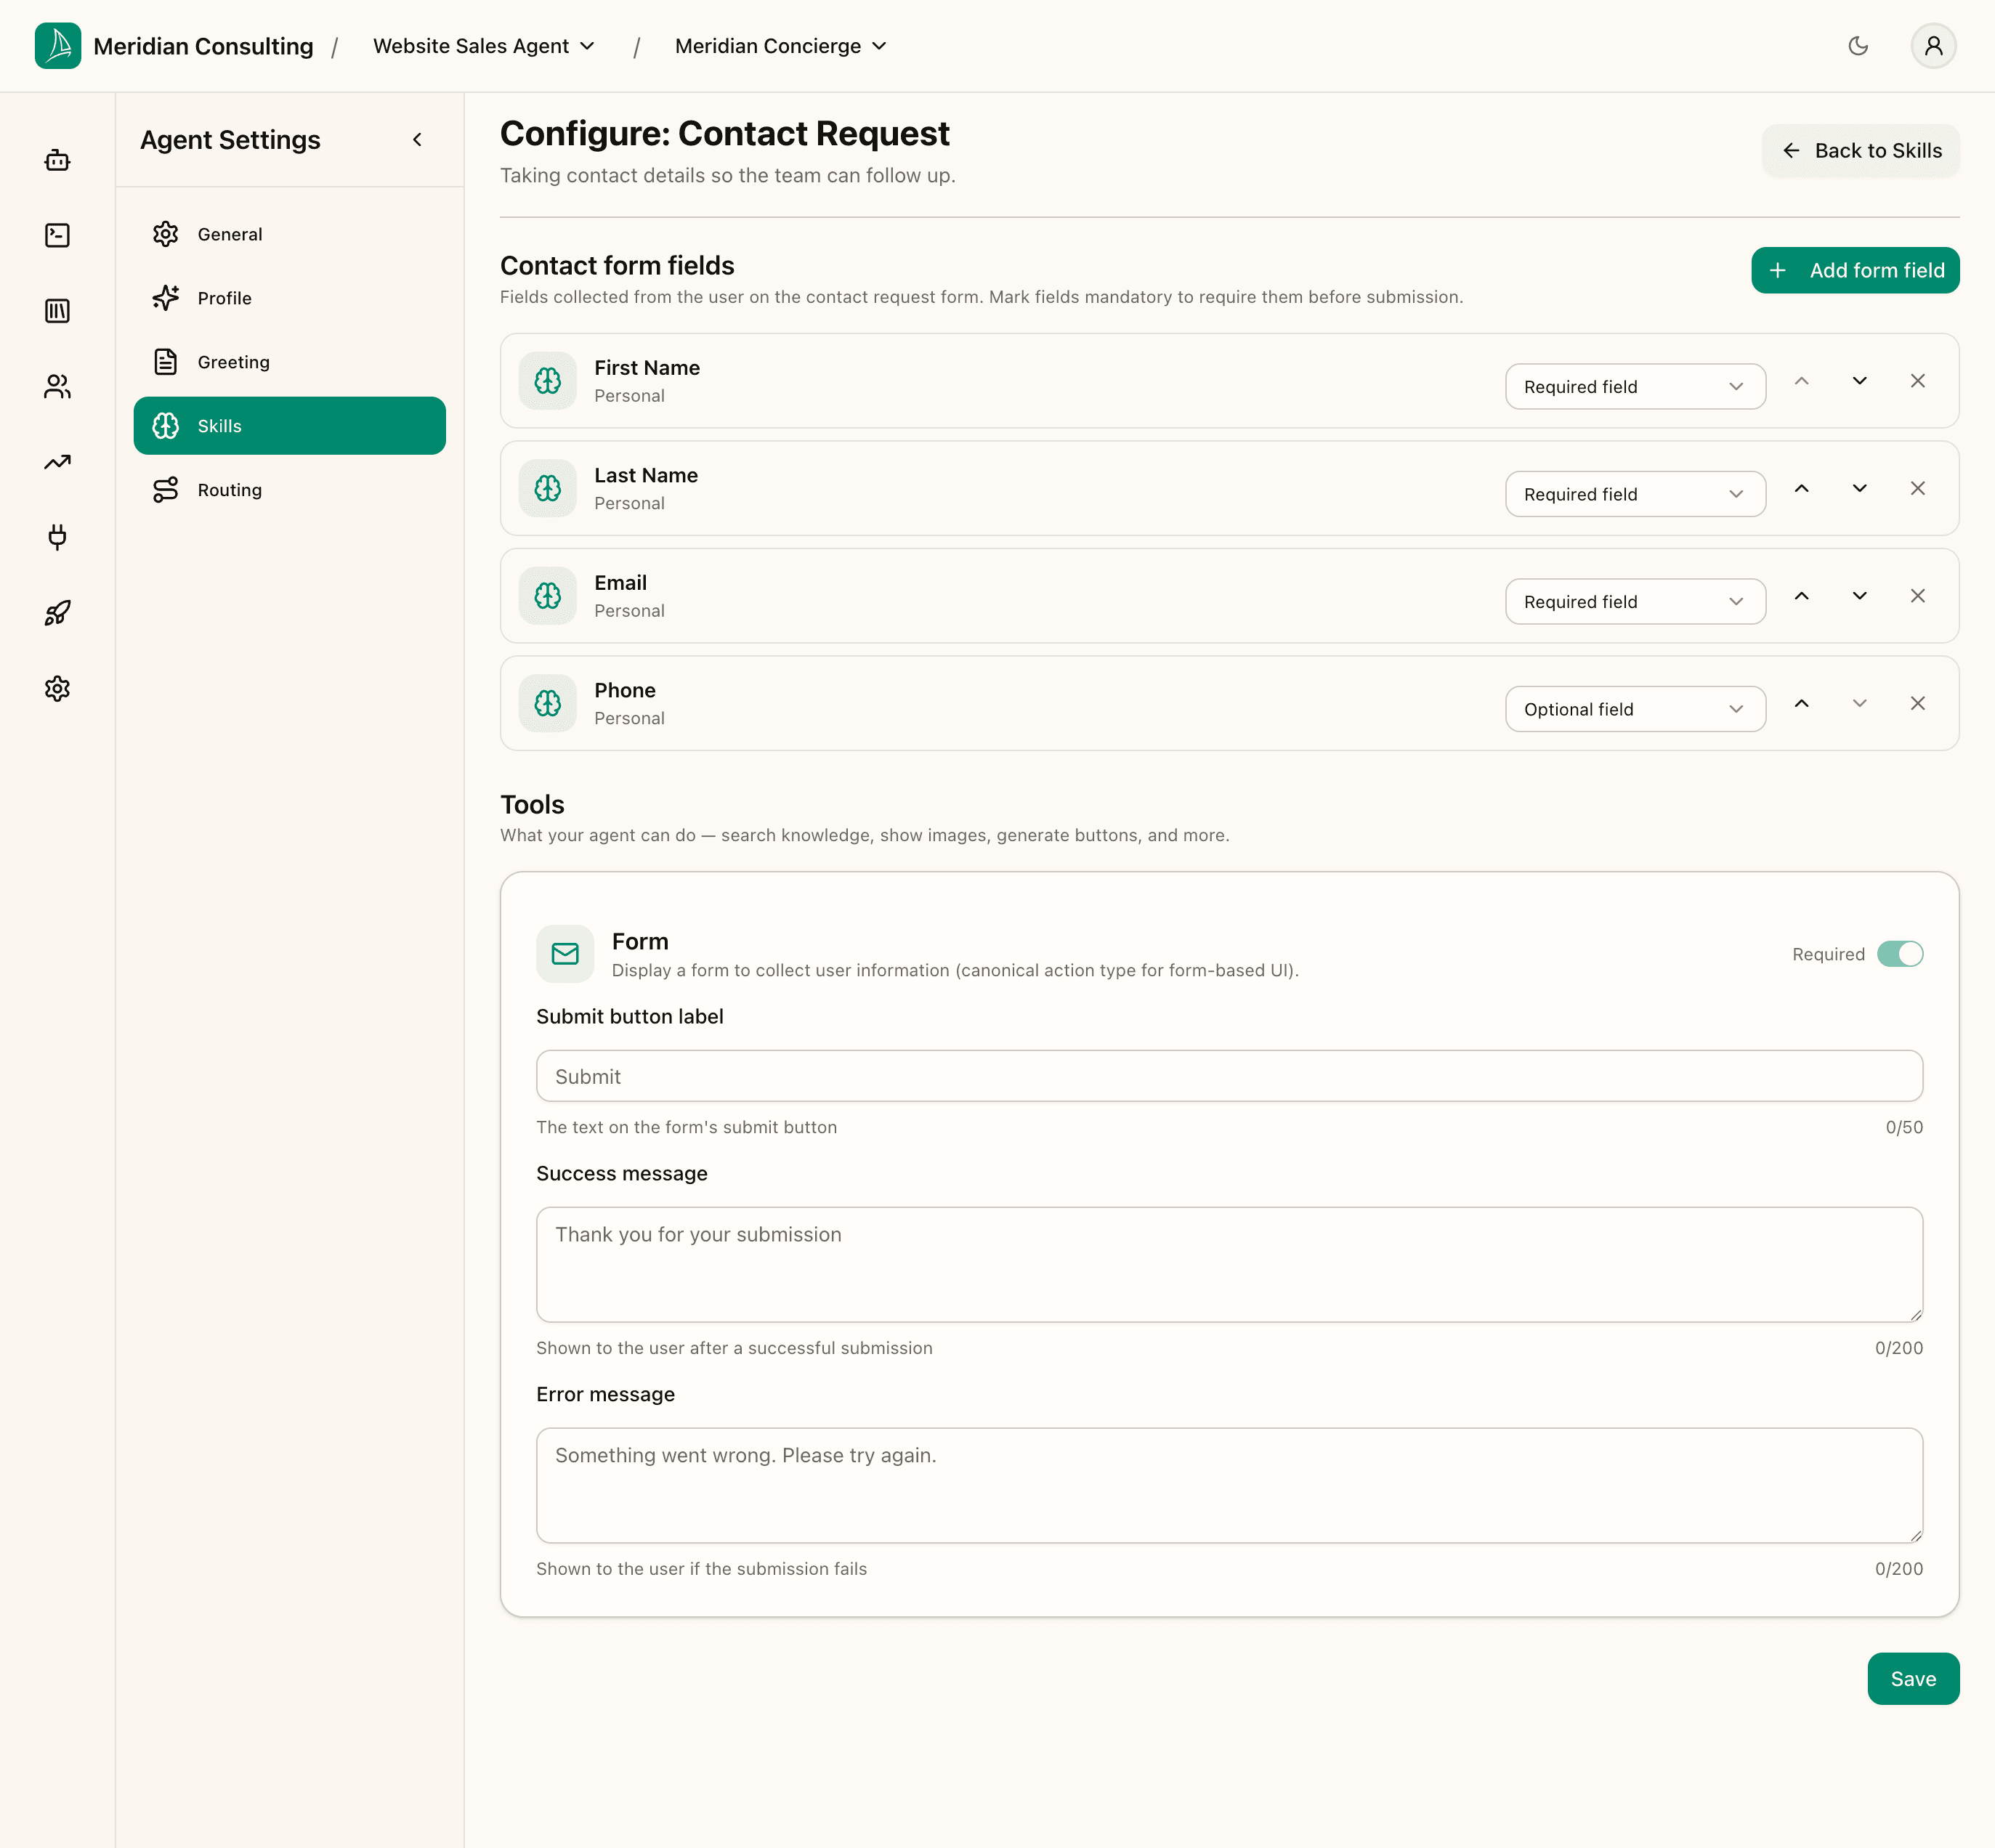
The skill has two sections: form fields, and the form tool itself.
Form fields
Four default fields are pre-attached: First Name (required), Last Name (required), Email (required), Phone (optional). Each has its own mode dropdown — Required or Optional — plus move-up / move-down / remove controls. Use Add form field to add more from the enabled memory types.
For most tenants the defaults are fine: name + email required, phone optional. Resist the temptation to add fields you'd like in your CRM but don't actually need before the team responds — the form's job is to capture intent, not to do the discovery.
Form tool — the inline submission UI
Below the fields, the Form tool has three pieces of customizable copy:
- Submit button label — the call-to-action on the submit button (default: "Submit")
- Success message — what the agent says after a successful submission
- Error message — what the agent says if submission fails
The defaults are generic; customising them is the single highest-leverage thing you can do here because it's the moment a visitor crosses from "asking questions" to "expecting a response." Write copy that sounds like your team would say it, sets a realistic expectation of when the visitor will hear back, and offers a fallback channel if the submission fails.

Click Save.
Product Finder — the screen, and why we left it disabled
Even when Product Finder isn't a fit, it's worth a look at what the screen offers so you know when it would be.
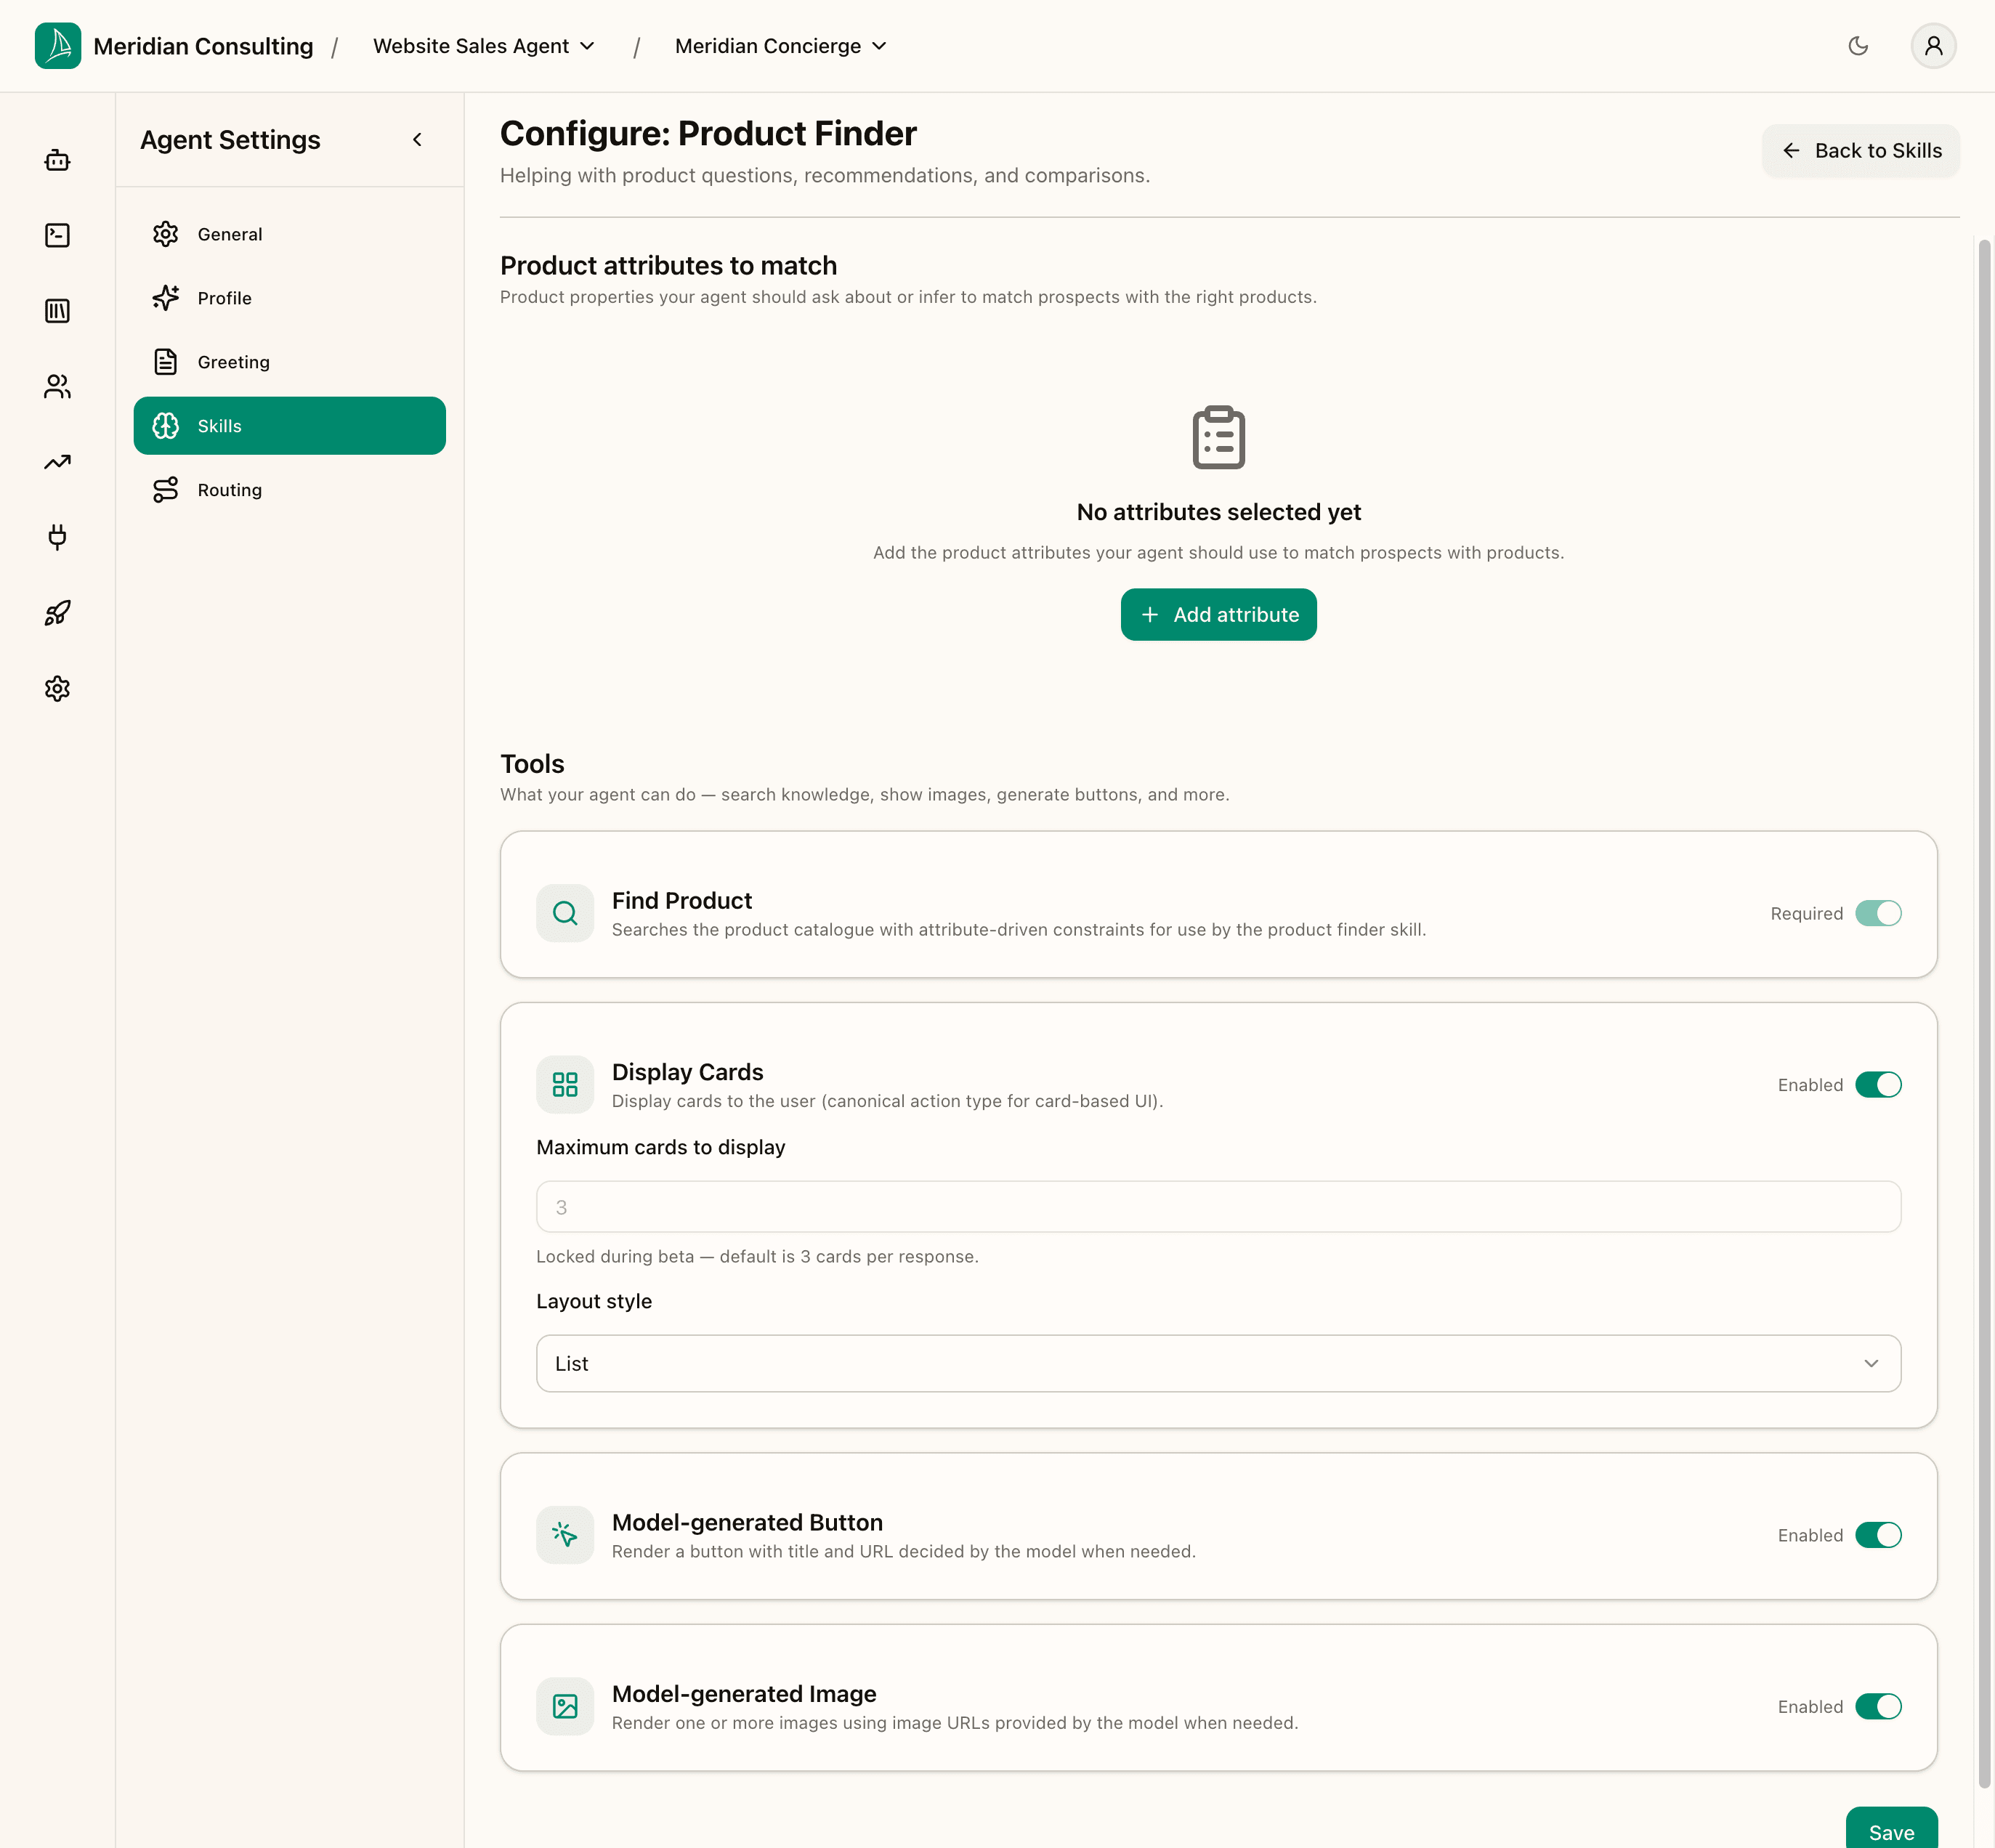
Two sections:
- Product attributes to match — the structured attributes the agent should ask about or infer to narrow down a product recommendation. These come from the Configure Attributes screen in the Content section (introduced in Ingesting knowledge). For a product-led tenant — a hiking-gear retailer, a SaaS plan finder, a consumer-electronics store — you'd define attributes like
waterproof_rating,plan_tier,screen_size, then add them here so the agent knows to ask about them. - Tools — Find Product (a required tool that queries the catalogue against the attribute constraints) plus optional Display Cards (with up to 5 cards per response, locked to 3 during beta), Model-generated Button, and Model-generated Image.
For services-led tenants none of this maps cleanly — there's no catalogue to filter, and the attributes that would drive filtering don't exist. Leave Product Finder disabled in those cases.
When you would use Product Finder
If your tenant has dedicated product pages on a website you've scraped, and you've defined attributes (see Ingesting knowledge) extracted from those pages, Product Finder lets the agent walk a visitor through a guided choice. The flow looks roughly like this:
- Visitor asks an open-ended question ("I need a waterproof jacket for spring hiking")
- Agent uses Product Finder to identify the attributes it needs to narrow the catalogue (
waterproof_rating,weight_class,intended_use) - Agent asks for or infers each attribute over a few turns
- Agent queries the catalogue with the constraints and surfaces a card or two with the matched products
If that flow doesn't match what your customers actually want from chat — leave Product Finder disabled.
Skills not deep-dived here
For brevity this chapter walks three skills end-to-end. The two we didn't cover work the same way mechanically:
- Advisory Guidance — no fields, no tools that need configuration. It's a behaviour skill: when the planner classifies a turn as advisory, the agent leans into a consultative tone. Nothing to set up; just leave it enabled.
- Informational — answers questions using the knowledge base ingested in Ingesting knowledge. The retrieval policies and FAQ priority fast-path mentioned in Introduction kick in here. No per-skill configuration is required; the work is done by the retrieval engine reading your content.
Plus the three that ship disabled and we didn't configure: Product Finder, Order Form, Emergency Contact Request. Configure and enable any of them if your use case calls for it; their configuration screens behave the same way the ones in this chapter do.
What's next
The agent's repertoire is set. The next step is to tell the platform when the agent should reach for which skill — and that's what routing rules are for.