Ingesting knowledge (content)
In this chapter you'll teach the agent everything it needs to know about your business. By the end, the team's knowledge base will hold a set of documents the agent can search and cite during conversations.
There are two ways to get content into the platform:
- Scan a website — find the pages on a public website and import the ones you want.
- Upload documents — push files (Markdown, PDF, Word, etc.) into the knowledge base directly.
Both routes feed the same downstream pipeline: the platform classifies the document, chunks it intelligently, extracts attributes, and embeds each chunk as a vector so retrieval can find it later.
We'll cover both routes, plus the Attributes screen that lives next to them.
Where the content lives
Open the team's Content section from the left-hand rail. It has its own sidebar with two entries: Library — the content itself, covered here — and Attributes, covered at the end of this chapter. You can collapse that sidebar with the toggle beside the page title to give the table the full width.
For a brand-new team the Library is empty.
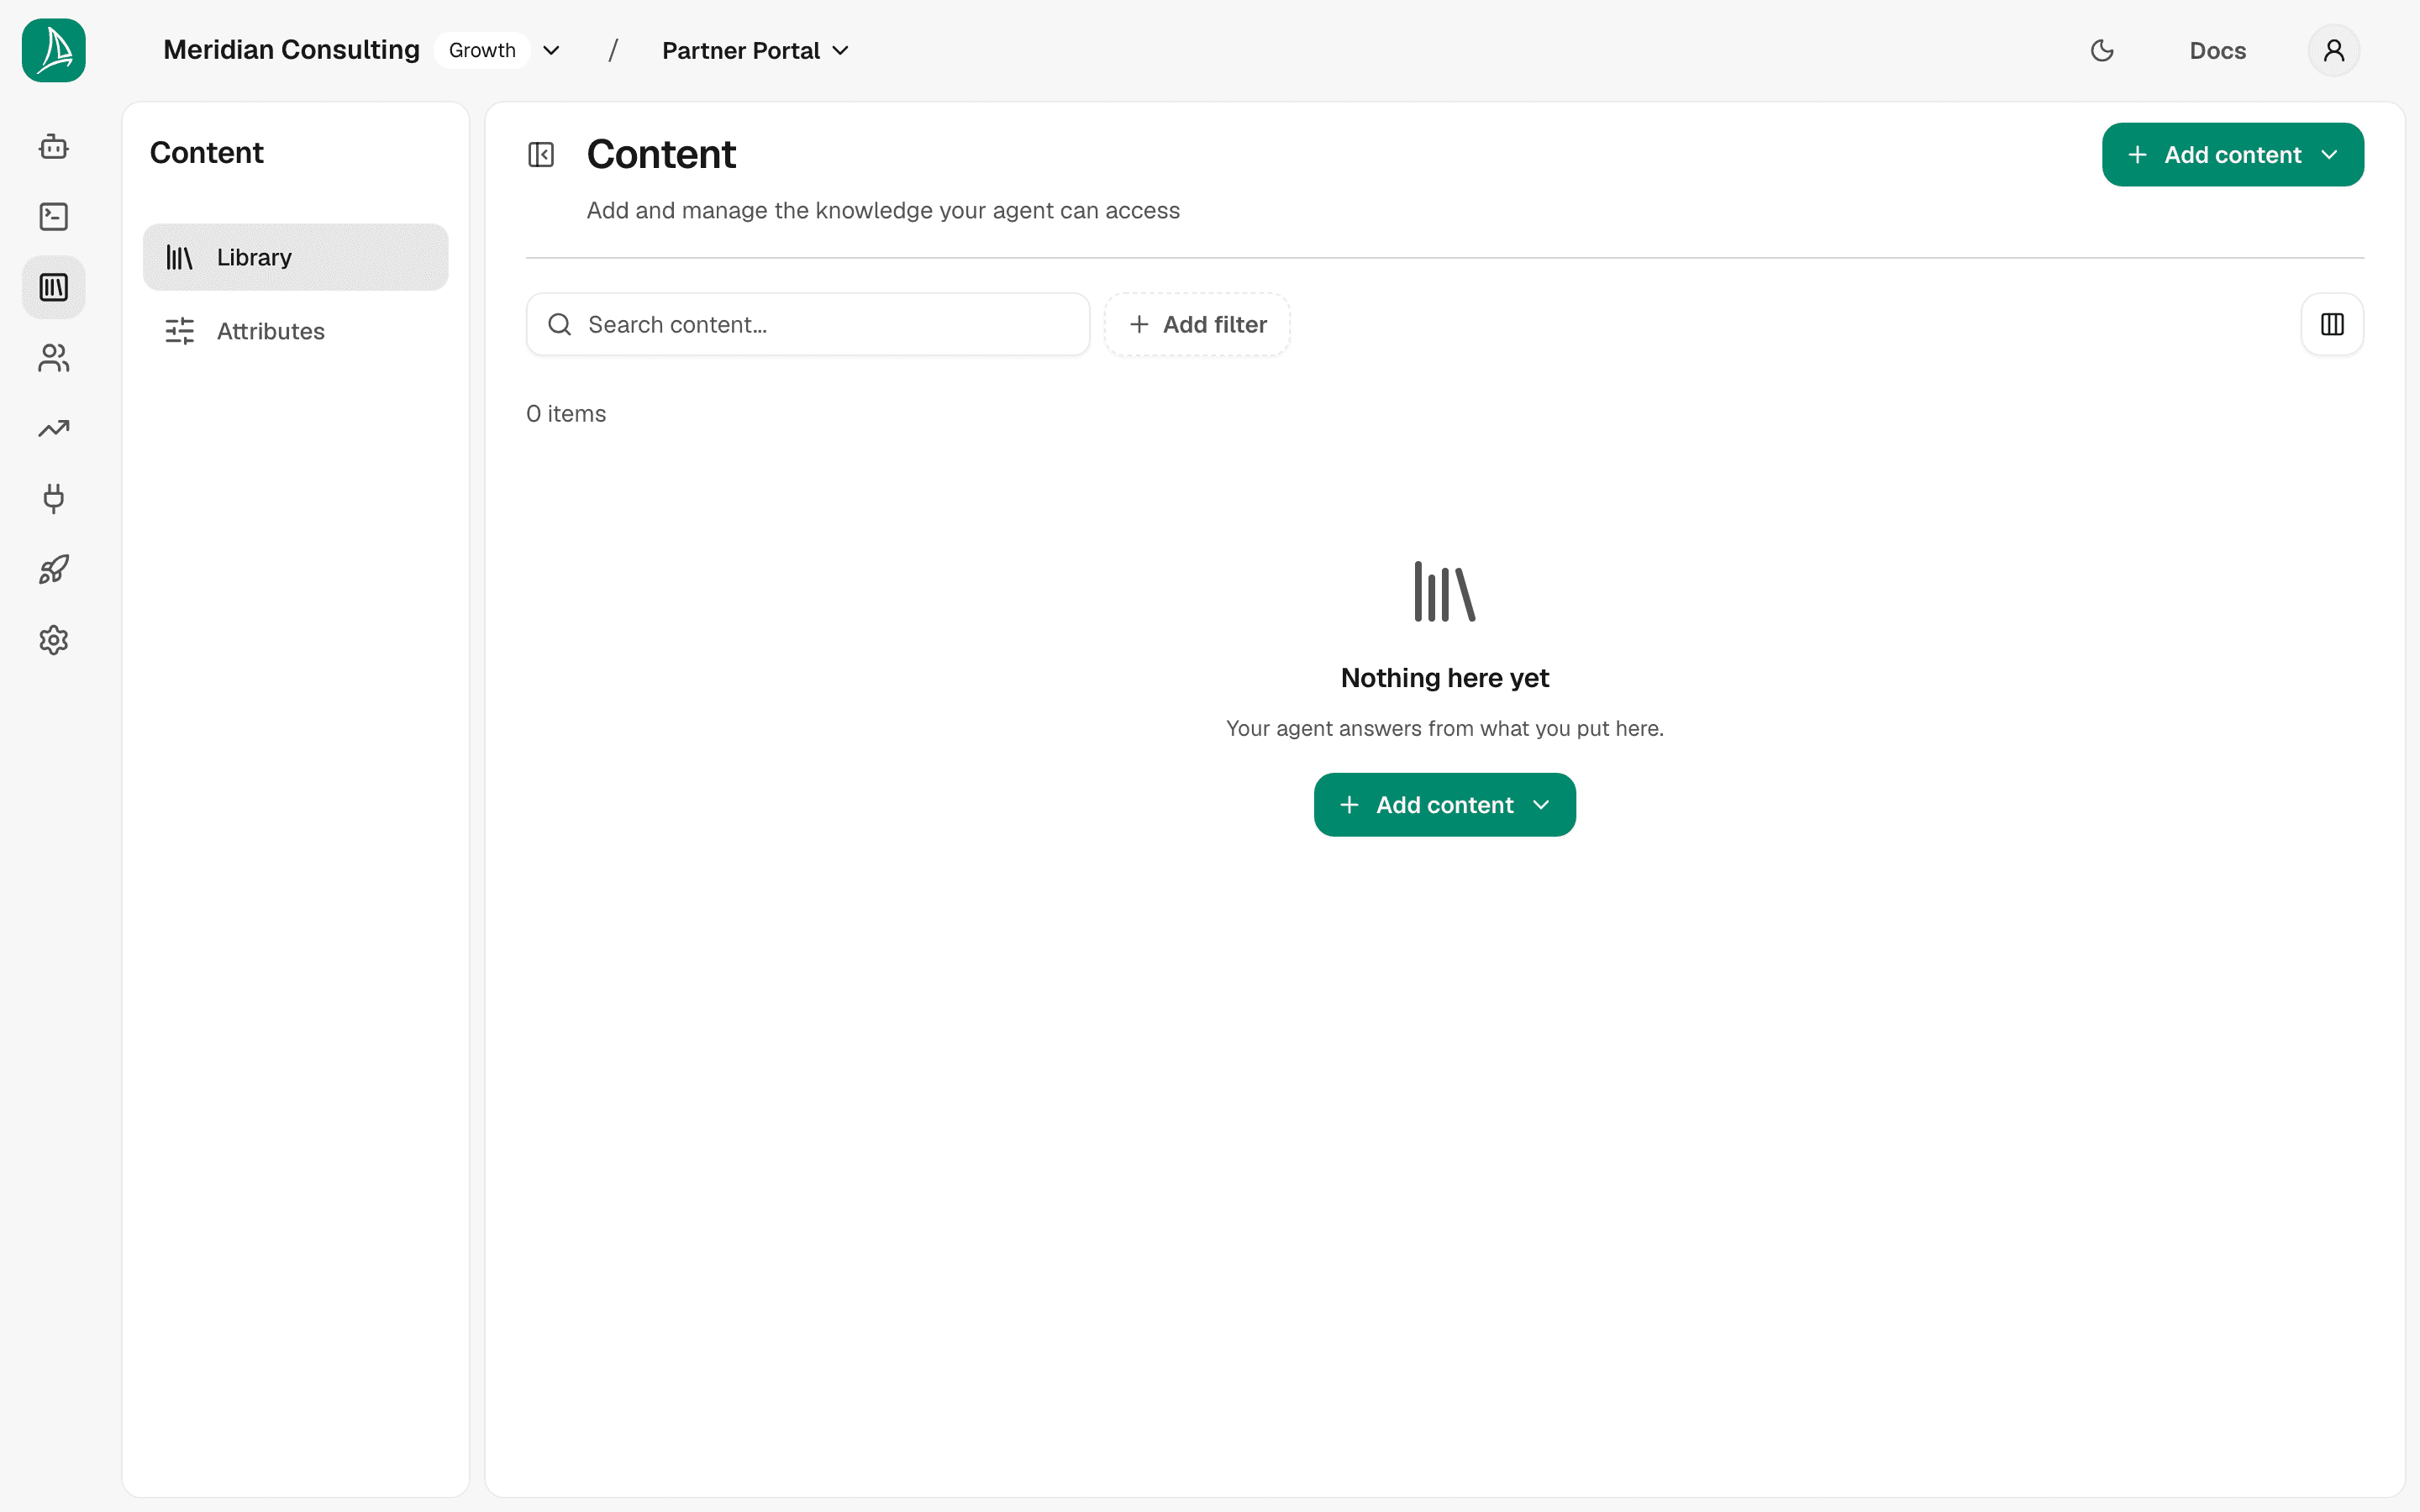
One button, Add content, opens a menu with the two ways in:
- Scan a website… — find the pages on a site and choose which to import
- Upload documents… — push files in directly
Both open the same panel, which slides in from the right over the list.
Below that, a search box and filter controls let you slice the content list by source, status, topic, page type, and date once you have items in it.
The Content list is what your agent can answer from. Pages a scan has found but you have not imported are not in it — they live in the import panel, which is where you choose them, and where you can remove the ones you do not want. That way a list of four hundred discovered pages never stands between you and the twenty you actually imported.
The table shows four columns to begin with:
- Name — the URL or filename
- Topic — what the page is about (see How the platform classifies content, below)
- Status — In progress, Ready or Failed (see What the pipeline does after ingest, below)
- Created — when the item entered the platform
Three more are available from the table's column picker:
- Source —
websitefor scanned pages,documentfor uploads - Page type — what the page is for: a product page, an FAQ, a pricing page, your terms
- Publication — only used by content the platform writes for you; blank for everything you import
The column picker also lets you reorder columns, and drag a column's edge to resize it. Your choices are remembered in this browser.
Topic and Page type are two different questions, and a page gets an answer to
both. Your case-studies page is company by topic and a case study by page type;
your pricing page might be product by topic and a pricing page by page type.
Topic decides how the agent searches your content; page type decides which
proactive message the widget shows on that page.
Importing from a website
Choose Add content → Scan a website…. The panel has two steps.
Step 1 — Connect
Enter the address of the site you want to read and press Find pages. Give it the root — https://example.com — rather than a single page: we crawl outwards from there.
Nothing is fetched or charged at this step. Finding out what pages exist is free; importing them is what counts against your allowance.
If you have scanned this site before, the panel takes you straight to the pages it already found, without crawling again. That is the point of Find pages rather than "scan": either way you end up looking at the pages.
Every scan runs a fresh lookup against your site, so pages you published recently appear as soon as your site lists them. (Before 11 August 2026 this read from a cache that could be up to a week old, which could silently omit recently added pages — if you scanned a site during that period, it's worth scanning again to check nothing was missed.)
Step 2 — Pages
The panel waits while the crawl runs, showing how long it has been going. Closing the panel does not stop it — the scan runs on our side, and reopening it takes you back to where you were. Most sites take under a minute; large ones can take five.
When it finishes you get the site as a tree: sections you can open and close, with a checkbox on each. Ticking a section takes everything under it, which is why there is no "select all" — the top of the tree is already that.
Single-page sites find nothing. The crawler reports pages reachable from the address you gave, not the address itself. For multi-page sites — documentation, product catalogues, anything with a nav — the tree fills with what it found.
The footer tells you what will happen: how many pages are selected, how many are already imported and will be skipped, and what the batch costs against your document-page allowance. Press Import and the panel closes, so you can watch the pages arrive in your Content list.
Your allowance limits the import, not the selection. If you choose more pages than remain in the current cycle, Import is disabled and says why. Delete stays available whatever the allowance says — so you can always clear pages you do not want, which is the one thing you need when the allowance is spent.
Delete removes pages from the library entirely. Scanning the site again would find them, at the cost of another crawl.
Coming back to a site
Open the panel, enter the same address, and you land on its pages without a new crawl. Press Check for new pages to scan again — that adds whatever has appeared since, rather than replacing what is there.
Uploading documents
Choose Add content → Upload documents…. This one is a single screen — there is nothing to decide between choosing files and sending them.
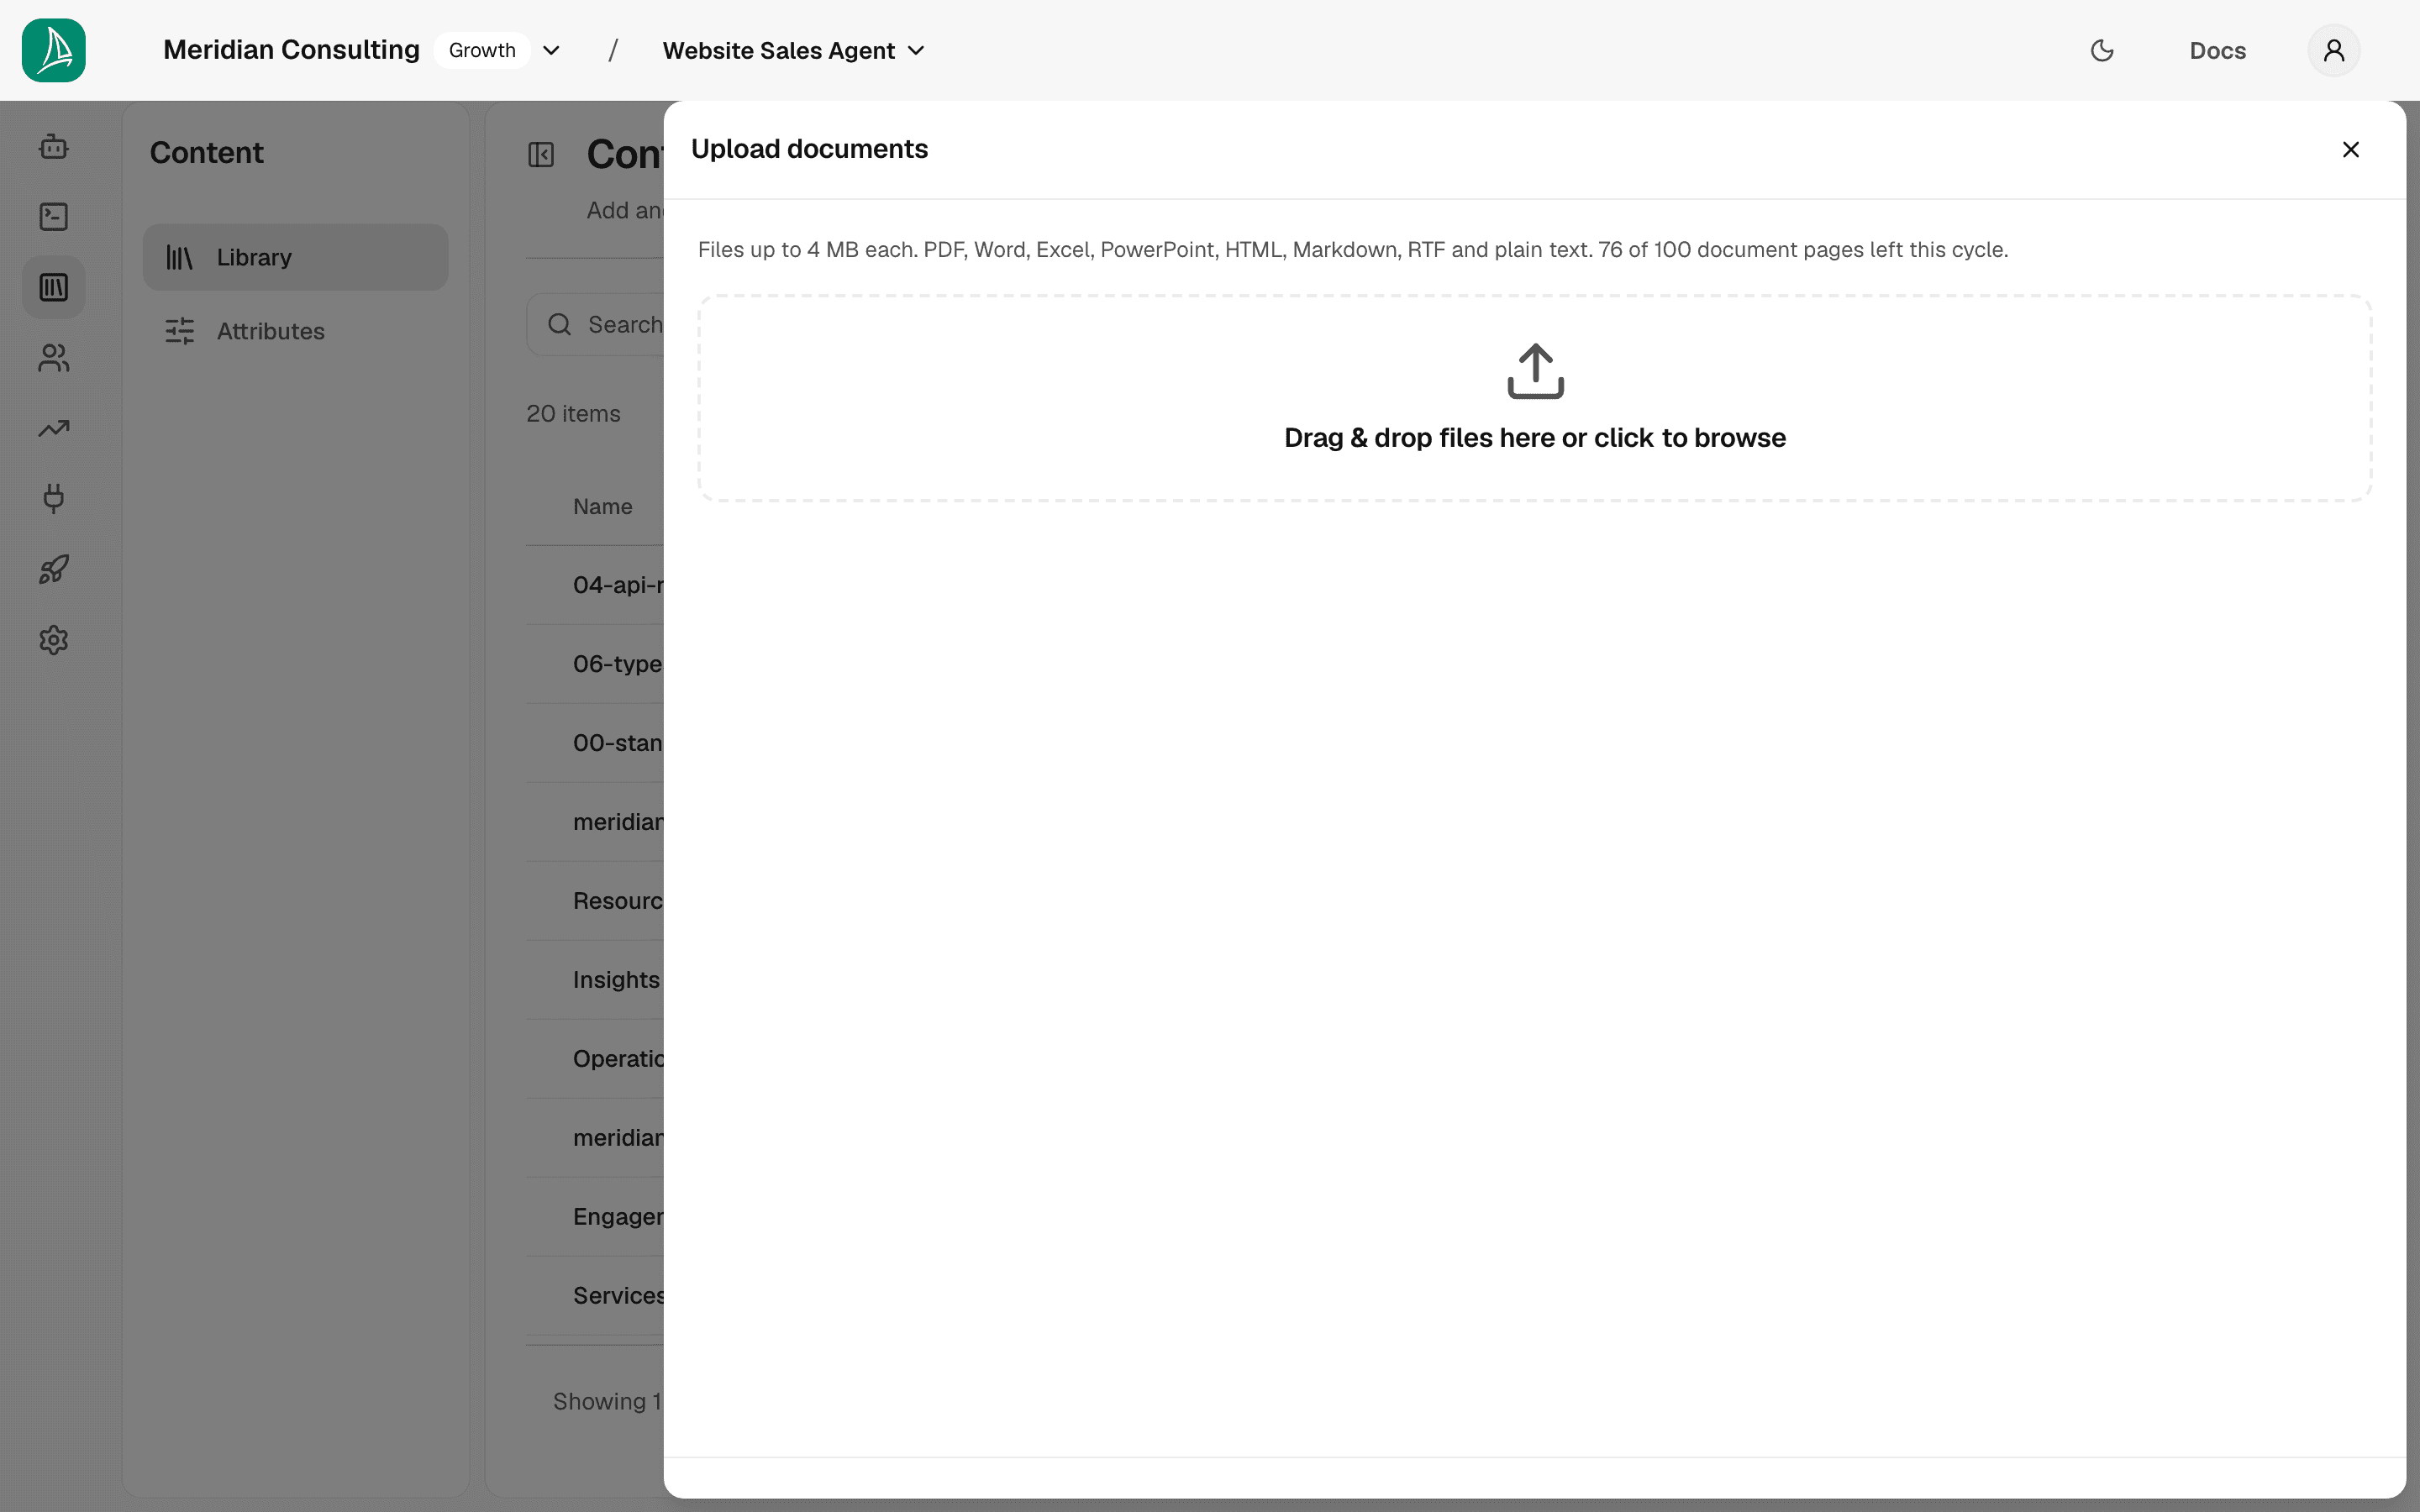
Supported formats are listed on the page itself: PDF, Word, Excel, PowerPoint, HTML, Markdown, RTF, and plain text. Each file can be up to 4 MB.
Drag files onto the drop zone, or click the zone to open the file picker. You can stage multiple files in one go.
The panel also tells you where your document-page allowance stands, and it says it three different ways depending on how much is left:
- While there is room, the count sits under the drop zone — "60 of 100 document pages left this cycle." Nothing to dismiss and nothing to act on.
- Once it is running out, a notice appears above the drop zone warning that large files may not fit, with a link to your usage.
- Once it is used up, the notice says so and links to your plan. Uploading is the only thing that stops; everything else on the Content screen keeps working, and the allowance resets at the start of your next cycle.
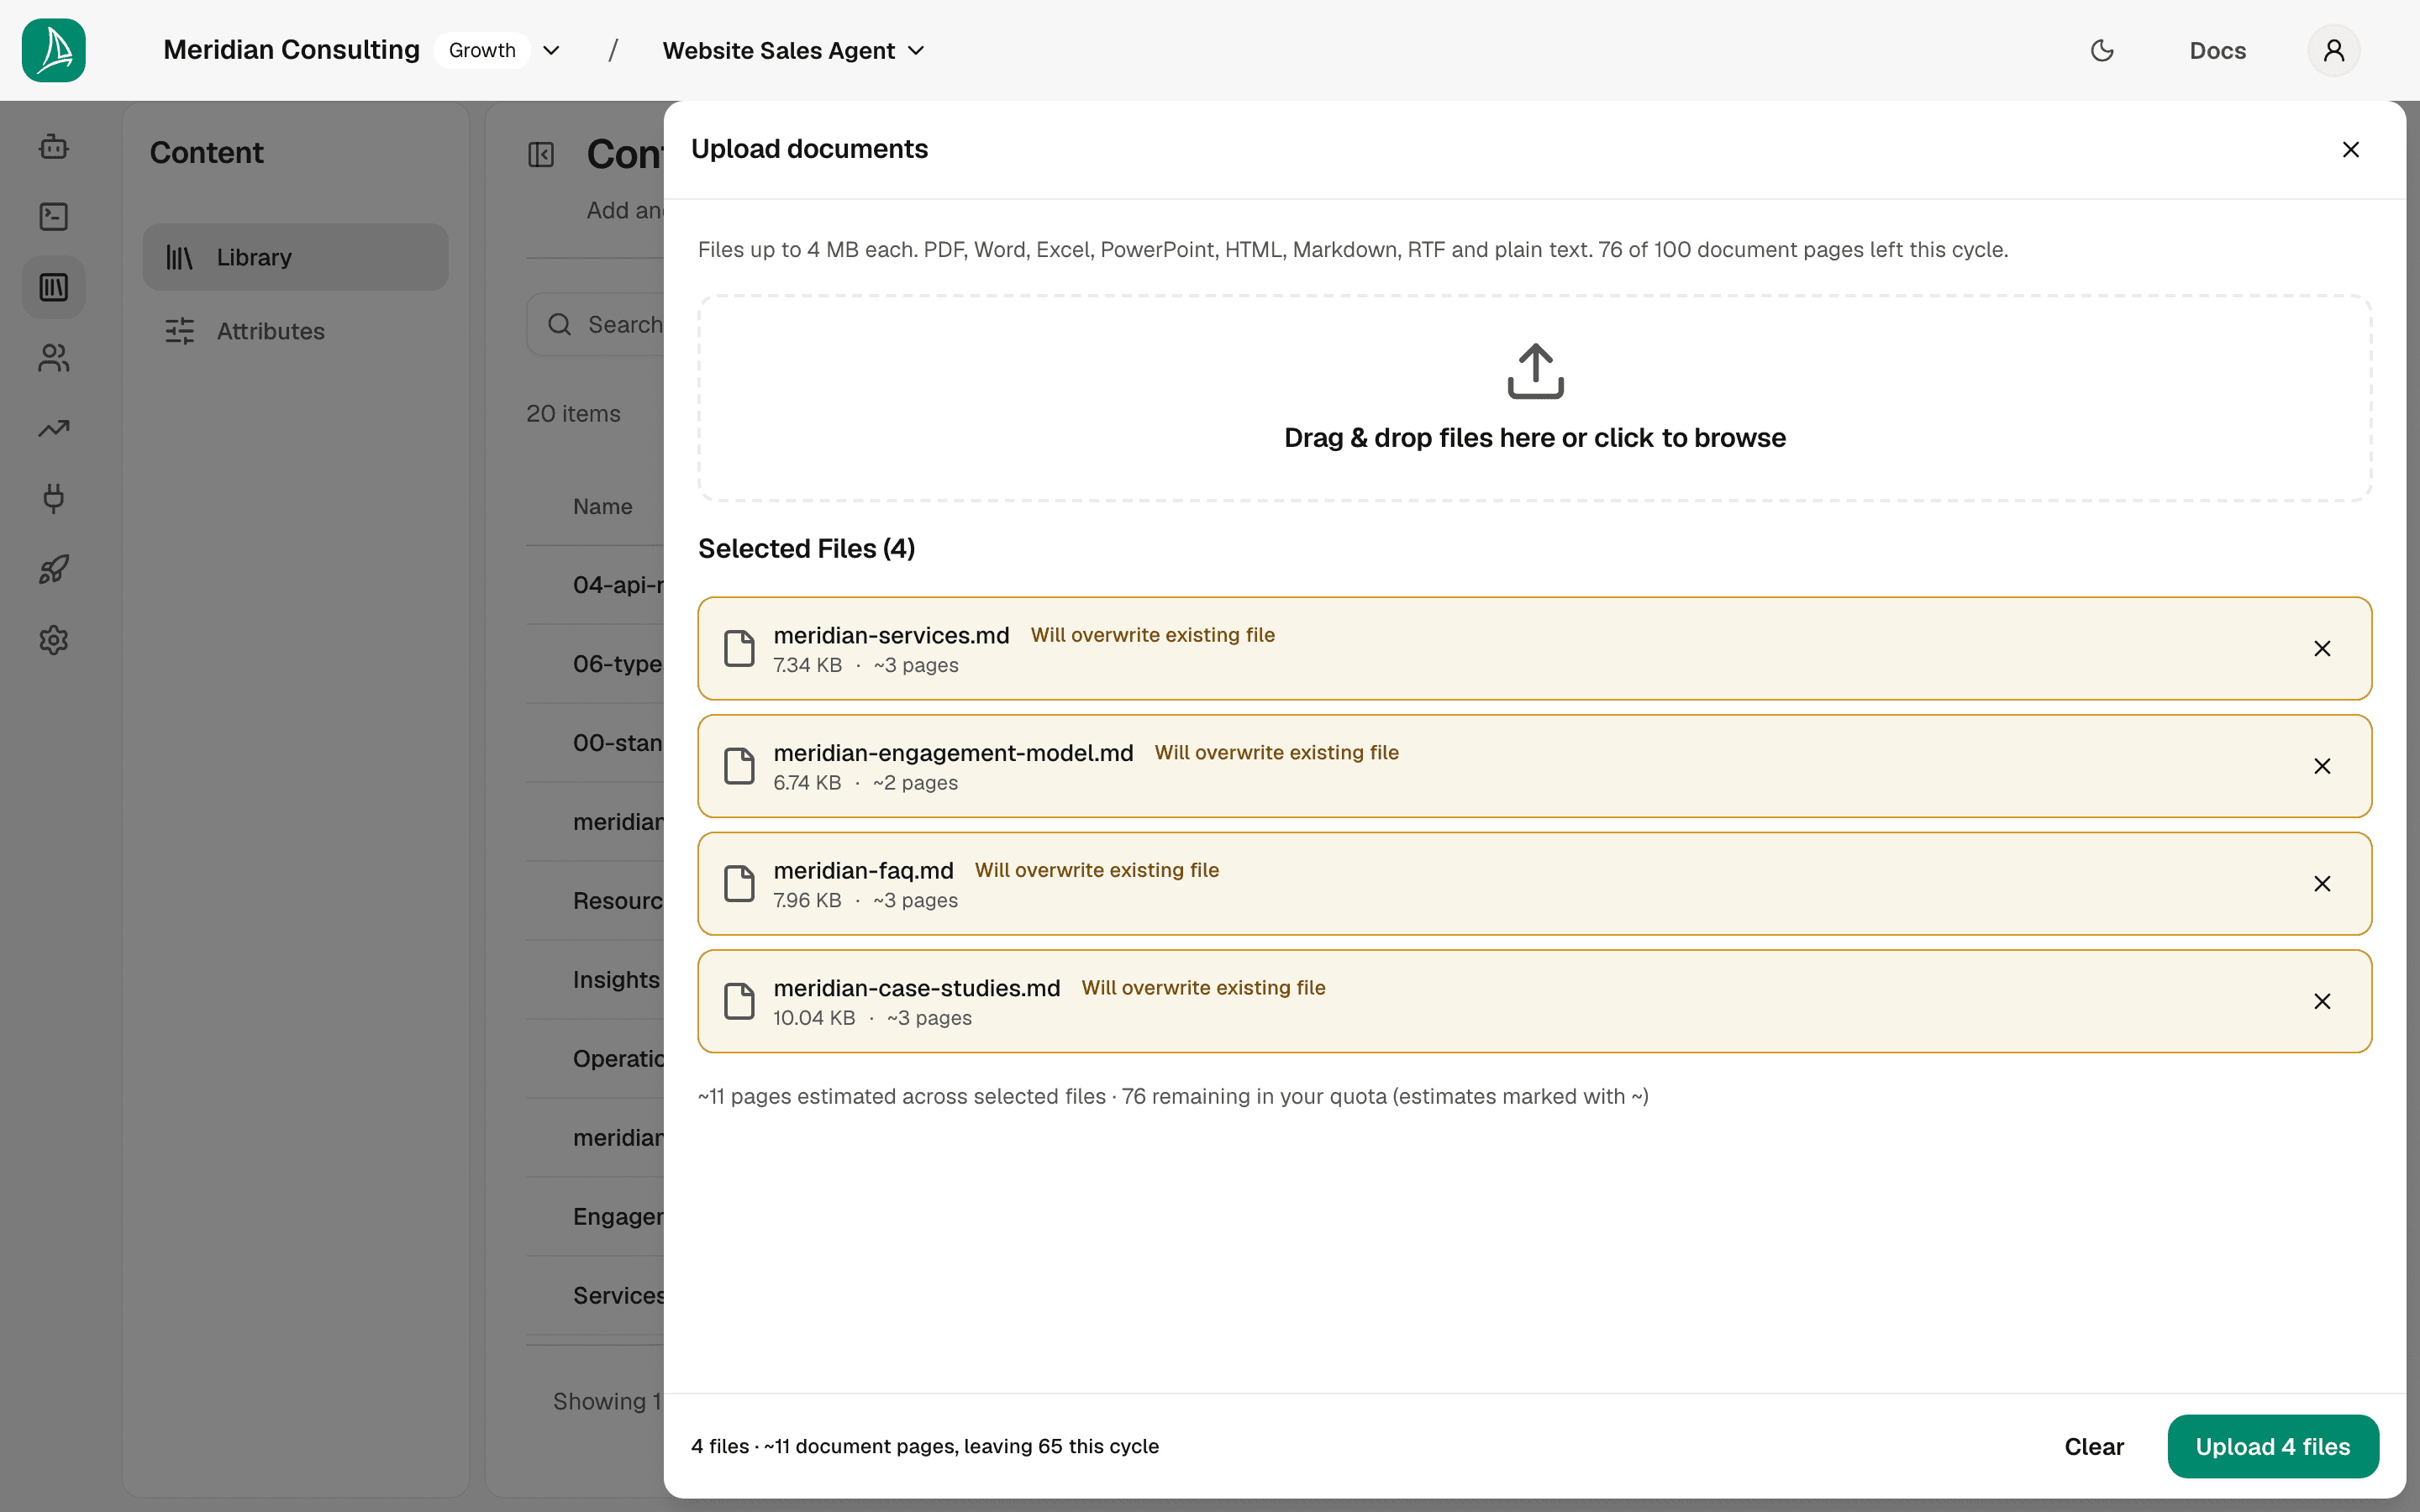
The footer counts what you have staged and what it will cost — "2 files · 54 document pages, leaving 1,186 this cycle" — and names any file it cannot read. One unreadable file holds the whole batch, so remove it and the rest go.
Press Upload to commit them. Unlike a website scan, this one waits: the files have to leave your browser, so the panel stays until they have, then closes. Processing carries on afterwards.
Why upload Markdown when scraping the website would do?
Two reasons we'll see throughout the rest of the manual:
- The website may not contain the depth of knowledge the agent needs. The information surfaced on a marketing site is usually summary-level; the real knowledge — services in depth, engagement model, FAQ, case studies — often lives in documents authored specifically for the agent to consume.
- Uploaded documents are easier to control. You write them, you version them, you know what they say. Scraped pages reflect whatever's live on the public site — useful, but not always what you want the agent grounded in.
In production tenants you'll usually use both: scrape the public site for breadth, upload authored documents for depth.
What the pipeline does after ingest
Once a content item enters the platform — whether scraped or uploaded — it moves through several stages before it's ready for the agent to use.
| Stage | What happens |
|---|---|
| Parse | The raw file is converted to text. PDFs and Office documents go through Unstructured.io; Markdown is consumed natively. |
| Classify | The platform decides what kind of content this is — product, knowledge, company, etc. The classification influences how it'll be retrieved later. |
| Chunk | The text is split into self-contained chunks. The chunker is AI-driven; it tries to keep semantically coherent passages together rather than splitting on raw token counts. For an FAQ-style document, each Q&A typically becomes its own chunk. Product pages follow a fixed set of categories — see How product pages are chunked. |
| Extract attributes | Structured attributes (see next section) are pulled out of each chunk. |
| Embed | Each chunk is converted to a 1536-dimensional vector for similarity search. |
While these stages run, the content item's Status column reads In progress, with a spinner beside it. The column says one of three things:
| Status | What it means |
|---|---|
| In progress | The pipeline has the item and is working through the stages above. The spinner stops on its own. |
| Ready | The item is chunked, embedded and searchable — the assistant can answer from it. |
| Failed | Something went wrong and the item did not finish. Re-import it, or get in touch if it keeps happening. |
A page the crawler can't fetch — a dead link, or a page behind a login — ends as Failed rather than sitting In progress indefinitely. So does an import refused because your document-page allowance ran out part-way through.
The pipeline runs asynchronously, so you can ingest more content in parallel and move on to other configuration work.
Pages a site scan found but nobody has imported yet are not in this list at all — they live in the import panel, marked Not imported, until you choose them.
How the platform classifies content
You'll see the Topic column take different values depending on what the platform thinks each document is. In the example shown, the four uploads classified as:
| File | Topic |
|---|---|
meridian-services.md | product |
meridian-engagement-model.md | product |
meridian-faq.md | knowledge |
meridian-case-studies.md | company |
Three different topics from four documents. The classifier reads the content rather than the filename, so a "FAQ" document is recognised as knowledge regardless of what you call the file, and a case-studies document is recognised as company (general organisational context) rather than product information.
And what each page is FOR
Alongside the topic, each scraped page gets a page type: a product page, a product listing, an FAQ, a pricing page, a contact page, a guide or article, a case study, a page written for a particular audience or industry, an about page, your home page, or your legal and checkout pages.
The platform works this out from the page itself, in order of how certain the
evidence is — first the page's own structured markup (the same data it publishes
for search engines), then how the page is built (question headings, a contact
form, priced rows), and only then by reading the content. If none of that
settles it, the page is marked Unclassified rather than guessed at. A dash
means something different: that page has not been classified yet.
Two things follow from the page type:
- The widget's proactive message. An FAQ page gets an offer to answer a question; a pricing page gets an offer to work out which option fits.
- Pages that show nothing. Your terms, privacy policy, cookie policy, checkout and account pages carry no proactive message at all — not even the general one. Interrupting someone reading your terms is a cost, not a missed opportunity.
These types matter at retrieval time. The platform's retrieval policies (covered in the agent's behaviour, not in this chapter) weight different content types differently — a product question searches product pages, while a general question searches everything and gives your FAQ content a lift in the ranking.
Content that explains a CHOICE is worth writing on purpose. When Product Finder asks a narrowing question the visitor cannot answer — "water or biofilm?", "what sensitivity?" — the agent answers its own question from your knowledge base and asks again, rather than handing the visitor off (see Configuring skills). What it needs for that is guidance-shaped content, not specifications: a page or FAQ entry that says when each option applies. A specifications table describes the options without helping anyone choose between them.
How product pages are chunked
Content classified as product is chunked differently from everything else. Rather than splitting wherever the page's own structure suggests, the chunker sorts the page into a fixed set of categories and produces one consolidated chunk per category:
| Category | What goes in it |
|---|---|
| Overview | What the product is and what it's for, in plain prose. Always produced. |
| Specifications | Measurements, materials, technical tables, classification labels. |
| Pricing | Prices, tiers, cost breakdowns, commercial terms. |
| Problems addressed | Risks, pain points, compliance drivers — the "why you need this" framing. |
| Benefits | Outcomes, advantages, "why this is better". |
| Instructions | Steps, operating guidance, how to interpret a result. |
| Reviews | Testimonials, ratings, customer feedback. |
| Use cases | Industries, sectors, environments — who uses it and where. |
| Other | Relevant content that fits none of the above. |
A category the page doesn't cover is simply left empty — nothing is invented to fill it. Scattered passages of the same kind are merged, so a page that mentions pricing in three places produces one pricing chunk rather than three.
The overview is the important one. It's what the agent matches against when a visitor describes what they're looking for in their own words, and what it uses to tell two products apart. It's now guaranteed on every product page; previously a page dense with specifications could produce none at all, which made the product effectively invisible to Product Finder even though the page ingested cleanly and showed ready.
You don't have to do anything to get this — but if you write product pages yourself, a page that opens with a couple of sentences saying what the product is and who it's for will always chunk better than one that opens straight into a specifications table.
Re-importing content when it changes
Ingestion is a snapshot. A content item reflects your source as it was at the moment it was scraped or uploaded — it does not track the page afterwards. When the source changes, or when a platform change improves how content is processed, you re-import to pick it up.
To refresh a page or document:
- Find the item in the Content list and delete it.
- Add it again — Add content → Scan a website… for a page, Upload documents… for a file.
- Confirm it reaches
ready, then click into it and check the chunks look right.
Deleting removes the item's chunks from the agent's pool immediately, so there's a short window where the agent can't answer from that content. For a handful of pages that's not worth worrying about; if you're refreshing a large catalogue, work through it in batches rather than deleting everything up front.
When to re-import. The obvious trigger is that the source changed — a product page was rewritten, a price moved, a document was revised. The less obvious one is a platform improvement to the ingestion pipeline: those apply at ingest time, so existing content keeps its old shape until re-imported. Appendix C — Release Notes calls out which releases are worth a re-import.
Inspecting ingested content
Back on the Content list, the four uploaded files now show Ready:
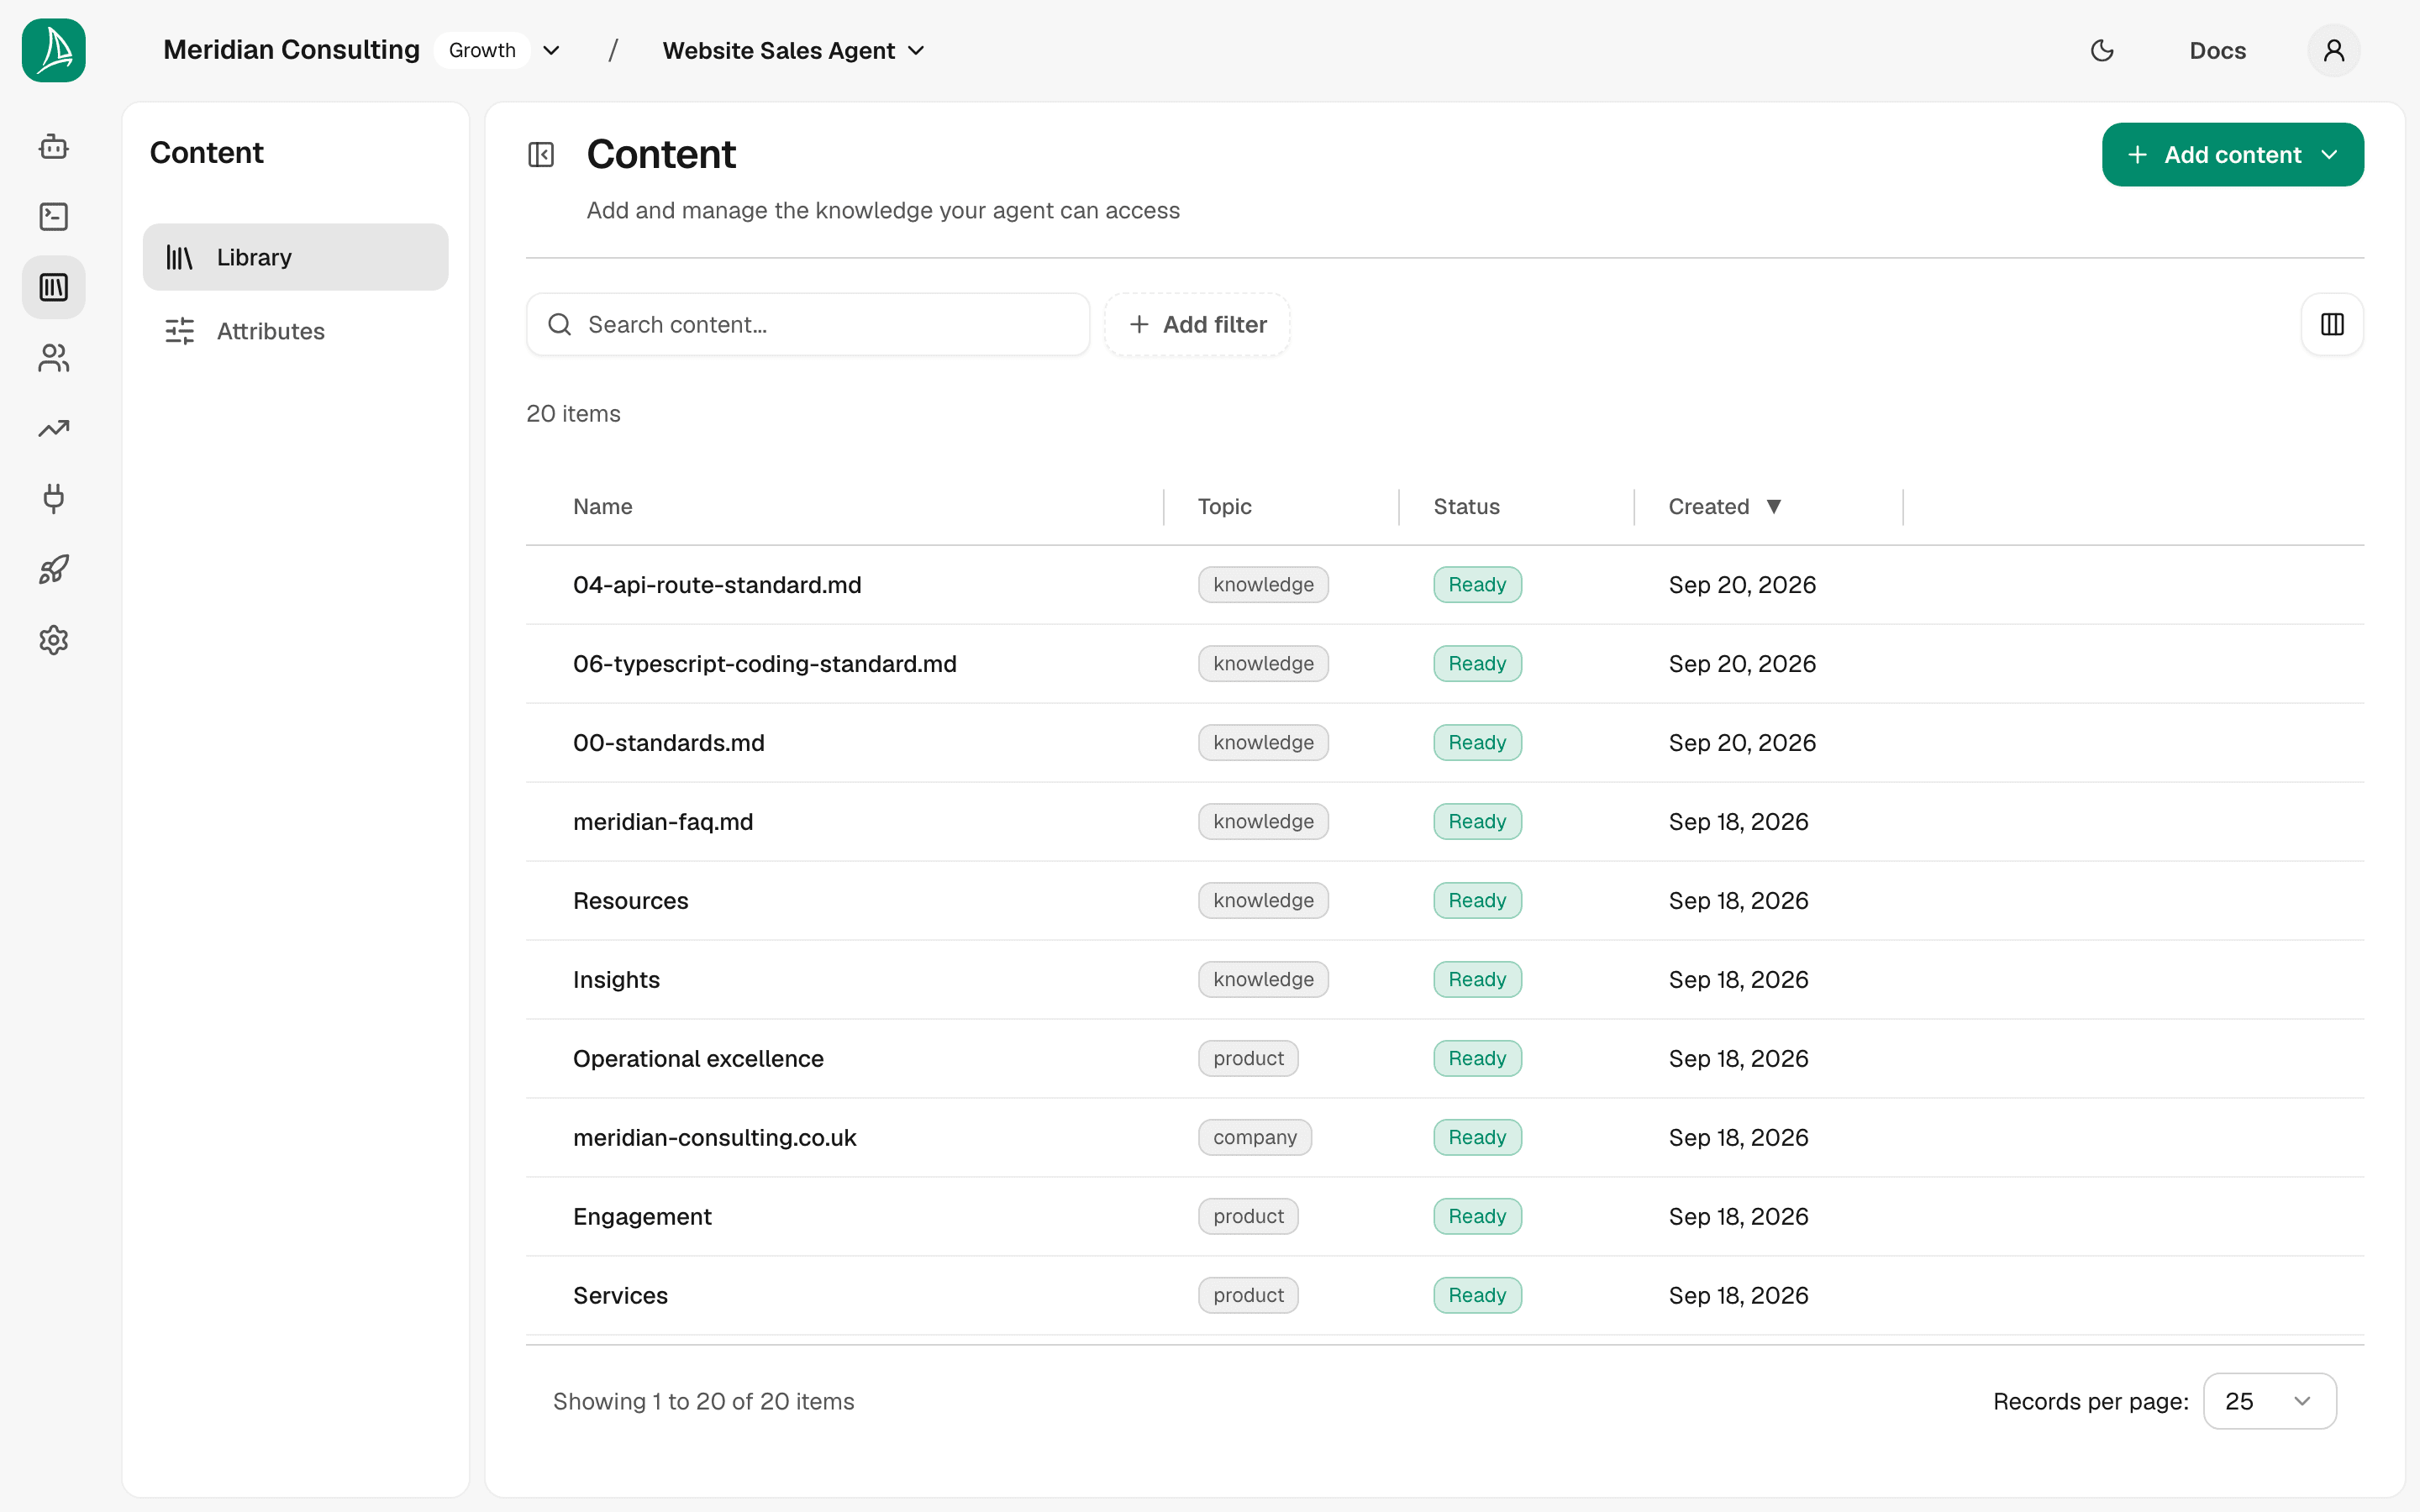
Click any row to open the detail panel. It has two tabs, with a Details rail beside them:
- Page (the tab it opens on) — the content itself, as the platform read it.
- Chunks — the chunks the pipeline produced. Each chunk shows its title, its type tags, and its body text.
The Details rail describes the page:
- Classification — the page type (or, for an uploaded document, the topic), why the platform decided it, and a control to change it.
- Data — its source, status, when it was added and updated, how many chunks it produced, and how cleanly it was scraped.
- Attributes — the structured attributes extracted from this content (more on these below).
- Links, Images and Downloads — what the scraper found on the page.
Press Escape to close it.
Correcting a page type
The Classification section shows the reason beneath the page type — "Read from the page's own markup", "3 question-shaped headings, each answered below" — so you can check the reasoning rather than take the label on trust.
If it's wrong, pick the right page type from the list. Page types are grouped under their topic, so one choice sets both, and it saves as soon as you pick it — there's no Save button. An uploaded document has no page type, so you choose its topic instead.
Your choice then sticks, and the section is marked Yours: re-importing the page will not overwrite it. That also means the platform stops trying to work that page out, so correct one when you know better, and leave it alone when you don't.
A page you haven't corrected is re-decided on every re-import. That's usually what you want — it picks up improvements to the classifier — but it means a page type you never pinned can change after you re-import. Pin the ones that matter.
To find pages worth checking, filter the content list by Page type — filtering
for Unclassified shows every page whose type the platform could not settle. (A page it could not fetch at all is Failed, not Unclassified.) (Turn the
Page type column on from the column picker to see it in the table as well.)
For the FAQ document shown, the chunker produced 22 chunks — one per Q&A. Each chunk's title is the question itself, which is what you want for FAQ-style content to retrieve well.
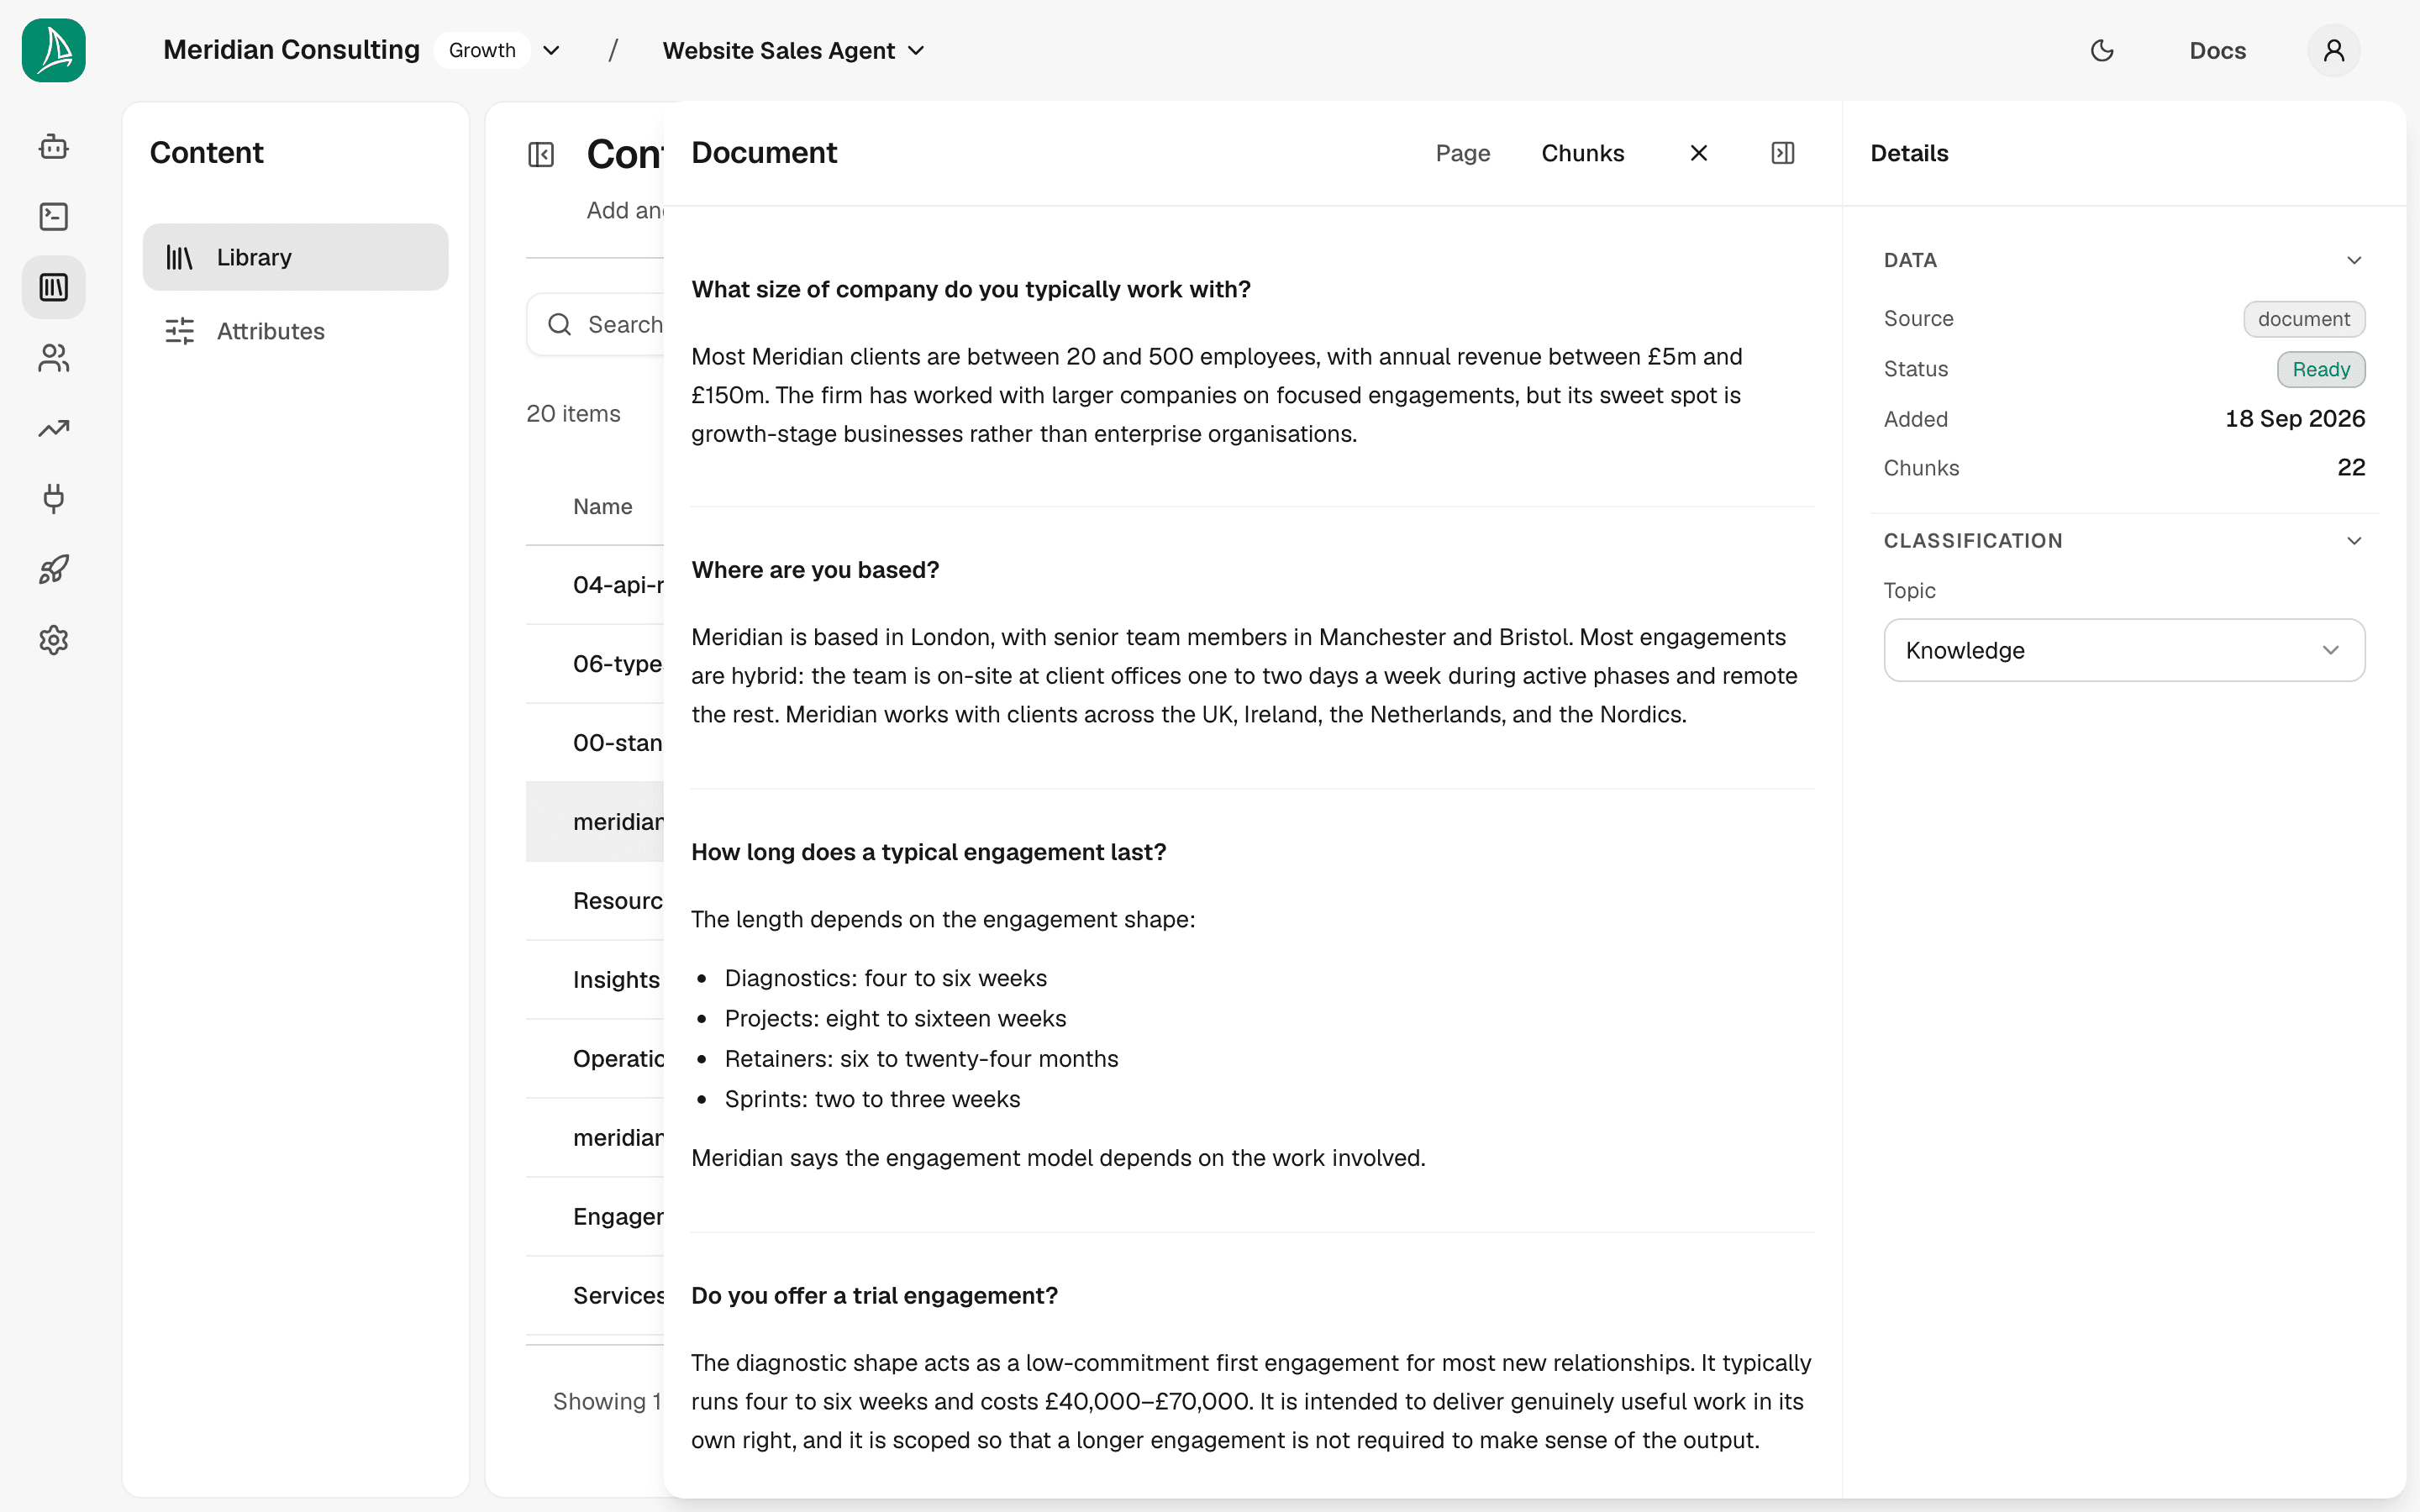
Hover a chunk and a × appears to delete it, which removes it from the agent's available pool. There is no way to edit a chunk's text: a chunk is what the pipeline produced, and correcting it means correcting the source. You'll rarely need to delete one in practice — the AI chunker handles most content well. If a whole item looks wrong rather than one chunk, re-import it.
On a product page, check there's an overview chunk. It's the one the agent leans on most when a visitor describes what they want in their own words. If a product page's chunks are all specifications and pricing with nothing describing the product in plain prose, re-import the page — see How product pages are chunked.
Attributes (introduction only)
Choose Attributes in the Content sidebar to open the Product Attributes page.
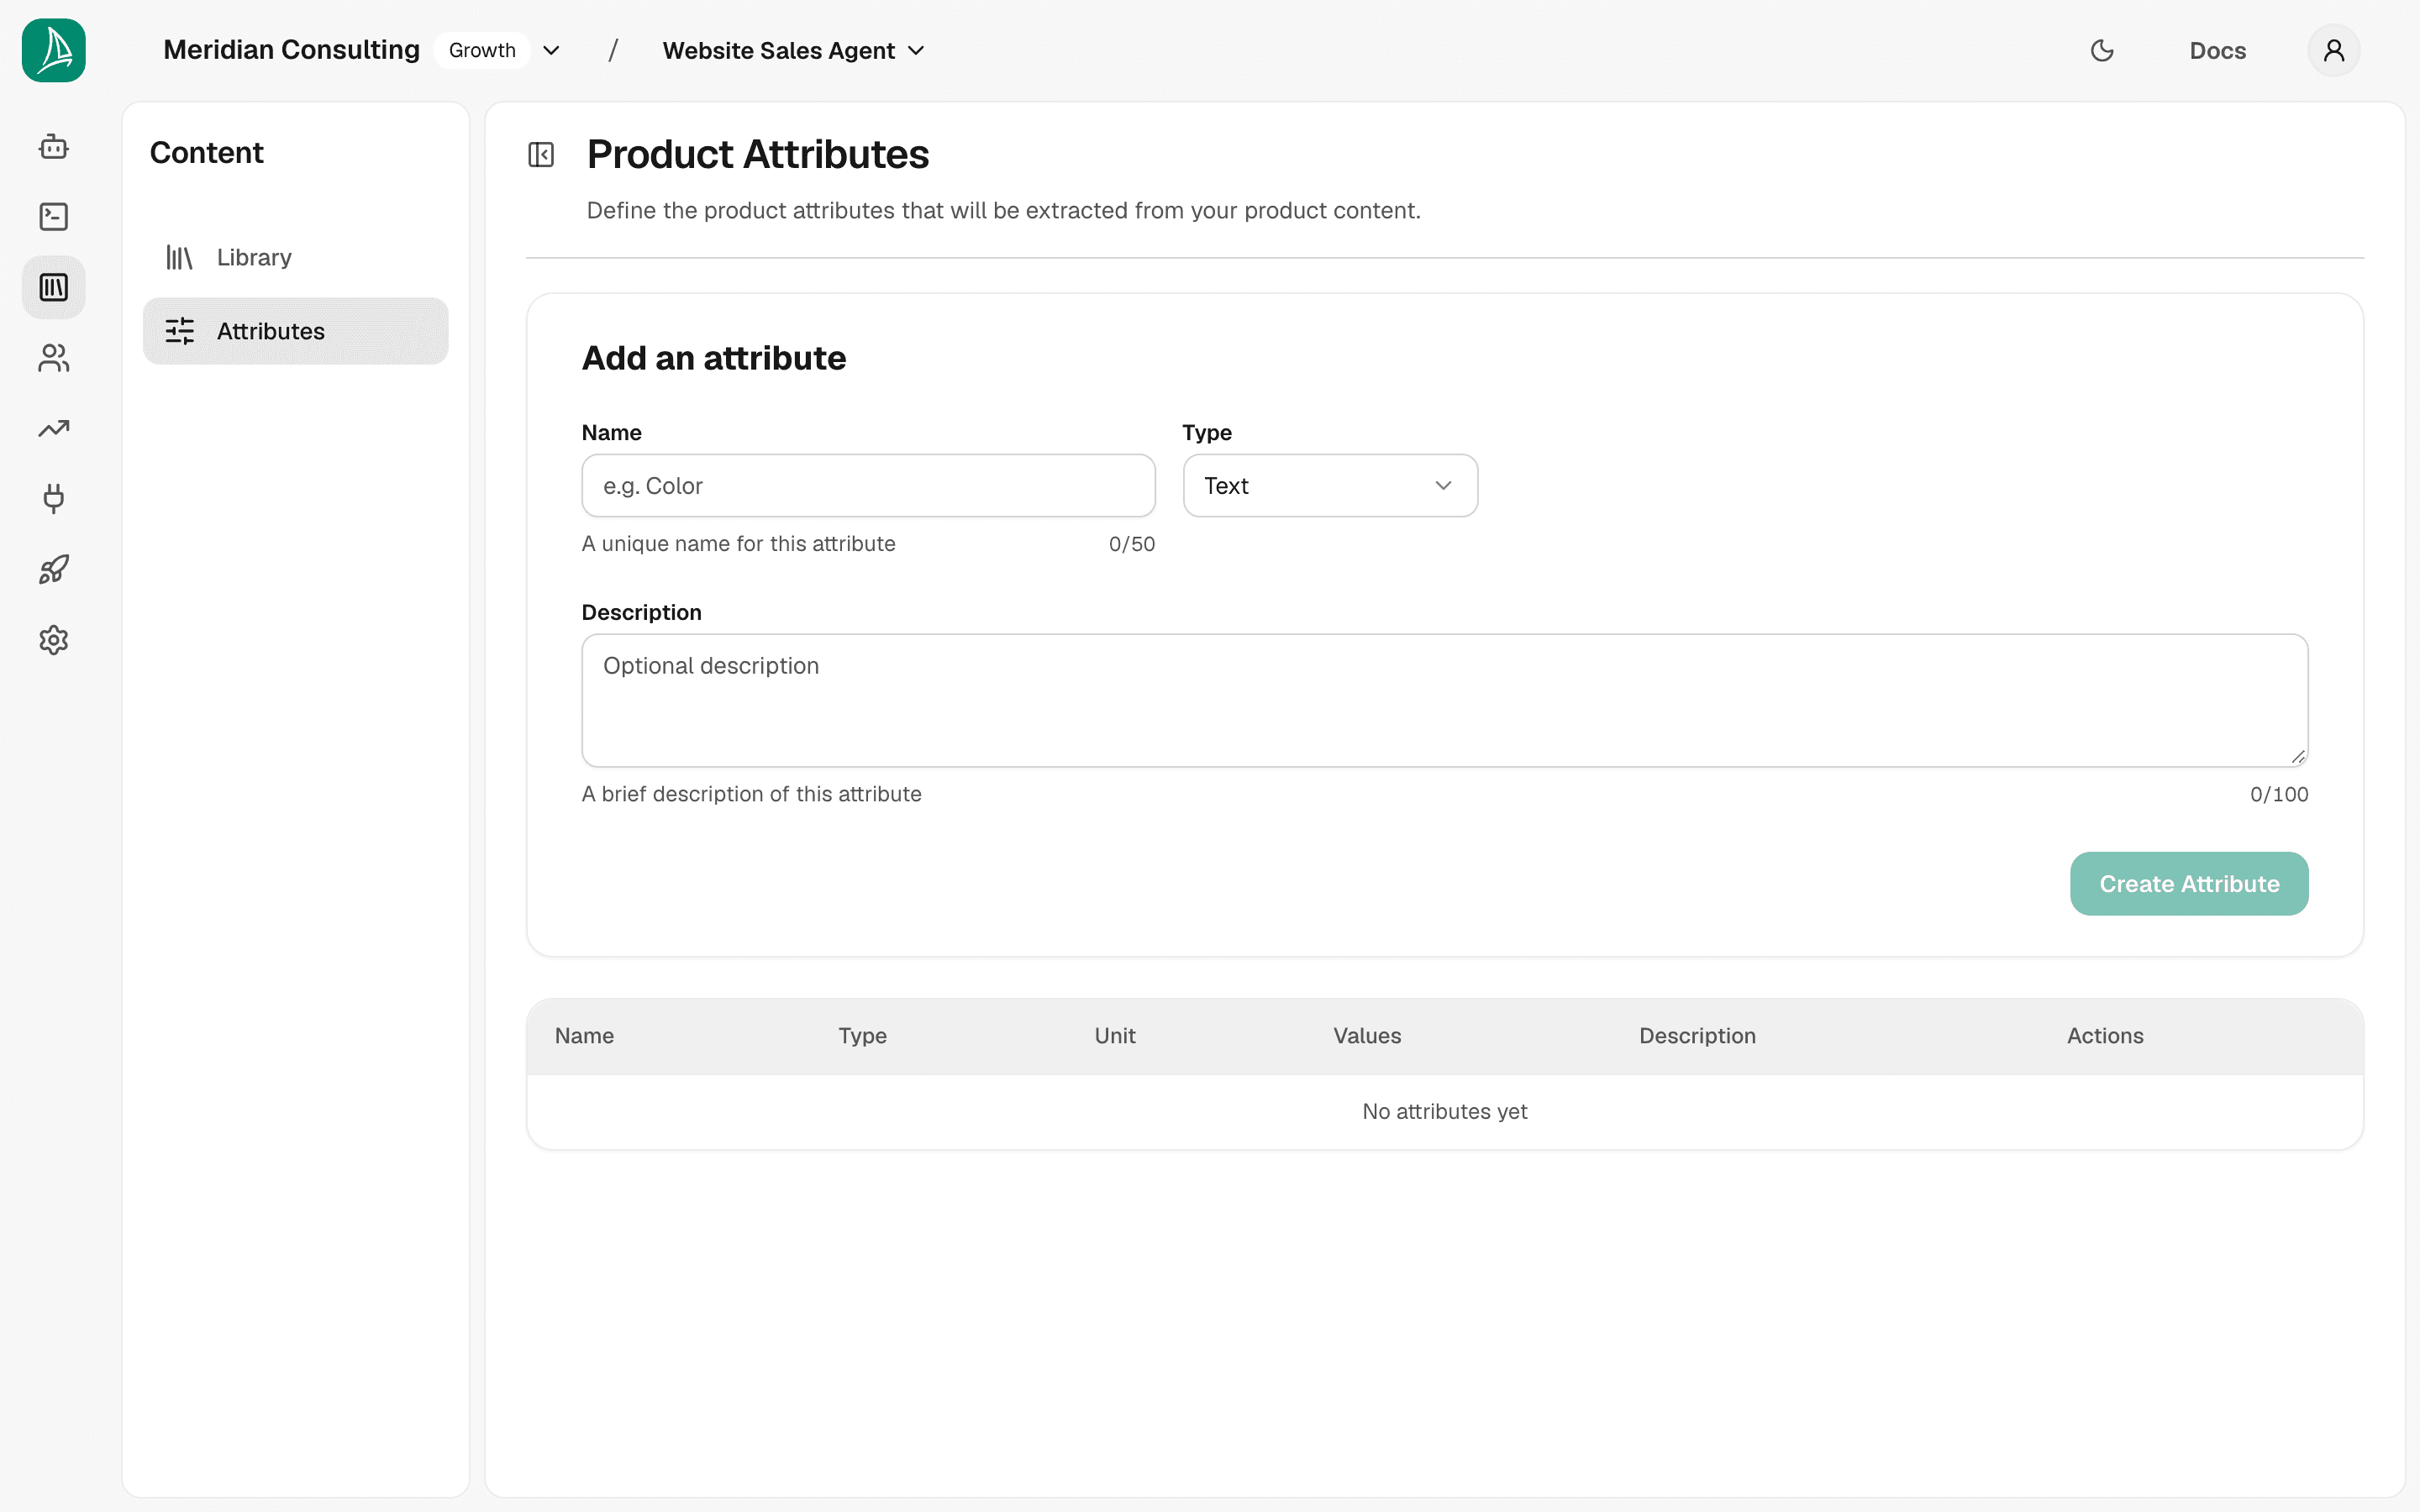
This page lets you define a structured schema that gets extracted from your product content. For an e-commerce store, attributes might be things like colour, size, material, price_band, brand, style. For a SaaS product catalogue, they might be plan_tier, seat_count, region, integration_supported. The attribute schema feeds the agent's retrieval — when a visitor asks for "waterproof jackets under £150", the agent applies the structured attribute constraints rather than relying on the text match alone.
Important: attributes are only worth configuring for product-shaped catalogues. If your content describes discrete items with consistent structured properties — products with sizes, plans with tiers, parts with specs — define attributes here and the agent will use them to filter retrieval. If your content is services-shaped (long-form descriptions, FAQs, case studies) leave attributes alone; semantic similarity plus content-type classification will do the right thing without them. Configuring attributes on the wrong kind of content adds noise rather than precision.
What's next
Your knowledge base is populated. The agent now has something to draw on when visitors ask questions. The next step is to tell the platform what the agent should remember about each visitor — that's properties and segments, configured before we attach skills to the agent.